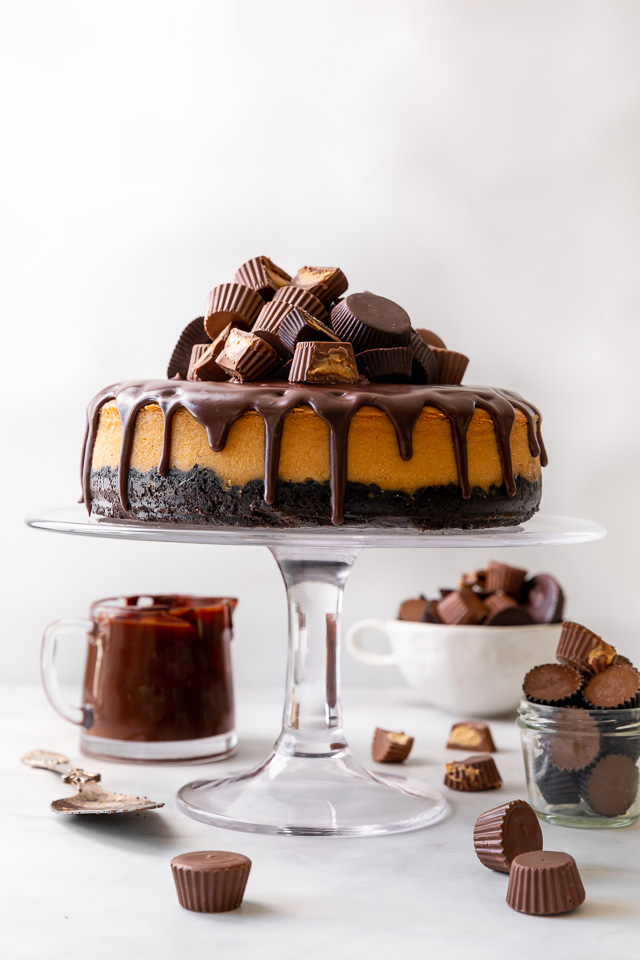
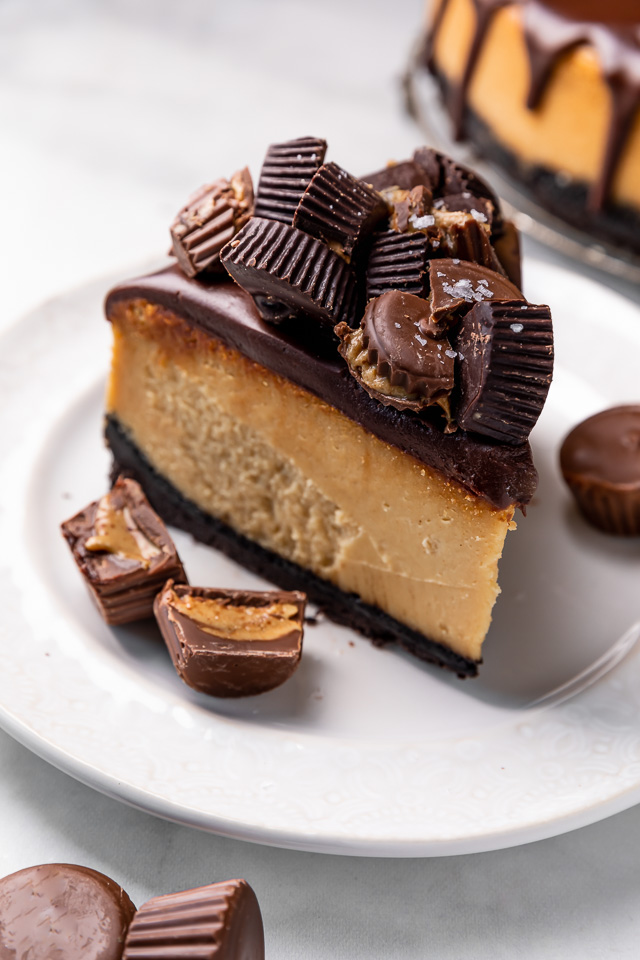
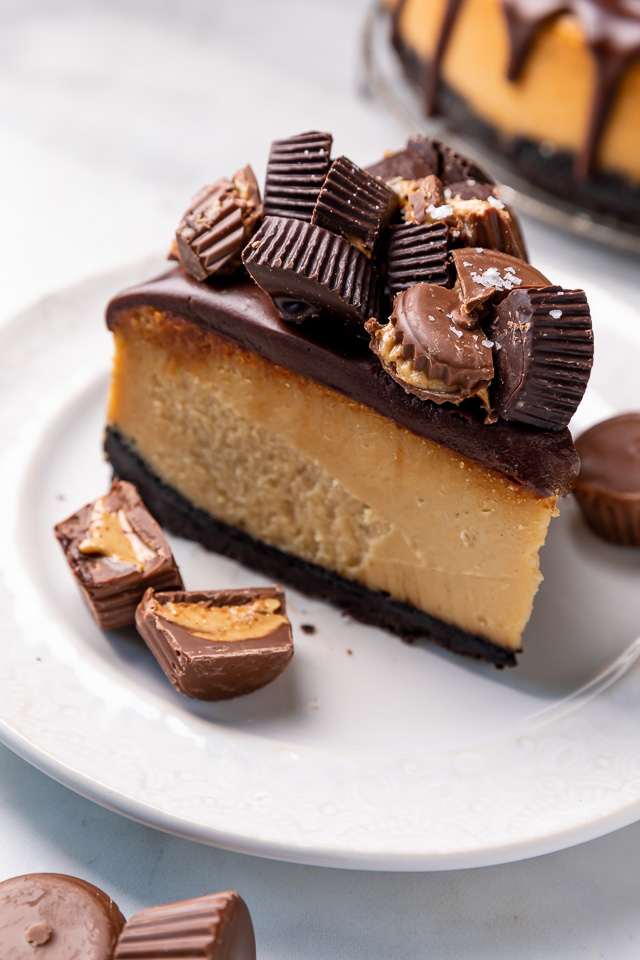
This Chocolate Covered Peanut Butter Cheesecake is ultra creamy and the perfect marriage of chocolate and peanut butter! Featuring an oreo crust, creamy peanut butter cheesecake filling, and topped with with peanut butter chocolate ganache and peanut butter cups, it’s a true showstopper! And any leftovers freeze great!
Peanut Butter Cheesecake Recipe
If you love the combination of chocolate and peanut butter, today’s new recipe is for you!
Because we’re combining these iconic flavors into one of the most delicious cheesecake recipes I’ve ever baked… or tasted! Chocolate and peanut butter flow through every bite! And the combination of crunchy and creamy textures is truly a feast for the senses!
And it better be! Because cheesecake is not the quickest recipe to make! It’s a labor of love that involves a good amount of patience. But I promise, just one bite will make you a believer that this recipe is worth it all! So let’s dive into the details and get you on your way!
How to Make Oreo Cookie Crust
Step 1 is making your oreo cookie crust! Which is thankfully very easy! You’ll need a full-size package of classic oreo cookies and a blender or food processor. Here in the states, a full-size package includes 37 oreo cookies, so if you can find the classic size, just combine smaller packages or buy the family size and just use 37 cookies. But make sure they’re the classic cookie in size and variety, because there are so many flavors out there now. And we want classic, not double stuff or any other variety.
Next, you’ll place those cookies (leave the cookies whole with the filling inside the cookie) in the body of your blender or food process, and and pulse until the cookies are fine crumbs! Then combine the cookie crumbs with melted butter and viola! You have an oreo cookie crust!
You’re going to press the crust into the bottom of a 9-inch springform pan. I like to use a small measuring cup to help me press it firmly into the bottom, and then halfway up the sides of the pan.
You’ll partially bake this crust then set aside to cool as you make your peanut butter cheesecake batter! P.S. You can totally use graham crackers and make your favorite graham cracker crust for this recipe instead.
Peanut Butter Cheesecake Batter
It’s crucial your ingredients are at room temperature for this part! That means your eggs, heavy whipping cream, and cream cheese should all sit outside of your fridge for at least 30 minutes. I actually prefer to let my cream cheese sit a little bit longer, because the softer it is the easier it is to blend!
Once your ingredients are good to go, you’ll blend the cream cheese and peanut butter together in a blender, food processor, or the bowl of a stand mixer fitted with the paddle or whisk attachment! I use JIF peanut butter, but any regular peanut butter brand will work! I don’t suggest using low-fat or low-sugar/natural varieties for this recipe! You’ll want to beat the cream cheese until it’s creamy and relatively lump free, then add the remaining ingredients!
How to Make a Water Bath
This recipe does call for a water bath! But I promise, it’s really a simple step that ensures your cheesecake will come out ultra smooth, creamy, and crack free! Here’s what you’ll need: a roasting pan or large skillet, heavy duty aluminum foil, and freshly boiled water. That’s it!
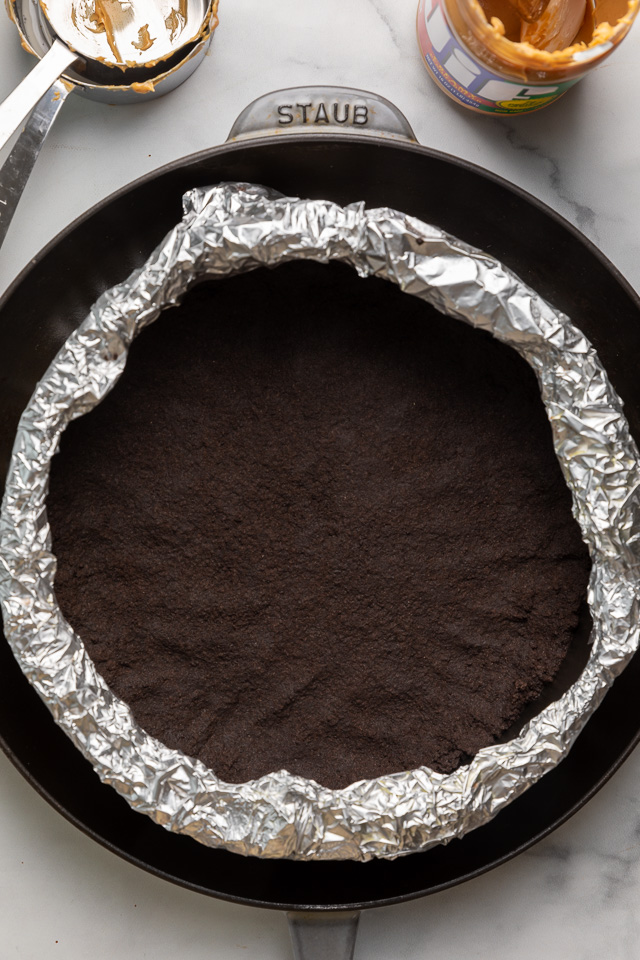
You’ll wrap the springform pan with the heavy duty foil, bringing the foil up and around the edges of the pan. It’s crucial to use the heavy duty foil variety, because the sheets are large enough that they cover the entire pan with no gaps! You literally cannot get a soggy crust if there’s nowhere for the water to enter! But just to be extra safe, I wrap my pan 3 times!
I suggest doing this before you even make the crust, that way the pan is prepped and ready to go.
Time to Bake Cheesecake!
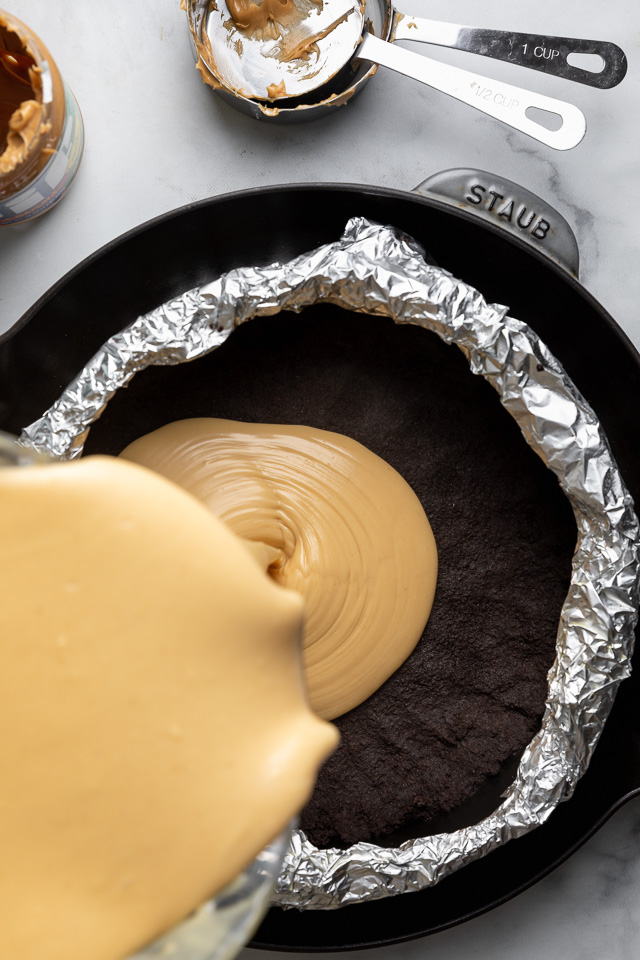
You made it! It’s time to pop that beautiful peanut butter cheesecake in the oven! You’re going to place your foil wrapped pan into a large roasting pan or skillet and place it on the middle rack in your preheated oven. Slowly fill the pan up with 2 inches of hot water, then carefully push the cheesecake into the middle of the rack, close the door, and bake for 1 hour and 20 minutes!
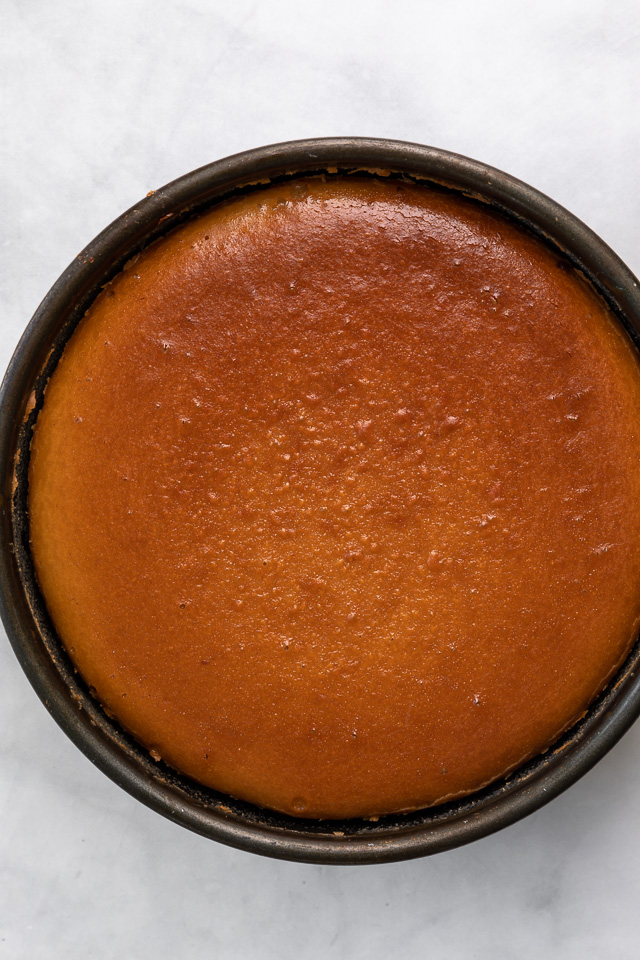
Once the cooking time is up, you’ll leave the cheesecake in the oven, with the door shut, but the oven turned off, for another 20 minutes. Then remove the cheesecake and place on a wire rack to cool completely. Finally, place the cheesecake in the fridge to chill for at least 6 hours, but preferably overnight!
Decorating your Peanut Butter Cheesecake
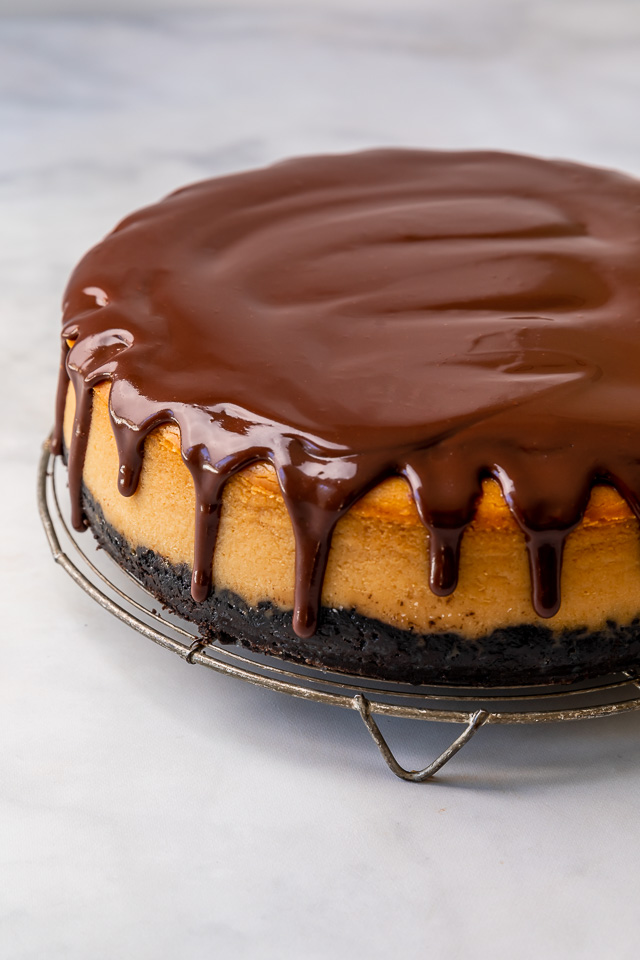
In my opinion, this is the funnest part! First, you’re going to make your peanut butter ganache! Which is as easy as boiling cream and peanut butter, then pouring it over chopped chocolate (or very high quality chocolate chips). You’ll pour this over the cooled cheesecake, letting it drip down the edges. I suggest pouring a 1/2 cup at a time so you can control the flow a little better.
I like to make double the ganache amount so I can pipe chocolate peanut butter ganache rosettes all around the cheesecake. And then I add a mountain of milk chocolate and dark chocolate peanut butter cups on top! You could even throw some mini chocolate chips or peanut butter chips on there if you want to get crazy!
P.S. If you want to skip the store bought peanut butter cups and make your own, I’ve got your back! Here’s my recipe for 5-Ingredient Peanut Butter Cups!
How to Store
This cheesecake will keep, covered and stored in the refrigerator, for up to 3 days! Or, you can freeze the cheesecake (minus the ganache and candy) for up to 2 months! You’ll want to cool it completely in the fridge, then wrap it well in Saran Wrap and then a layer of foil, and then pop it in the freezer. Take it out the night before you plan on serving it and let it thaw in the fridge. Decorate with the ganache and candy a few hours before serving!
More Peanut Butter Recipes:
- Bakery-Style Chocolate Chip Peanut Butter Cookies
- Chocolate Covered Peanut Butter Pretzel Cheesecake Cupcakes
- Easy Peanut Butter Fudge
- Peanut Butter Cup Brownies
- Creamy Milk Chocolate Peanut Butter Pie
- Mini Peanut Butter Butterfinger Cheesecakes
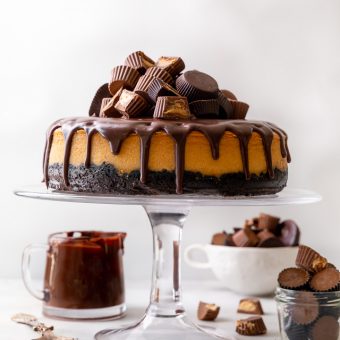
Chocolate Covered Peanut Butter Cheesecake
Ingredients
For the Oreo Crust:
- (1) full-size package Oreo cookies, crushed into fine crumbs (37 original sized sandwich cookies in total, filling left in)
- 1/2 cup (113 grams) unsalted butter, melted
For the Peanut Butter Cheesecake Filling:
- 32 ounces (904 grams) full-fat cream cheese, at room temperature
- 1 and 1/2 cups (365 grams) creamy peanut butter, at room temperature
- 1 cup (199 grams) granulated sugar
- 1/2 cup (106 grams) light brown sugar, packed
- 5 large eggs plus 3 egg yolks, at room temperature
- 1 cup (227 grams) heavy whipping cream
For the Peanut Butter Chocolate Ganache:
- 1 and 3/4 cups (300 grams) high quality semi-sweet chocolate, finely chopped
- 1 cup (227 grams) heavy cream
- 1/4 cup (67 grams) creamy peanut butter
- 1/4 teaspoon salt
Instructions
For the Crust:
- Preheat oven to 350°F. Grease the bottom and sides of a 9-inch springform pan. Wrap the outside of the pan in layers of heavy duty aluminum foil. You’ll be placing this pan in a water bath, so be sure the pan has been wrapped from every angle.
- In a large bowl combine the crushed cookie crumbs and melted butter, mix well to combine.
- Press the mixture into the bottom - and slightly up the sides - of the prepared pan.
- Bake the crust in preheated oven for 10 minutes. Remove the crust from the oven and set aside on a cooling rack until needed. Reduce the oven temperature to 325 degrees (F).
For the Peanut Butter Cheesecake Filling:
- In the bowl of a food processor, high-powered blender, or in a large bowl using handheld electric mixer, beat the cream cheese and peanut butter until completely smooth, scraping down the sides of the bowl as needed, about 2 minutes.
- Add in both sugars and beat smooth. Add in the eggs and egg yolks, one at a time. Then pour in the heavy cream and mix until just combined, about 30 seconds.
- Remove the bowl from the food processor and, using a rubber spatula, stir the filling several times to ensure it is evenly blended.
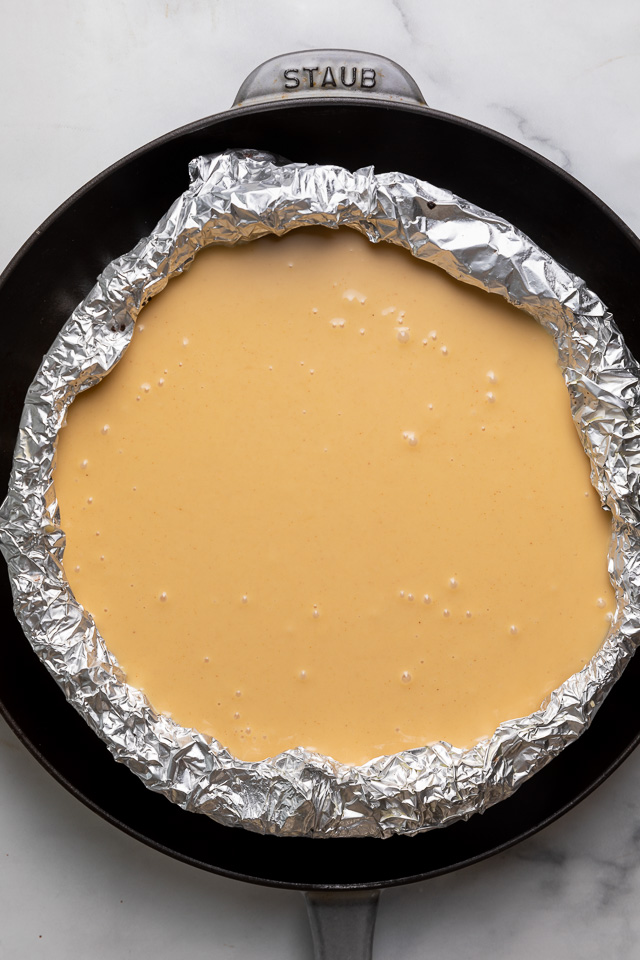
- Pour the filling over the partially baked crust and smooth the top with a spatula.
- Place the springform pan in a roasting pan or large skillet. Place the roasting pan in the preheated oven and carefully pour enough hot water into the pan to come 2-inches up the sides of the springform pan. Carefully move the pan into the middle of the rack and close the oven door.
- Bake the cheesecake in the water bath for 1 hour and 15 minutes. Then turn the oven off, but keep the cheesecake in the oven, with the door closed, for another 20 minutes.
- Remove the cheesecake from the oven. Then remove it from the water bath and place the pan on a wire cooling rack. Carefully loosen the foil, then immediately run the tip of a knife around the sides of the pan, to prevent the top from cracking.
- Cool completely (in the pan), then transfer cheesecake to the refrigerator to chill for at least 6 hours before adding ganache and serving.
For the Peanut Butter Chocolate Ganache:
- Place chopped chocolate in a medium-sized bowl and set aside.
- Heat the cream in a small saucepan over medium heat, until the mixture begins to steam and bubbles form all around the sides of the pan. You want it simmering but not at a full boil. Add in the peanut butter and whisk until completely combined.
- Pour the hot cream mixture over the chopped chocolate and let sit for 3 minutes. Then stir until the chocolate is completely melted. Stir in the salt.
- Allow ganache to sit for 10 minutes, then pour over the cooled cheesecake. Allow ganache to set for at least 20 minutes before slicing. You can speed this up by placing the cheesecake back in the fridge.

Just made this for my sons birthday. I don’t use foil for a water bath. I have made several cheese cakes. I use a foil pan that I put the springform pan into and then I put the foil pan inside another pan. Put the water in the larger pan. It’s works great! And it’s a lot easier. Water can never get in.
Brought this, along with dinner, to my friend who just had a baby.
Her comments are as follows. And I quote:
This dessert should be illegal.
I mean, what theeeeeeee
This is some next level s***!
Lol, I took it as a win! The ganache is **chefs kiss** for sure!!
Now, off to make your chocolate chip cookies with my 4yos! Which make an appearance weekly at our home!
From one chocoholic to another, Thanks so much, Ashley!
My 1st time tying one of you recipes, the cheesecake came out perfect and the water bath was spot on, but my ganache looked a little grainy. It really had great sheen though. Thoughts???
Can I use crunchy peanut butter
I did! It worked out just fine!
Oh Ganosh!
This is my first time attempting a ganache & it did not go so well. My chocolate chips didnt melt all the way so i had to pop it in the microwave on 50% power to get them there. Even after doing that, the ganache wasn’t liquid enough to beautifully run over the sides of the cheesecake, like in your picture. So I used a spatula to smear across the top & then tried piping drips down the side. It didnt quite turn out the same :/ (refer to pic on Instagram). This was my first attempt at the cheesecake & later this week I plan to make it again for a charity cake auction, so I would really like to master it and get those ooey gooey drips overflowing down the sides! Wondering if you have any other helpful tips.
Is there a high quality chocolate you recommend? I just used generic semi-sweet chips from the grocery store. Also, since you said not to let the cream come to a full boil, once it came to a simmer as you described, I turned down the heat a bit while stirring in the peanut butter. Should I have done something different?
P.S. – I can’t wait to eat this cheeseake!! I figured I should do a trial run before the auction for 2 reasons:
1) To troubleshoot any issues like this one. My water bath also seeped in because I didnt use extra long foil. I saw elsewhere online a recommendation to use a turkey bag instead of foil – have you ever done that? I think I’m gonna try it!
2) I figured if I didn’t get to try one before the auction, I’d end up bidding on my own cheesecake cuz it sounds SOOO good! 😛
Thanks for the recipe – and any help you can give!
Made this tonight for my soon to be 15 year old’s birthday. I also noticed it was very “whippy”. Which was well before I added eggs. It did puff up. Still looks yummy. There was water though in the bottom of the foil wrap, near the pan. I wrapped it with heavy duty Reynolds foil 3 times. Not sure where the water came from. Fingers crossed it tastes amazing and he loves it!
Hey! It seems like my cheesecake batter turned out too whipped. Will it still turn out?
Hi Rachel. It’s impossible for me to say without seeing the batter/having been in your kitchen while you made it. But the worst case scenario is the batter was beaten too much after the eggs were added, so it’ll rise quite a bit in the oven and could deflate when you take it out. Hopefully not the case, but it’ll still be delicious covered in chocolate ganache and peanut butter cups 😉
Hi. I would like to try it in a small pan (6 inches). Can I just half the recipe? If yes, do I still need the water bath for a small one?
Easy recipe to follow with outstanding results. Perfect amount of peanut butter flavor. Ideal for celebrations or dinner party. Your guests will be impressed.