


 Search
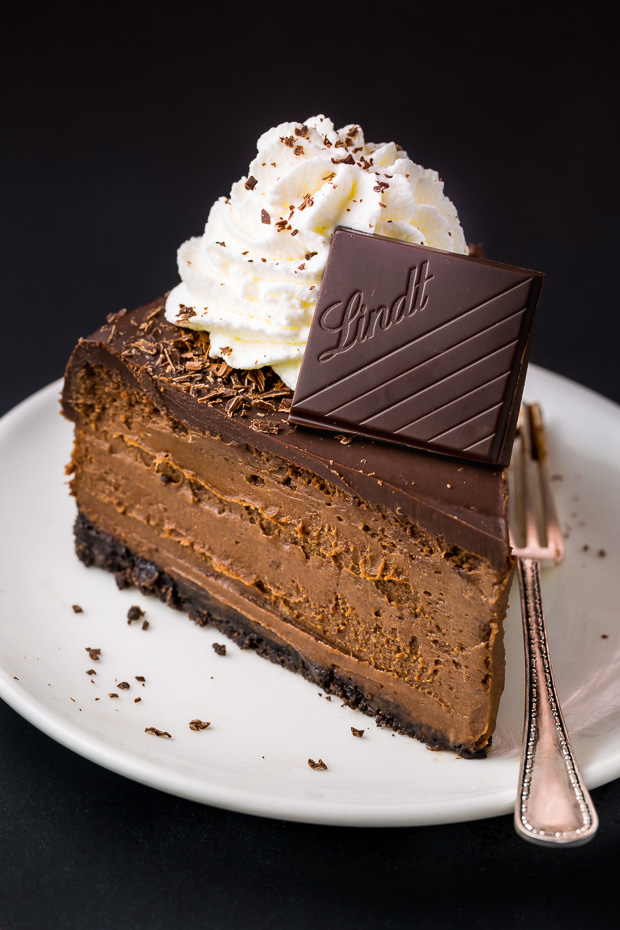
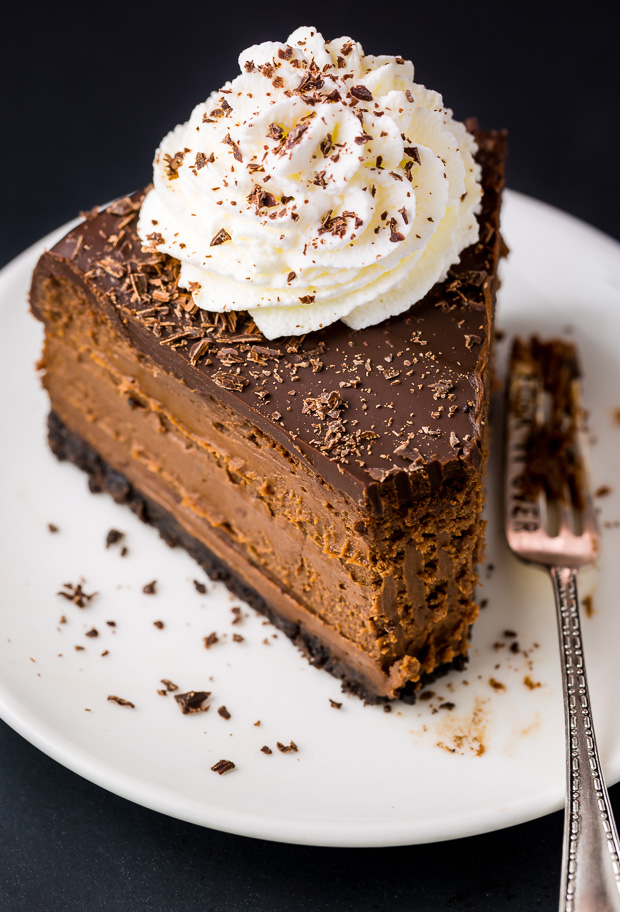
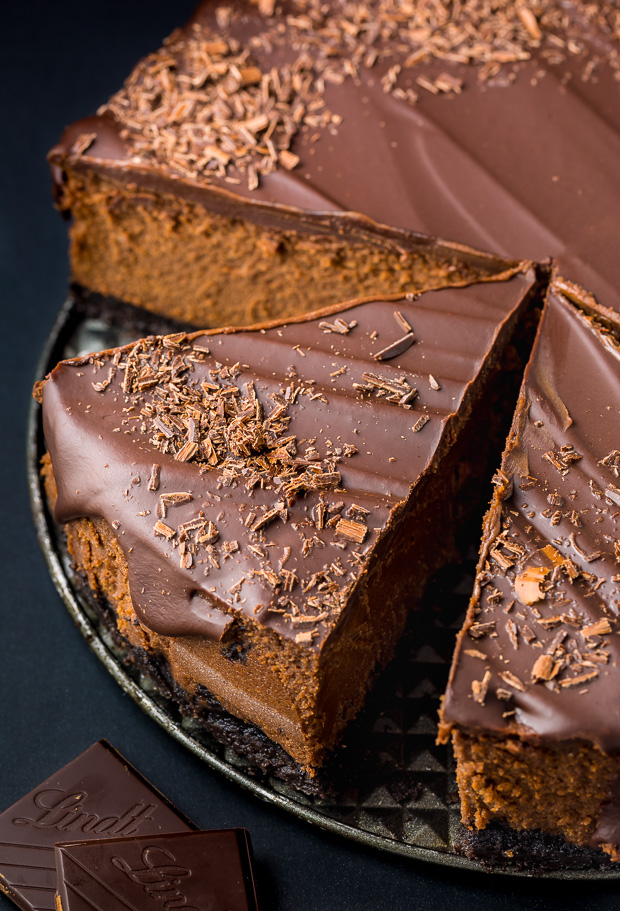
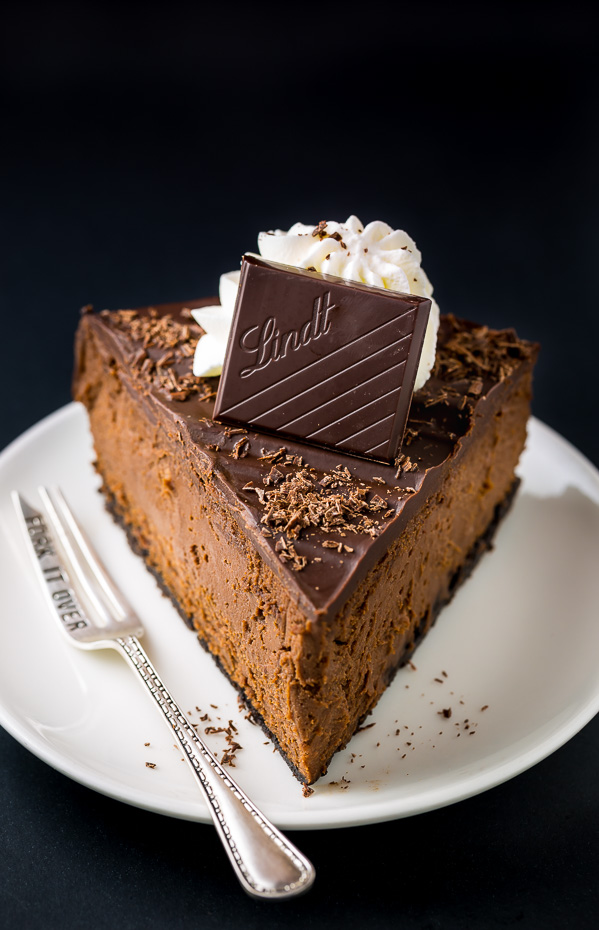
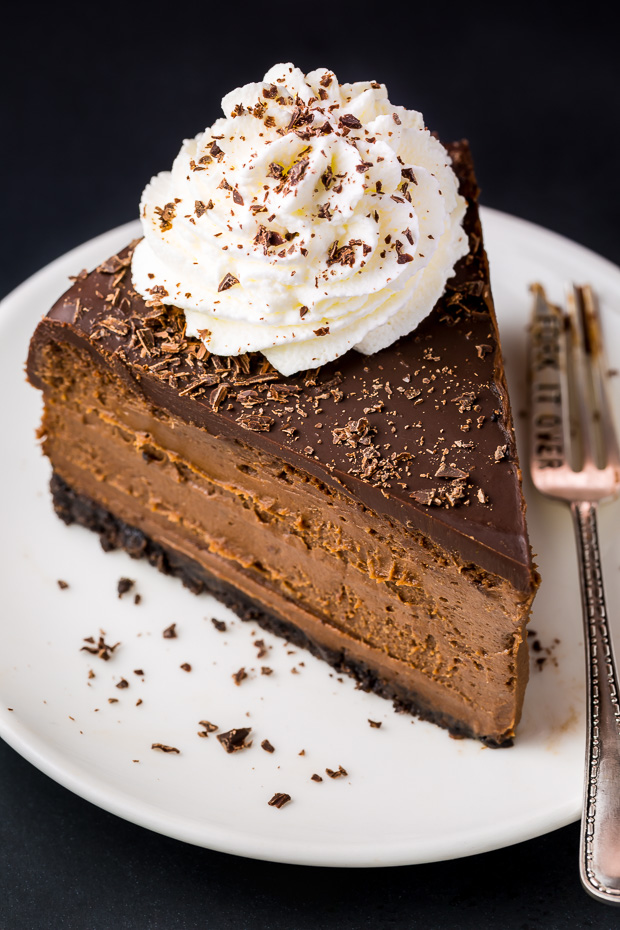
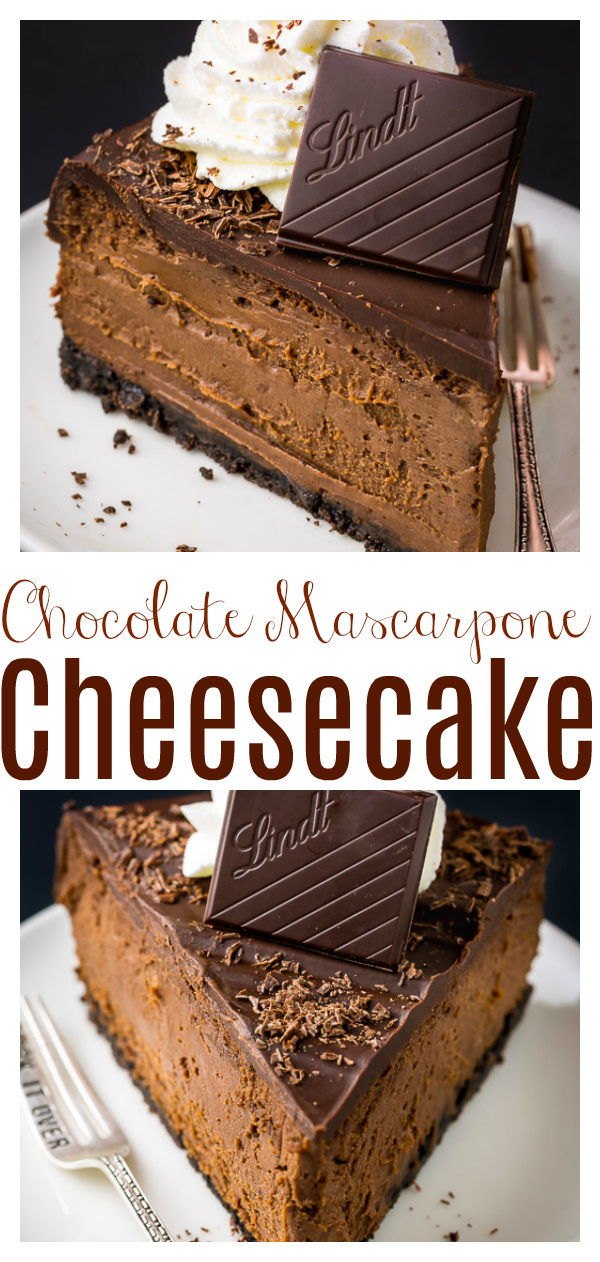
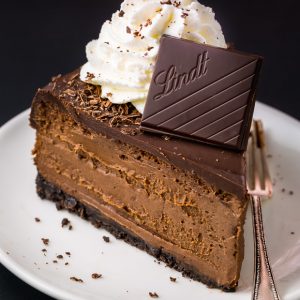
Rich and creamy Chocolate Mascarpone Cheesecake! This decadent chocolate cheesecake features a chocolate cookie crust, a creamy chocolate mascarpone filling, and a chocolate ganache topping! Death by chocolate cheesecake anyone?!
Mascarpone Cheesecake
Holy smokes! This chocolate cheesecake is going to rock your world. Want to know why?
It’s simple: MASCARPONE CHEESE. This ingredient is a total game changer! Because it’s luscious, creamy, and just a little bit tangy. ← Wait, don’t stop reading! If you’re put off by the tangy thing, let me ease your mind. The “tang” is very similar to sour cream or buttermilk. It’s subtle… delicate, really! But it does its job and it does it well. And it balances out the sugar and chocolate which prevents the cheesecake from becoming cloyingly sweet. It creates a texture that’s so rich and creamy it feels like magic.
Each bite melts in your mouth and leaves you wanting more. It’s nirvana!
How to make Chocolate Cheesecake
- To make the chocolate cookie crust you will need two ingredients: melted butter and Oreo cookies. Do not remove the cream from the center of the cookies. Simply toss the whole cookies into a blender or food processor and pulverize them into small crumbs. You’ll want to scrape the edges of the food processor a few times during the pulsing to ensure there are no large chunks.
- This recipe requires a springform pan. If you don’t already own one and need a good place to start, feel free to click here and check out the one I’ve been using for years.
- The cream cheese and mascarpone cheese MUST be very soft before you begin assembling this recipe. I typically leave these ingredients out on the counter for at least two hours before I plan on baking.
- You should also bring your eggs and milk to room temperature. Batters made with cold ingredients don’t come together smoothly.
- As for the chocolate, it will need to be melted and slightly cooled; 10 minutes or so should do the job. I recommend using a quality chocolate brand you know tastes great and melts well. I used Lindt 70% chocolate, but use any brand you know and trust. I do not recommend using chocolate chips!
Do I have to make a water bath for this cheesecake recipe?
Yes, this recipe does call for a water bath, but don’t fret! Because if you’re unfamiliar with the water bath process, I’m going to walk you through it step-by-step!
What is a water bath?
A water bath is simply the term bakers use when they place a baking pan (in this case, our cheesecake pan) into a larger pan that’s been filled partially with hot water. Taking this extra step helps insulate the pan from direct heat on all sides while it bakes.
Why use a water bath?
The water bath method helps your cheesecake bake gently, ensuring the finished product doesn’t burn, curdle, or crack. It also helps the cheesecake maintain its silky smooth texture.
When it comes to choosing a pan for your water bath, choose one that is as tall as the cheesecake pan and large enough to leave a few inches between the cheesecake pan and the outer rim – you want enough room for the water to circulate easily. When you’re ready to make your water bath, here’s what you do: Adjust an oven rack to the middle position. Preheat oven to called for temperature. When the oven is preheated, carefully (using an oven mitt) pull out the middle rack and place your large pan on it, fill the pan with about two inches of hot water, then place the filled cheesecake pan in the center of the water bath. Slowly slide the rack back to its full inserted position, close the door, and bake the cheesecake according to instructions.
If you’re using a springform pan it’s essential to wrap the pan in MULTIPLE LAYERS of heavy-duty tin foil to avoid water seeping in. I wrap my pan from every angle pressing the foil in, up, and around to prevent a soggy crust. You’re going to leave the cheesecake pan in the water bath, even after you turn off the oven. You’ll take the cheesecake out of the water bath once it has been removed from the oven.
Most importantly, you MUST chill the cheesecake in the fridge for 6 hours (or overnight) before slicing and serving. If you try to slice into it before it’s cooled, it will be too soft and mushy. Yuck!
Imagine slicing your fork through this mouthwatering chocolate mascarpone cheesecake… scraping each creamy bit off your plate… savoring every last crumb…
Wait! Why imagine… when you can go make this your reality?! Treat yourself to this amazing recipe today 🙂

More Chocolate Cheesecake Recipes:
- Ultimate Chocolate Cheesecake
- Mini Chocolate Cheesecakes
- Easy Chocolate Cheesecake Bars
- Chocolate Raspberry Cheesecake
If you try this recipe for If you try this recipe for Chocolate Mascarpone Cheesecake, let me know what you think! Leave a comment below, and don’t forget to snap a pic and tag it #bakerbynature on instagram! Seeing your creations makes my day ♥
Chocolate Mascarpone Cheesecake
Ingredients
For the Oreo Crust:
- 24 Oreo cookies
- 1/4 cup unsalted butter, melted
For the Chocolate Mascarpone Cheesecake Filling:
- (2) 8 ounce packages of cream cheese, VERY soft
- (2) 8 ounce packages Mascarpone cheese, VERY soft
- 1/4 cup whole milk
- 3 large eggs + 2 egg yolks, at room temperature
- 1 and 1/2 cups granulated sugar
- 2 tablespoons unsweetened cocoa powder
- 8 ounces semi-sweet chocolate, melted and slightly cooled
- 2 teaspoons vanilla extract
For the Chocolate Ganache:
- 8 ounces semi-sweet chocolate, chopped
- 1/2 cup heavy cream
For the Whipped Cream:
- 1 cup heavy cream
- 1/4 cup confectioners' sugar
- 1/2 teaspoon vanilla
Instructions
- Preheat oven to 325 degrees (F). Wrap a 9" spring form pan VERY well in multiple layers of heavy-duty tin foil; lightly grease the pan with non-stick spray; set aside.
For the Oreo Crust:
- Add the Oreos to the body of a blender or food processor and pulse until the cookies are fine crumbs. Stir in the melted butter, mixing well to combine. Dump the mixture into the prepared pan, pressing the crust down firmly and slightly up the sides. Set aside.
For the Chocolate Mascarpone Cheesecake Filling:
- Beat cream cheese and mascarpone cheese in a blender until completely smooth. Beat in the milk. Add in the eggs, egg yolks, and sugar; pulse until well combined. Add cocoa powder and vanilla and pulse for another 30 seconds, or until cocoa powder has completely disappeared into the batter. Don't over mix! Using a rubber spatula, fold in chocolate, stirring gently until combined.
- Pour filling into prepared crust, spread evenly, and smooth the top with a rubber spatula.
- Place the springform pan in a large baking pan (with high sides) and fill the pan with about two inches of hot water; this is your water bath (see post if you need more information on this). Place cheesecake in preheated oven and bake for 1 hour and 20 minutes. Turn the oven off and let the cheesecake sit for 45 minutes, inside the oven, with the door shut. The cheesecake should be still slightly wiggly in the center. Remove from oven and gently run a knife around the edge of the cake, loosening any bits that may have gotten stuck while baking.
- Allow cheesecake to rest, on the counter, for 30 minutes before covering the pan with plastic wrap and refrigerating for at least 6 hours. When ready to serve pour the ganache on top of the uncut cheesecake and place it back in the fridge for 15 minutes (this will help the ganache set). Slice, top with a dollop of whipped cream, and serve!
For the Chocolate Ganache:
- Add the chocolate to a large, heatproof bowl; set aside.
- Heat the cream in a small saucepan over medium-heat just until it begins to bubble around the edges; about 2 minutes. Remove the cream from heat and pour it over the chopped chocolate. Let the chocolate and warm cream stand untouched for 1 minute, then whisk it together until the chocolate melts and a smooth ganache forms; about 2 minutes. Pour the warm ganache over the cheesecake before serving.
For the Whipped Cream:
- Place the heavy cream and sugar in a stand mixer fitted with the whisk attachment and beat on high until semi-stiff peaks begin to form. Add in the vanilla and beat for another minute or so. Dollop on top of cheesecake slices right before serving, or place in the refrigerator until needed. Keeps for 48 hours.
I have changed some because when I made it it was to hot and the air conditioner was going nonstop. I put everything in my refrigerator all measured and ready to go. The next day I put it to gether and baked it. No problems. It turned out great.
Thank you for this recipe.
I didn’t do the ganache and only put less than a cup of sugar in total, the kids(and I) loved it! Thank you soooooo much!❤
Wow – my favorite chocolate mascarpone cheesecake recipe yet! The presentation and taste is immaculate. Thank you!
Hello
I just put this in the oven! I had mascarpone cheese in the fridge for tiramisu, but I really wanted to make cheesecake (first time) instead.
Question, is this freezer friendly like the other cheesecakes? I need it for a party on Saturday…4 days away. I would like to freeze it before putting the ganache
Thanks for making it all look so simple!! Love your recipes, direction and photos!!
Happy New year to you and your family.
Is this correct that you don’t bake the Oreo cookie crust b4 pouring filling in?
Hi there! I have tried many of your recipes and everything came out successfully so far. I love your blog ❣️ n this cheesecake recipe is the next one i want to try. Wanted to know if i could half the recipe for a smaller 8” or 6” size cheesecake?
Can I use a food processor instead of a blender for the cheesecake filling?
Absolutely!