


 Search
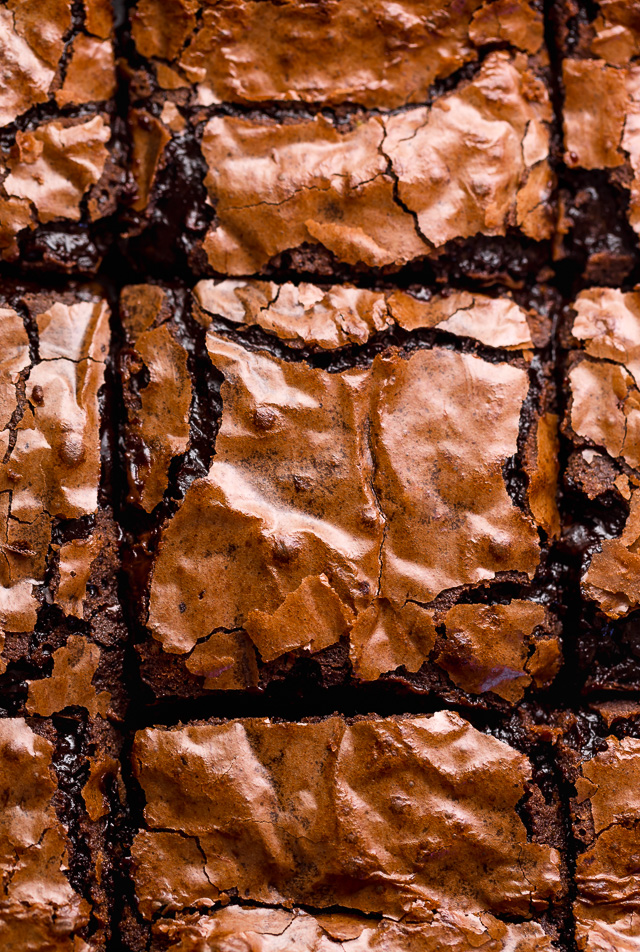
Brownie lovers rejoice: these quick and easy homemade brownies are the BEST! Made with simple ingredients like melted butter, granulated sugar, eggs, flour, and cocoa powder. Chocolate chips give these chocolate brownies EXTRA chocolate flavor and ensure they come out of the prepared baking pan with a shiny crackly tops! So much easier than boxed mix.
Homemade Brownies are So Easy!
I have dozens of brownie recipes on my website – and even one in my cookbook. But these cocoa fudge brownies hold the crown as my all-time favorite homemade brownies recipe!
I’ve been baking them for years… and will continue doing so the rest of my life. They’re quick and easy, indulgent, and basically foolproof. Plus, so much chocolate flavor thanks to chocolate chips and unsweetened cocoa powder!
Made with basic ingredients and just a few bowls… you can whip up bakery-style brownies anytime the craving strikes. I have no doubt you’ll love this recipe as much as I do!
Unsweetened Cocoa Powder vs Dutch Processed Cocoa Powder
This recipe contains baking powder but will work with both dutch processed cocoa powder and unsweetened cocoa powder. The results will be slightly different depending on your choice. Unsweetened cocoa powder (aka natural cocoa powder) will yield a brownie with a lighter color. And less intense chocolate flavor.
Dutch-process cocoa – or black cocoa powder – will give you super dark brownies with an intensely rich and deep chocolate flavor.
Get the Most Chocolate Flavor in your Brownie Recipe
- Use Quality-Cocoa: No matter what kind of cocoa powder you use, it should be quality-brand. A few of my favorites are Droste, Ghiradelli, and Guittard Rouge. They give a rich dark chocolate flavor! In a pinch, I’ve even had good experience using Hershey’s cocoa powder.
- Add Vanilla: An optional ingredient, it’ll enhance the chocolate flavor. Add 1 to 2 teaspoons of vanilla extract. Pure vanilla extract or bourbon vanilla extract works great.
- Add Espresso Powder: Another optional ingredient that will enhance dark chocolate flavor and elevate the taste of the brownies. Add a teaspoon of espresso powder with the flour mixture.
Quick and Easy Brownie Recipe
- Flour: Use all-purpose flour: not almond flour, coconut flour, or any other plant based flour. A 1 for 1 gluten free flour substitute will work ok for gluten free brownies.
- Baking Powder: This ingredient adds just a little lift to these bars which. I find baking powder is essential because the lift helps them not be too fudgy. Do not sub baking powder for baking soda!
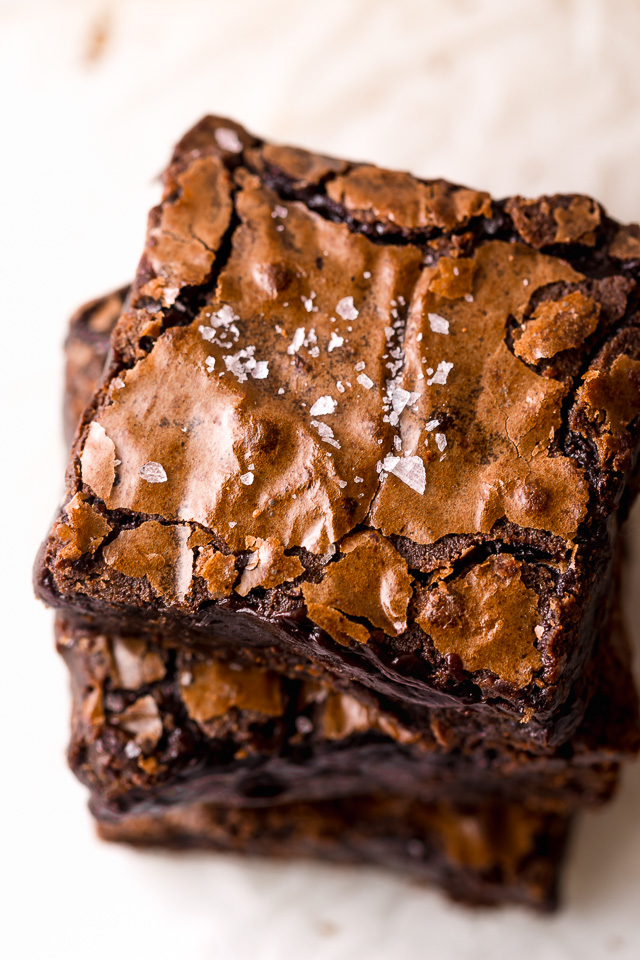
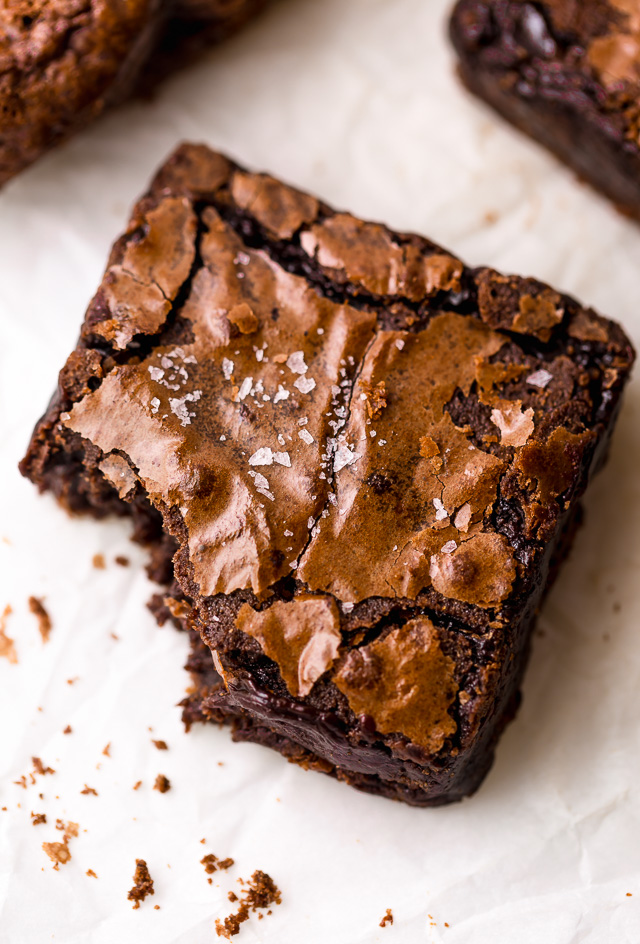
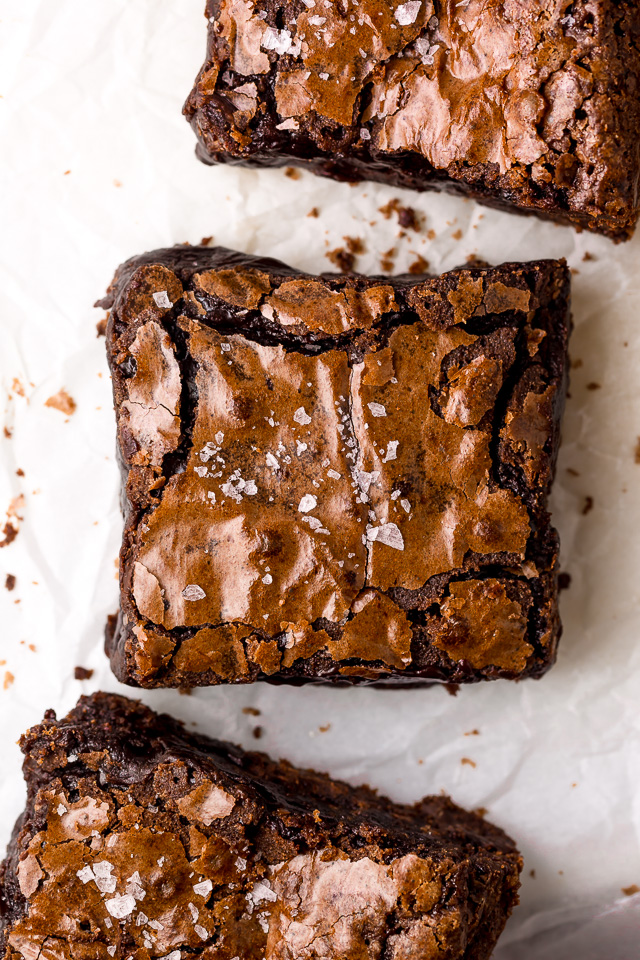
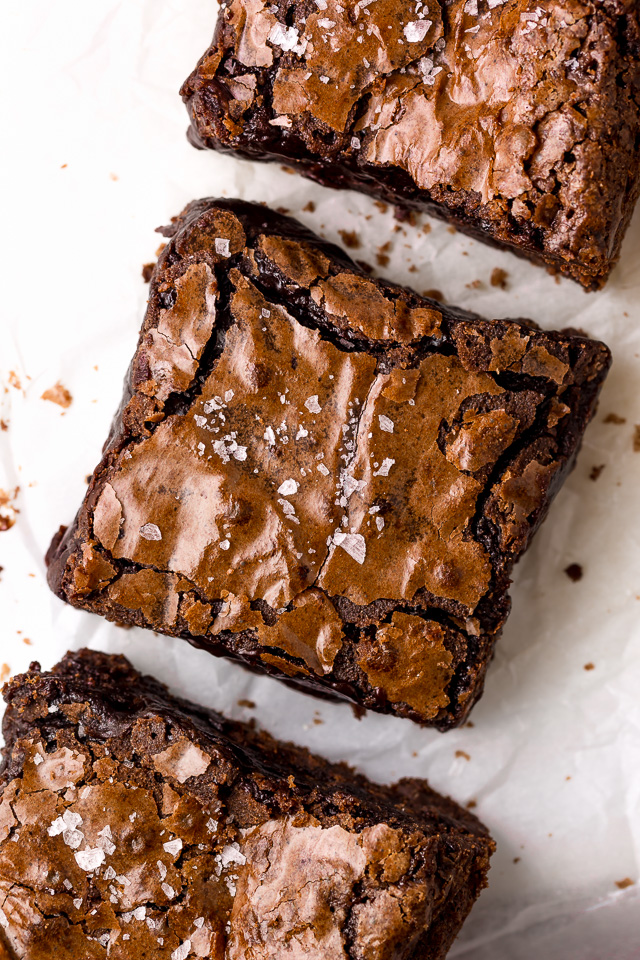
- Salt: Enhances the taste and flavor while also balancing the sweetness. For a bakery-style touch, sprinkle flaky sea salt on the crackly tops of the chocolate brownies before serving.
- Unsweetened Cocoa Powder: You can use natural cocoa powder or dutch-processed cocoa powder. Dutch cocoa will make the brownies darker and more rich.
- Butter: Melted butter adds flavor and moisture to the recipe. I suggest using unsalted butter to control the sodium added. Salted will work in a pinch, just omit the salt called for in the recipe.
- Oil: For extra moist brownies, you’ll need to add a little oil. Use canola oil, vegetable oil, or refined melted coconut oil. In a pinch, olive oil will even work. Olive oil will add flavor to the finished product.
- Granulated Sugar: Do not sub brown sugar in this recipe! It’ll make the brownies too moist and add unwanted molasses flavor.
- Eggs: You’ll use 2 whole eggs, plus one egg yolks, which adds richness without making the brownies cake-y. I cannot suggest an egg replacement and DO NOT suggest making them without eggs.
- Chocolate Chips: You can never have enough chocolate flavor! Use milk chocolate chips, white chocolate chips, dark chocolate, or even, peanut butter chips! Chocolate chunks make a wonderful replacement, especially for larger pockets of gooey chocolate. Or use 1 and 1/2 cups of mini chocolate chips!
- Optional: If you want to add some crunch and protein, feel free to add walnuts, pecans, or hazelnuts.
Secrets to a Shiny Crackly Tops
- Melt the Butter: The secret to getting that gorgeous shiny crackly tops? Melting the butter with some of the sugar!
- Whisk the Eggs: Secret #2 to crackly tops? Whisk the heck out of your eggs!
- Combine Hot and Cold: This might feel insane, but you’ll slowly add the HOT butter mixture to the cold egg mixture. The secret is to whisk constantly while you’re adding, and only add a little bit of the butter mixture at a time.
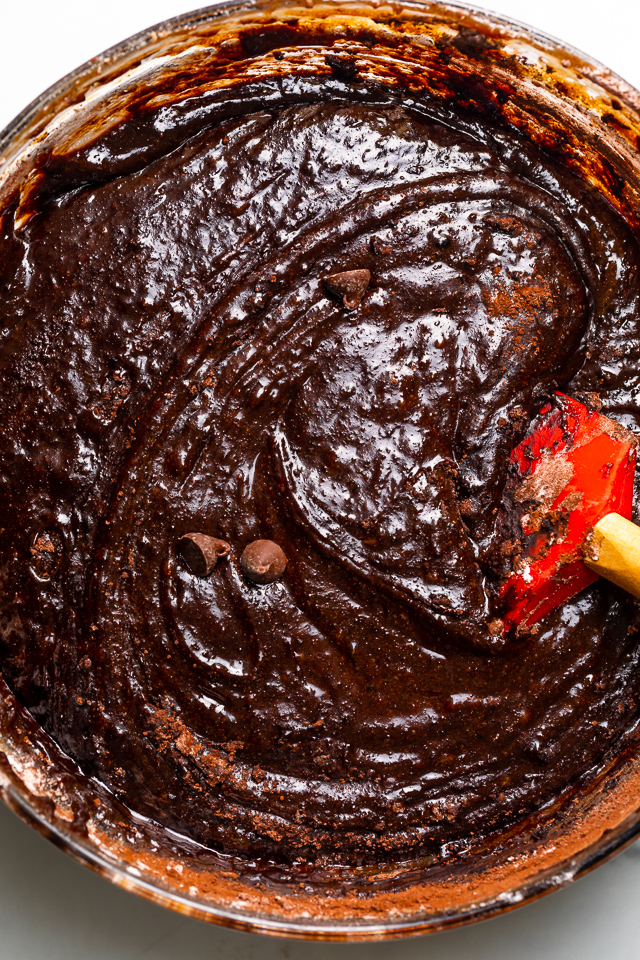
- Add Dry Ingredients: Fold in the flour, cocoa powder, salt, and baking powder, and stir until JUST combined.
- Add Chocolate: Stir in the chocolate chips or chocolate chunks. Stir ONLY until the brownie batter is just combined. Over mixing will cause cake-y brownies.
The Best Baking Pan
- This recipe requires a 9×9-inch baking pan. I don’t suggest using an 8-inch pan, but if you do, you’ll need to add at least 5 minutes to the bake time. And be prepared to have super thick brownies!
- The BEST baking pan for this recipe is a metal or aluminized steel baking pan. These pans allow the brownies to cook quickly and evenly. My favorite brownie pan is this 9×9-inch USA pan.
- If you use a glass or ceramic baking pan, bake longer than suggested. Depending on how thick your pan is, you’ll need to add anywhere from 10 to 25 minutes onto the bake time.
- Be sure to line the baking pan with parchment paper. Then pour the batter into the prepared pan and bake!
- To double this recipe, use a 9×13-inch baking pan.
This post may contain affiliate links!
Tips for the Best Chocolate Brownies
- Oil & Butter: This combination keeps this recipe moist and flavorful. Does butter taste better than oil in brownies? YES!!! Does oil keep brownies moister? Yes, that’s why we use both!
- Don’t over mix: Stop mixing the brownie batter when you still see the slightest trace of dry ingredients. This guarantees you don’t over mix! Over mixing leads to dry brownies.
- Avoid Over Baking: Take them out of the oven when they still have wiggle in the middle. Bake times are just estimates. So although I suggest baking for 27 to 30 minutes, this could vary depending on your oven and pan.
I suggest placing the brownies on a wire rack and cooling to room temperature in the baking pan before slicing. This takes a few hours. To enjoy a warm brownie, heat it up for a few seconds in the oven or microwave.
Can I Freeze these Brownies?
- Cool completely, they shouldn’t be slightly warm when you wrap them. Cooling will take about 2 hours, so be prepared to be patient.
- Once your homemade brownies are completely cool, wrap them tightly with saran wrap. This will protect them from freezer burn. Make sure the plastic wrap completely covers the brownies. Wrap a whole slab, or wrap individual brownies.
- Place in a freezer-safe sealable plastic bag and squeeze out as much air as possible before sealing. Air is the enemy of any freezer bound item!
- Label the bag and add the date, then pop it in your freezer. These will keep in the freezer for up to 2 months.
You can store them at room temperature for 3 days or store them in the fridge for up to 5 days!
The Best Cocoa Fudge Brownies
Ingredients
- 1 cup (120g) all-purpose flour
- 1/2 teaspoon baking powder
- 1/2 teaspoon salt
- 1/2 cup (43g) unsweetened cocoa powder
- 1 teaspoon espresso powder optional (don't use if you don't like coffee)
- 3/4 cup (170g) unsalted butter
- 2 Tablespoons (28ml) oil canola, vegetable, or coconut will work
- 1 and 1/3 cups (265g) granulated sugar divided
- 2 large eggs
- 1 large egg yolk
- 2 teaspoons vanilla extract optional, but recommended
- 3/4 cup (128 grams) chocolate chips
Instructions
- Preheat oven to 350 degrees (F) (175 degreed C). Line an 9×9-inch baking pan with parchment paper. Spray lightly with non-stick baking spray and set aside.
- In a large bowl, sift together the flour, baking powder, salt, cocoa powder, and espresso powder. Set aside until needed.
- In a medium saucepan, combine the butter, oil, and 1/3 cup of the sugar. Heat over medium heat, stirring frequently, until butter is completely melted. Remove from heat.
- In a large mixing bowl, combine the eggs, egg yolk, vanilla (if using) and remaining sugar. Whisk until well combined, about 30 seconds.
- Slowly, pour the warm butter mixture into the egg mixture, adding it very gradually (a little bit at a time) and whisking constantly until completely combined.
- Add in the dry ingredients and chocolate chips and, using a rubber spatula, slowly stir until just combined. *Do not over mix! Stop stirring when you see the last trace of dry ingredients. Over mixing will give you cakey brownies.
- Scrape the batter into the prepared pan and smooth the top.
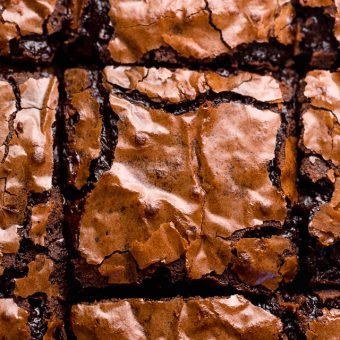
- Bake for 28 (to 30 minutes) or until the edges are firm and the top is shiny and slightly cracked.
- Place pan on a cooling rack and cool completely before slicing.
Video
Notes
- For very gooey brownies, you’ll want to pull them out closer to 27 minutes. For more structured brownies, let the, bake 30 to 32 minutes.
- Over mixing is the number 1 reason brownies come out cakey.
Hoping it make these tomorrow! Can I just ask can I used vanilla extract instead of espresso? As I believe that’s just to add flavour?
Ok I just tried making these and the HOT melted butter basically cooked some of the egg………….so I have nasty white looking pockets of cooked egg in the middle of my brownies, and I used up commodities like flour, sugar, and eggs that aren’t easy to come by these days
Hey I would suggest looking up a video of how to temper, you probably added too much of the hot mixture to the eggs you have to drop it in small batches and stir pretty quickly, I followed the recipe and had no problems!!
Hi! Can’t wait to make these!!! How long do they store well at room temp for?
These were absolutely delicious! My husband and I could NOT stop thinking about them and dreaming about them. The intense chocolatey, fudgey flavor was amazing, especially when warmed up with a few scoops of vanilla ice cream! Truly decadent! Make sure to use good quality chocolate!
Hi I was wondering can i change cocoa powder with milo? And lessen the sugar?? Will it still works? Until what stage should I melt the butter and sugar? Thanks
Thanks , Audrey
You’ve done it again! Ive made several of your recipes and love them all! I do have a question about how I could make them more chocolatey (I know, I’m hopeless)? I added the chocolate chips (semi-sweet) and used the full amount of cocoa powder. Mine didn’t look as dark as yours. They were delicious and my whole family loved them. I would totally make them again. I just love a slightly darker and more bitter brownie (like the boxed Ghirardelli mix) I’m curious how I could achieve this? A little less flour but more cocoa powder? Thanks Ashley!
Did you use Dutch process cocoa? If not, try that next time.
Hi Ashley, I tried this recipe today – it has come out well but nothing like yours. I didn’t get the shiny cracked top. Do you have a video of this recipe or can you post one?
Thnx. – Gazal
Do the chocolate chips melt during baking or so they create chunks? If so, I don’t love chunks in brownies, would melting them before adding to batter be a good option?
I used mini chocolate chips and no chunks.
Would you be able to give a gram /oz measurement for the flour? I’m so excited to make these but I don’t have US cup measurements as I’m in a different country. I know brownies go rather sideways if there’s too much flour so I would really appreciate it!
Hi…Glad I baked these gooey brownies. Got a great texture, very rich n gooey and soft. The kids couldn’t wait for them to cool down. Got over like a swish. One thing I could not achieve was the flaky ness on the top from corner to corner which I see in your pics. How do I get that ?