


 Search
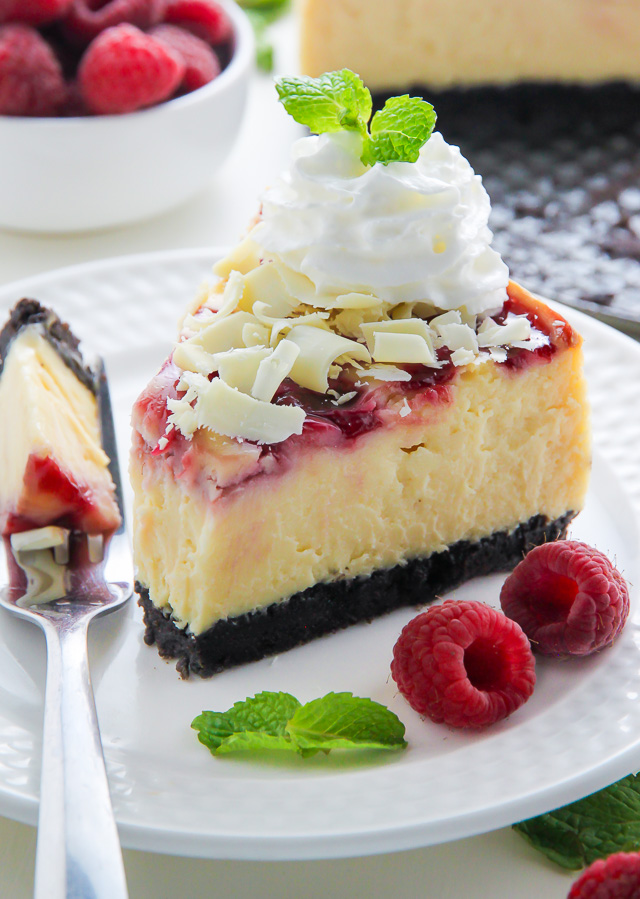
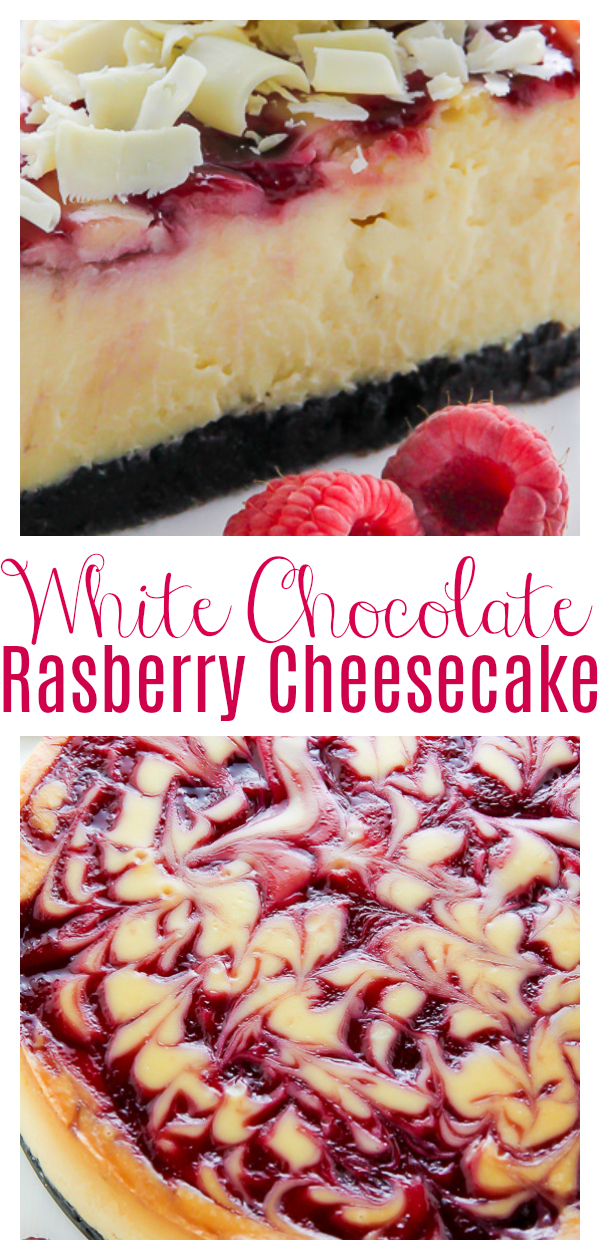
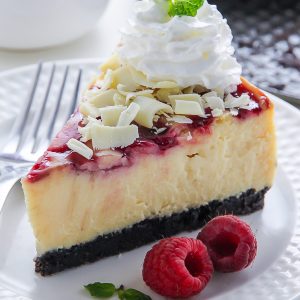
Creamy White Chocolate Raspberry Cheesecake, complete with a homemade chocolate cookie crust and fresh whipped cream. This one is a showstopper!

White Chocolate Raspberry Cheesecake Recipe
Hello from the coffee shop! I’m currently sitting here in Hamburg, sipping a macchiato, and eating the most incredibly delicious almond croissant. Not bad for a Friday… not bad at all 😉 How’s your morning so far? Any exciting weekend plans?
When I was in my early 20’s I spent a few years working at The Cheesecake Factory. It was a really fun, high paced job, and it quickly developed me into a (self-proclaimed) cheesecake connoisseur. I should probably note I didn’t work in the bakery – or gain access to any top secret recipes (I wish!) – but still, my time spent there definitely helped spark my intense love affair with creamy cheesecake.
Question for you: What’s your favorite cheesecake flavor?
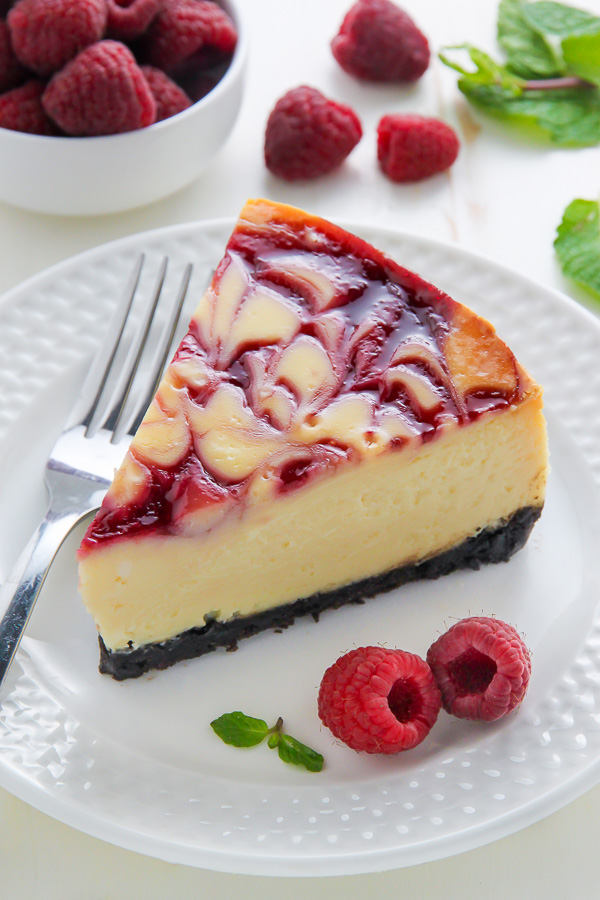
Today I’m very excited to be sharing with you my favorite flavor: White Chocolate Raspberry Cheesecake!
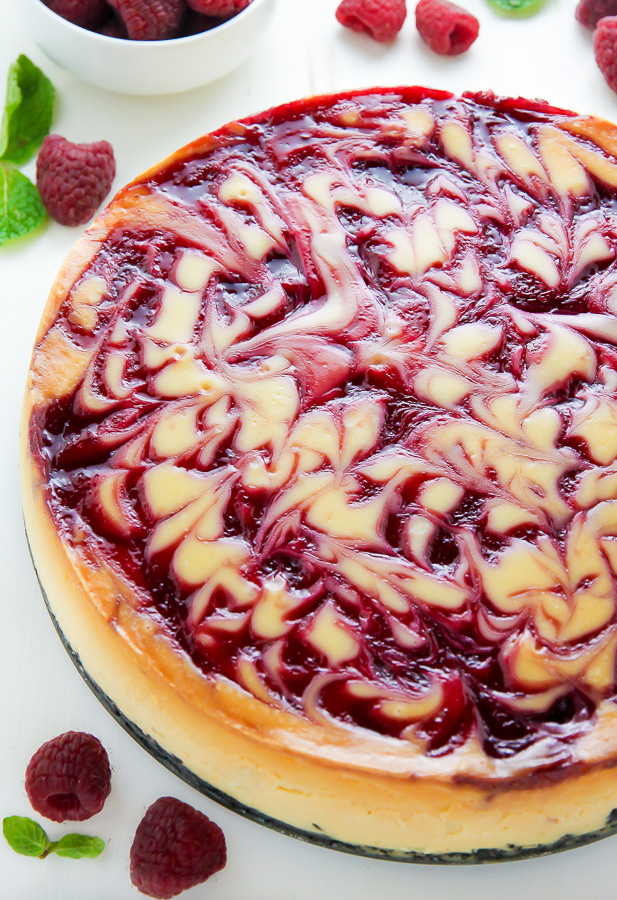
I’m going to walk you through exactly how to make it, but first… can we just take a second to soak in this beauty?! ↓↓↓ That raspberry swirl is hypnotizing.
Alright my friend, let’s get down to details. This cheesecake is made up of 4 parts: the chocolate Oreo cookie crust, the creamy white chocolate filling, the fresh raspberry swirl, and the homemade whipped cream. I know that probably sounds like a lot of steps, but each one is quite easy and straightforward. Plus, I’m going to talk you through each one, and am always here if you have additional questions. You can totally do this!
Ready?
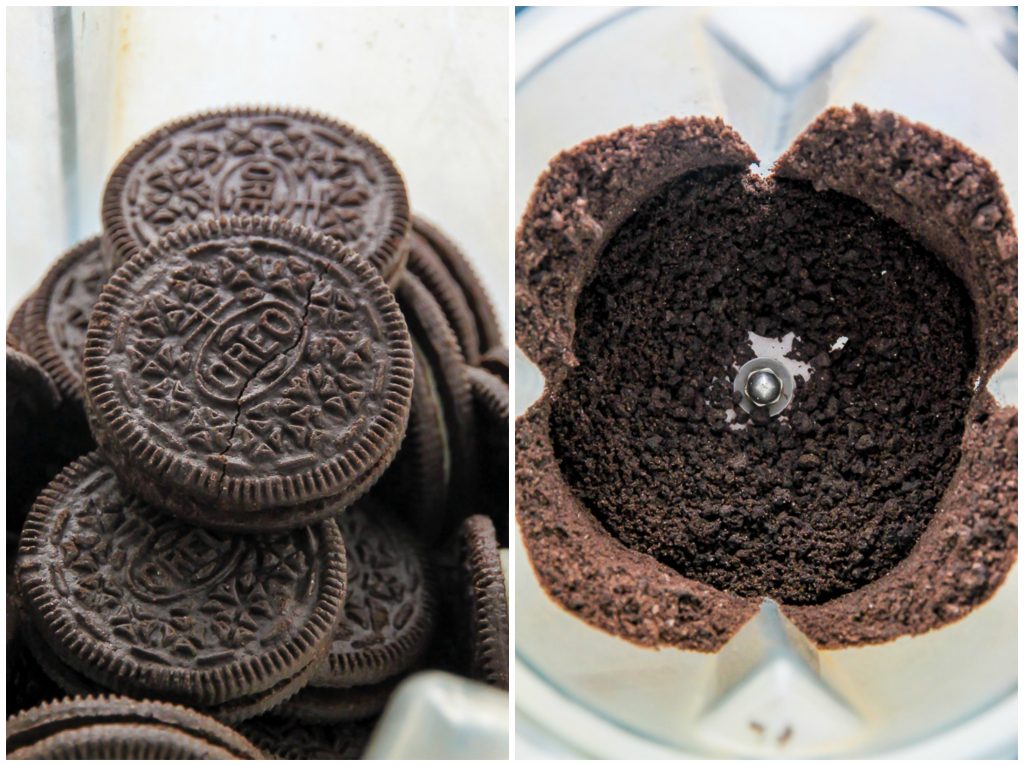
This recipe begins with the crust and so that is also where we will begin. To make the crust you will need melted butter and crushed Oreo cookies. Yep – just two ingredients! You do not need to remove the cream from the center of the cookies. Simply place them in a blender or food processor and pulverize them into small crumbs. Once they’re crushed, you will combine them with the melted butter and then press this mixture into your prepared pan. And that’s that. You just made a homemade cheesecake crust!
How to make a Water Bath
- You must use a springform pan for this recipe. If you do not own one and need a good place to start, feel free to click here and check out the one I’ve been using for years.
- This recipe calls for a water bath. A water bath is the term bakers use when they place a baking pan (in this case, our cheesecake pan) into a larger pan that’s been filled with hot water. Taking this extra step helps insulate the pan from direct heat on all sides while it bakes. The water bath method helps your cheesecake bake gently, ensuring the finished product doesn’t burn, curdle, or crack. It also helps the cheesecake maintain its silky smooth texture. When it comes to choosing a pan for your water bath, choose one that is as tall as the cheesecake pan and large enough to leave a few inches between the cheesecake pan and the outer rim – you want enough room for the water to circulate easily. When you’re ready to make your water bath, here’s what you do: Adjust an oven rack to the middle position. Preheat oven to called for temperature. When the oven is preheated, carefully (using an oven mitt) pull out the middle rack and place your large pan on it, fill the pan halfway with hot water, then place the filled cheesecake pan in the center of the water bath. Slowly slide the rack back to its full inserted position, close the door, and bake the cheesecake according to instructions.
- Since this recipe uses a spring form pan, it is essential to wrap the pan in heavy-duty tin foil to avoid water seeping in. I wrap my pan from every possible angle pressing the foil in and around to prevent a soggy crust. I use my extra large skillet as a water bath and it works great. If you’d like a visual of this, please check out my lemon blueberry swirl cheesecake post.
- You’re going to leave the cheesecake pan in the water bath, even after you turn off the oven. You’ll take the cheesecake out of the water bath once it has been removed from the oven.
Time to talk about the filling. You’re going to need cream cheese, sour cream, eggs, egg yolks, sugar, flour, vanilla extract, fresh lemon juice, and high-quality white chocolate.
Important:
- The cream cheese MUST be very soft before you begin assembling this recipe. I typically leave my blocks of cream cheese out on the counter for at least two hours before I plan on baking.
- You should also bring your eggs and sour cream to room temperature. Cold ingredients will not incorporate evenly. Batters made with cold ingredients don’t come together smoothly, so be sure to take the extra step and bring them to room temperature.
- As for the chocolate, it will need to be melted and slightly cooled, about 10 minutes or so should do the job. I recommend using a white chocolate you know melts well. I used Lindt white chocolate with great results (and I promise I am not getting paid to say that!).
The raspberry swirl sauce is our next step. You will need a small food processor (or blender) to blend the the raspberries smooth. Then you’ll press this mixture through a fine mesh strainer, getting rid of the seeds and pulp. Add in a little sugar, and you’re all done. To swirl, you’ll dollop the raspberry mixture on top of the unbaked cheesecake batter by the spoonful, then use a skewer to swirl. I don’t recommend swirling to much, or the end result will look messy.
The final step is the whipped cream, and it is completely optional. I know some people are not a fan, so feel free to skip this part; the cheesecake is definitely delicious enough on its own. If you do plan on making it, the “recipe” I use is a simple and straightforward method that calls for heavy cream, confectioners’ sugar, and a dash of vanilla. You will need a stand mixer fitted with a whisk attachment or a handheld electric mixer to reach the proper consistency. I recommend making the whipped cream right before serving, and adding it on top of the cheesecake at the very last minute. Otherwise, it will begin to melt and make the presentation look sloppy.
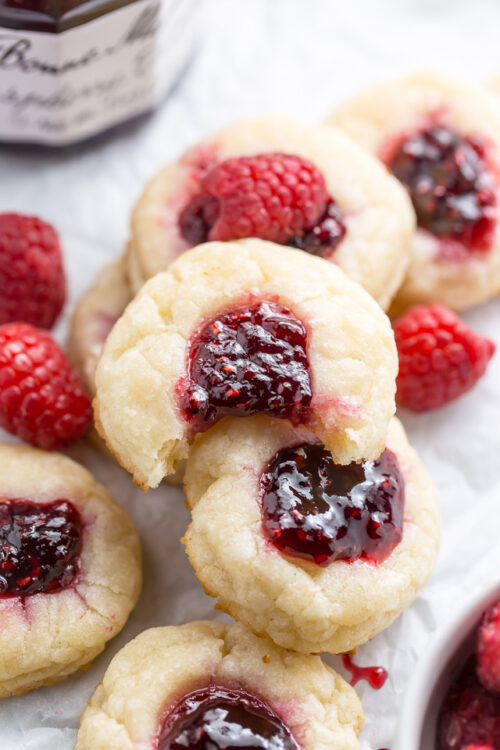
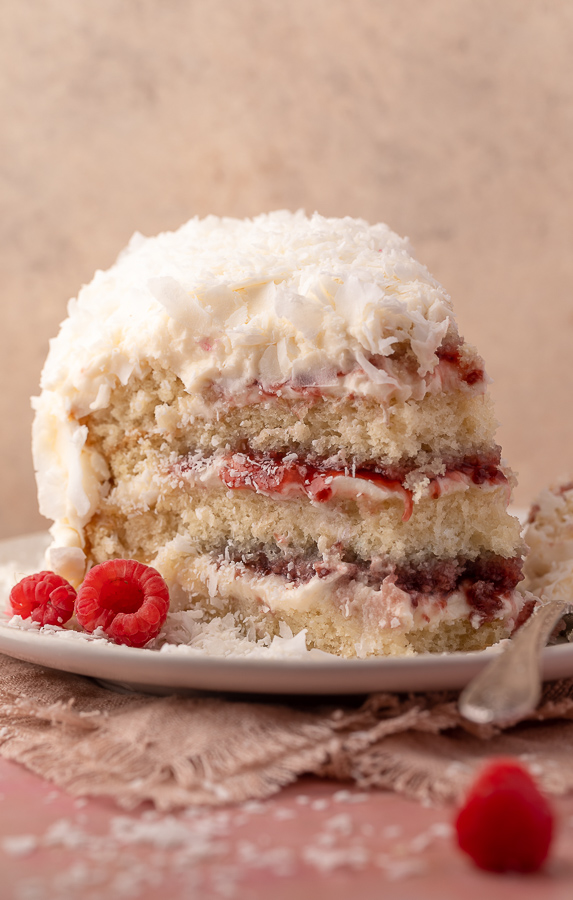
More Raspberry Recipes:
I love that this white chocolate raspberry cheesecake can be made ahead of time and frozen until needed (minus the whipped cream, of course). So convenient! I also love that it fools all of my friends into thinking it’s from some fancy bakery. It’s seriously such an impressive dessert!
If you try this recipe, let me know! Leave a comment below and don’t forget to snap a pic and tag it #bakerbynature on Instagram! Seeing your kitchen creations makes my day. ♥
White Chocolate Raspberry Cheesecake
Ingredients
For the Oreo Crust:
- 24 Oreo cookies
- 1/4 cup unsalted butter, melted
For the White Chocolate Cheesecake Filling:
- 3 bricks (24 ounces) full-fat cream cheese, VERY soft
- 1 cup (8 ounces) full fat sour cream, at room temperature
- 3 large eggs + 2 egg yolks, at room temperature
- 1 and 1/2 cups granulated sugar
- 1 1/2 teaspoons vanilla extract
- 1/4 cup fresh lemon juice
- 8 ounces white chocolate, chopped, melted and slightly cooled
For the Fresh Raspberry Swirl:
- 3/4 cup fresh raspberries
- 3 tablespoons granulated sugar
For the Whipped Cream:
- 1 cup heavy cream
- 1/4 cup confectioners' sugar
- 1 teaspoon vanilla
Instructions
Prepare the pan:
- Preheat oven to 325 degrees (F). Wrap a 9" springform pan VERY well in multiple layers of heavy-duty tin foil; lightly grease the pan with non-stick spray, and set aside.
For the Oreo Crust:
- Add the Oreo cookies to the body of a small food processor or blender and pulse until the cookies are fine crumbs. Stir in the melted butter, mixing well to combine. Dump the mixture into the prepared pan, pressing the crust down firmly and slightly up the sides. Set aside.
For the White Chocolate Cheesecake Filling:
- Beat the softened cream cheese and sour cream in a blender until completely smooth, scraping the sides and bottom of the container as needed. You want this mixture completely smooth before adding anymore ingredients!
- Add in the eggs, egg yolks, and sugar and pulse until combined. Add in the vanilla and pulse for another 10 seconds. Don't over mix!
- Using a rubber spatula, fold in the lemon juice, then fold in the melted white chocolate.
- Pour the filling into the prepared crust, spread evenly, and smooth the top with a rubber spatula.
- Top with the raspberry swirl.
- Place the springform pan into a large baking pan (with high sides) and fill the pan halfway with hot water; this is your water bath (see post if you need more information on this).
- Place cheesecake in preheated oven and bake for 1 hour and 30 minutes.
- Turn the oven off and let the cheesecake sit for 45 minutes inside the oven with the door shut. The cheesecake should be still slightly wiggly in the center.
- Remove from oven and gently run a knife around the edge of the cake, loosening any bits that may have gotten stuck while baking.
- Allow cheesecake to rest on the counter for 30 minutes before covering with plastic wrap and refrigerating for at least 6 hours. When ready to eat, simply slice, top with a dollop of whipped cream, and serve!
For the Raspberry Swirl:
- In a small food processor or blender, puree the raspberries until completely smooth. Press the mixture through a fine mesh strainer, discarding seeds and pulp. Stir in the granulated sugar. Spoon the raspberry mixture on top of the unbaked cheesecake, a few dollops at a time. Use a skewer to swirl the mixture as much or as little as you'd like. Bake cheesecake as directed above.
For the Whipped Cream:
- Place the heavy cream in a stand mixer fitted with the whisk attachment and beat on medium-high until semi-stiff peaks begin to form. Reduce the speed to low and add in the confectioners' sugar and vanilla and beat for another minute or so. Dollop on top of cheesecake slices right before serving, or place in the refrigerator until needed. Keeps for 48 hours.

I dont often leave reviews but I was looking for a white chocolate raspberry recipe with oreos (all my mom’s favorite things) to make for her birthday cake and omg we all LOVED this. It literally melts in your mouth. I didnt have a pan large enough to do a waterbath, my springform pan is larger than 9 inch. I did a pan of water on the shelf below and it did crack a little without the water bath but it still looked great and tasted amazing. Fab recipe!!
After making without cornstarch which was good i then made with 2 tablespoons of cornstarch & left in of for 40 minutes instead of 45 with oven off after baking. That one was fluffier & tastier also used around quarter cup more of raspberries. Yum yum. Great recipe. Glad I ran into it.
The detailed breakdown mentions flour in the cheesecake, however you do not have flour or how much in the ingredient list. Can you please clarify how much flour and when to add it? I’ve made some of your other cheesecake recipes and I do recall those also called for flour, but it seems like it got mention in the description but forgotten in the directions/ingredients.
This is a great cheesecake, however I gave 3 stars because the directions and ingredient list are missing important pieces. In the general direction she says she uses flour, however it’s not listed in the ingredients. What I ended up doing in order to make the cheesecake was I used her blueberry cheesecake recipe side by side to this one – it essentially has the same directions and similar ingredients. I used the flour amount from that recipe, as well as the lemon amount. Great cheesecake after I basically combined it with another one of her cheesecake recipes. * I would not recommend making this if this is your first cheesecake.
Very very good.
I made this cheesecake last week. Even though it was good, it didn’t turn out like yours. When you walk us through and you talk about the filling, you mention flour, but in the recipe, there is no flour listed.
As for the raspberry swirl, there is nowhere near enough raspberries to make a beautiful swirl like yours and my filling was a bit runny so it didn’t stay on top.
I made this into a keto version and omg!!! We loved it. Will definitely make the original for my family next time I make.
You mentioned having flour in your narrative, but I don’t see flour listed as an ingredient in the recipe.
Personally, I try to avoid flour in cheesecake!
Does this recipe need it, if so, how much and when to add?
I love Cheesecake Factory cheesecake that motivated me to make this cheesecake. I failed miserably at my first attempt. Not sure what happened but I followed the exact instructions. The only thing I did differently was used 2% yogurt in place of the sour cream. And when I baked the cake it was not in half filled hot water bath just slightly touching the baking pan. Also one thing I noticed the raspberry swirl disappeared towards the last 30 mins of baking. Is the raspberry swirl supposed to stay as in the picture after 1 hr and 30 mins of baking? The cake turned out too squishy and broke off. Not sure if what I mentioned above contributed to my failed attempt pls advise!! I think it is probably just me not the recipe itself but I love to try again and succeed. Any advice will be appreciated. Thanks!!
With cheesecake, it’s important to use full-fat cream cheese and sour cream, otherwise the texture will be too soft.
If you want to substitute yogurt for sour cream, try 5% fat Greek yogurt. That might make a firmer cheesecake.
I still recommend using full-fat cream cheese and full-fat sour cream for the best results.
You say to use a blender. Can I use a food processor?