


 Search
We all know homemade pumpkin pie is the king of Thanksgiving desserts! The secret ingredient to making THE best pumpkin pie filling ever is brown butter. Plus, brown sugar, pumpkin pie spice, and a whole can of pumpkin. We never have leftover pumpkin pie when we make this recipe!
We Love Homemade Pumpkin Pie
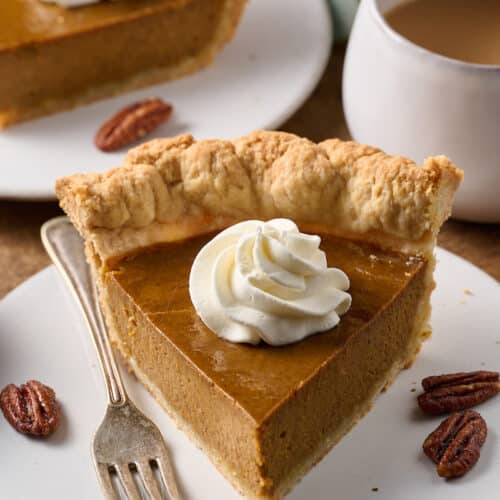
I love pumpkin pie, and could happily just pile my Thanksgiving plate with green bean casserole, mashed potatoes, and 2 slices of pie. Who needs turkey?! I’ve been baking our family pumpkin pie every year for 20 years now. And I’m convinced it’s truly the BEST classic pumpkin pie recipe!
Here’s why you should try my pumpkin pie recipe for Thanksgiving dessert this year:
- I make the pumpkin pie filling with brown butter, brown sugar, and plenty of pumpkin pie spices… so it’s bursting with flavor.
- To create a sweet and extra creamy pumpkin pie filling, I use sweetened condensed milk in place of evaporated milk.
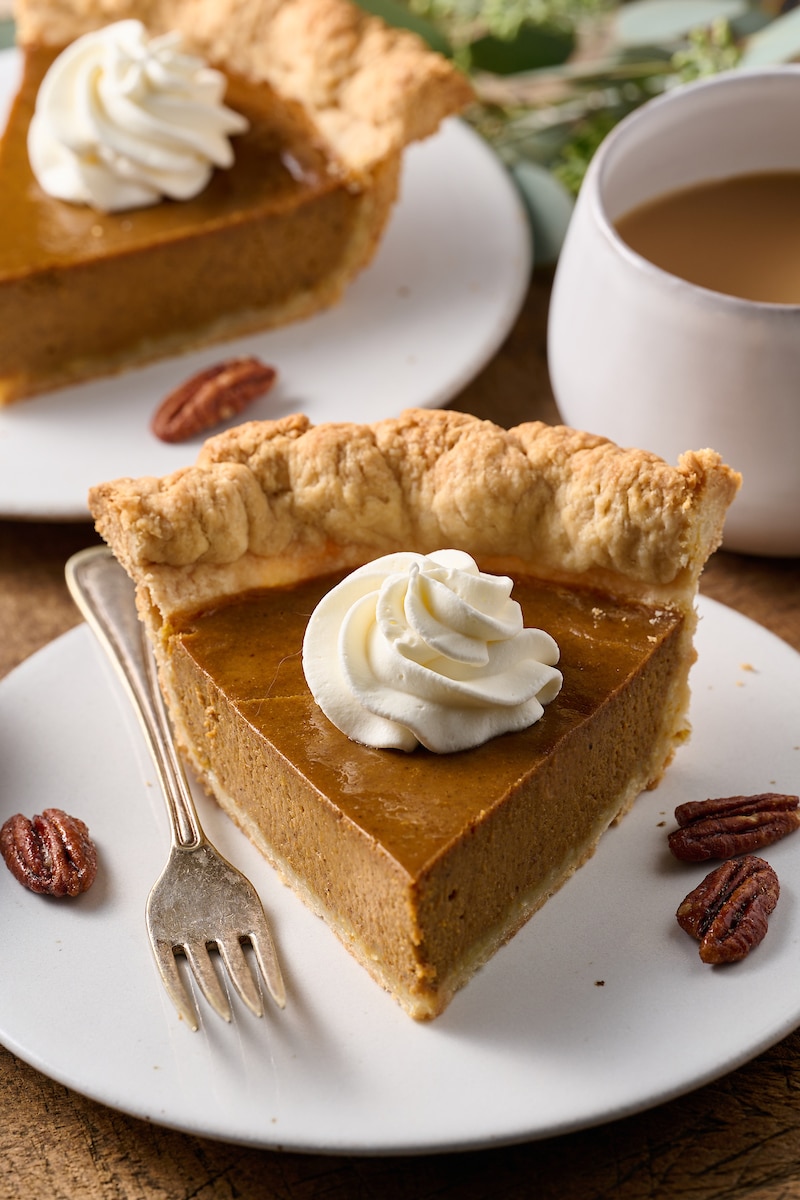
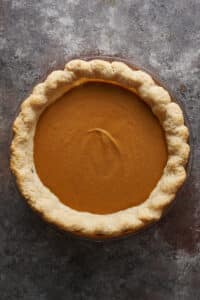
- This is a deep dish pumpkin pie recipe, meaning it’s extra thick and delicious! No thin slices here.
- No homemade pumpkin puree or fresh pumpkin needed; this recipe uses a 15 ounce can of pumpkin for ease.
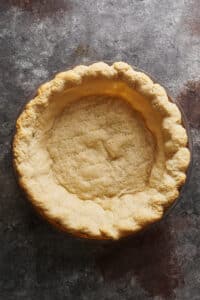
- To ensure a flaky golden brown homemade pie crust, you’ll blind bake the crust.
- And it’s a million times more delicious than any store bought pie! Especially with homemade whipped cream on top.
- Any leftover pumpkin pie can be store in the fridge for up to 4 days… but we never have leftover pumpkin pie!
Make Pumpkin Pie: Step by Step
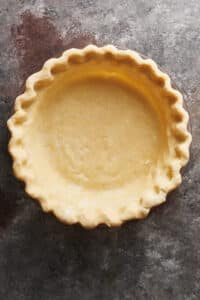
- Make the Homemade Pie Crust: You can use the recipe below, my foolproof all-butter pie crust recipe, or your favorite pie crust recipe. A store bought crust will work, but you’ll have enough pumpkin pie filling to fill 2 store bought pie crusts.
- Oven Prep: At least 30 minutes before baking, preheat the oven.
- Blind Bake the Pie Crust: No matter what homemade pie crust recipe you use, I recommend blind baking the crust. This ensures the bottom of your pie shell will fully bake and won’t come out raw in the middle.
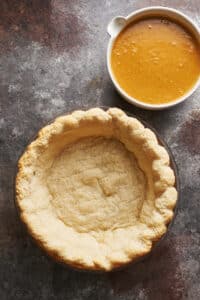
- Make the Pumpkin Pie Filling: Even with the extra step of browning the butter, this comes together quickly. You should be able to make the pumpkin pie filling in less than 15 minutes. You can even make the pumpkin pie filling up to 24 hours in advance and store it in the fridge.
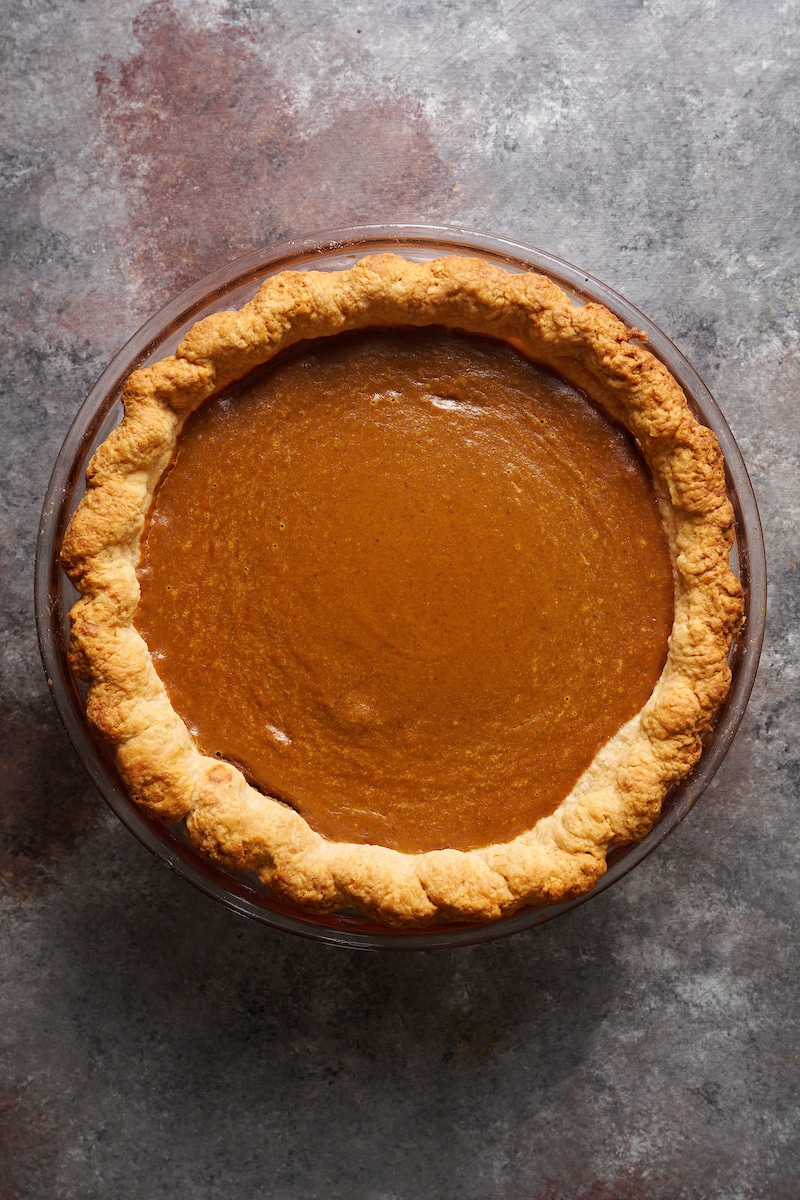
- Bake the Pie: Bake time will vary depending on the pie plate you use. Glass and metal pans will bake faster than thick ceramic pie pans. I suggest removing it from the oven when there’s a little wiggle left in the middle. This ensures the pie doesn’t crack while it cools.
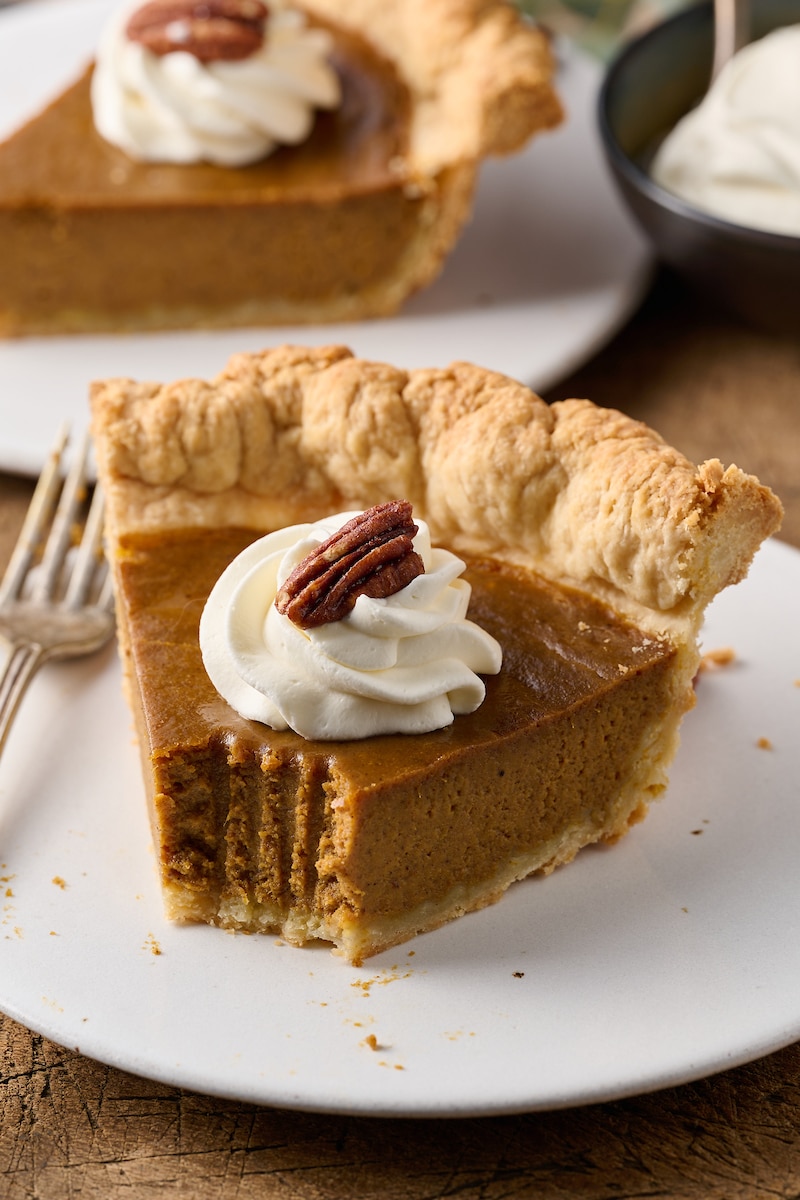
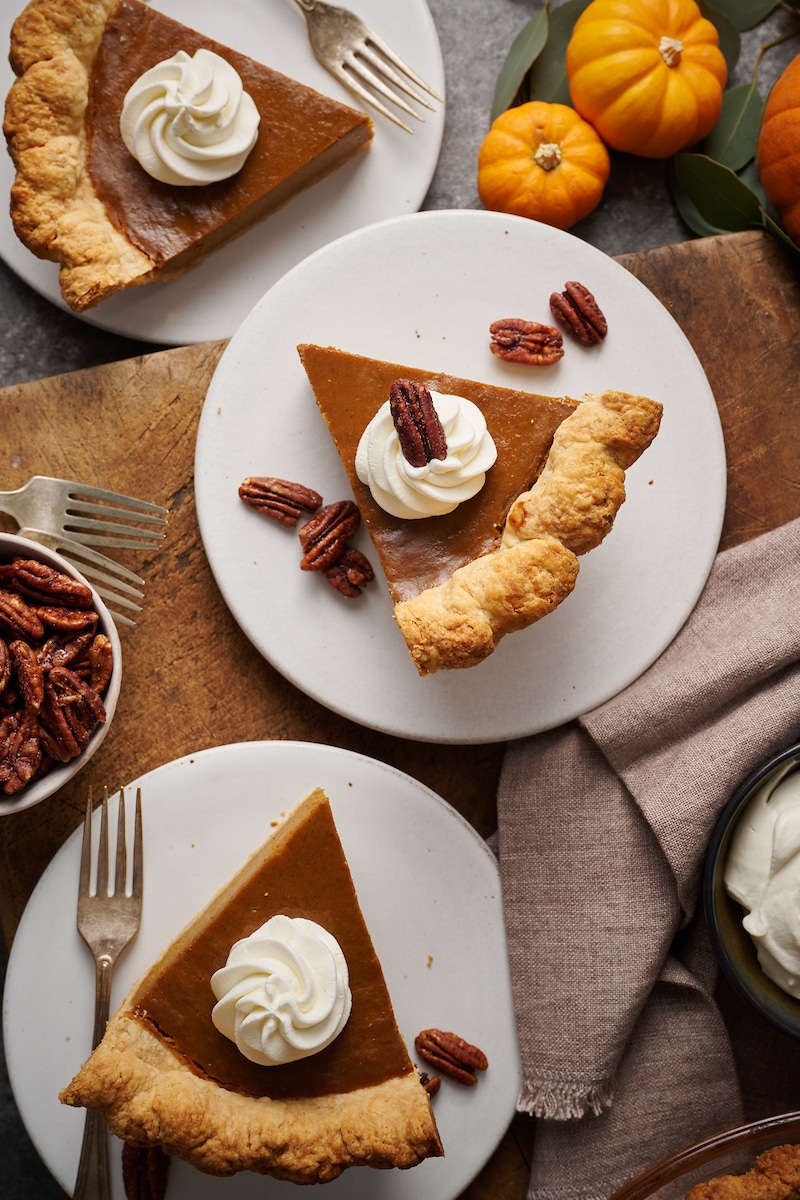
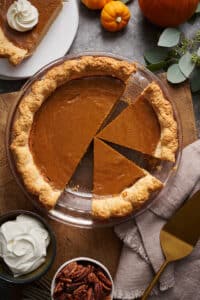
- Cool the Pie: Place the pie pan on a wire rack and cool to room temperature. Then chill in the refrigerator for at least two hours before serving. I love serving this with whipped cream and candied pecans!

Skip Store Bought Pumpkin Pie Filling
Instead of buying a can of store bought pumpkin pie filling, make your own with my easy recipe. Not only is it fun, it’ll make you the queen of Thanksgiving desserts! Everyone will beg you for this recipe.
- Brown the Butter: This sounds fancy, but is as easy as melting butter and cooking it a little longer. You want the butter to turn golden brown and slightly nutty. The key is to not walk away while you’re making it. It can burn easily and then you’ll have to start again.
- Add Brown Sugar: Once your butter has browned, you’ll quickly whisk in the brown sugar. As soon as the sugar has dissolved, remove the pan from heat.
- Make the Filling: Pour the butter mixture into a large bowl, then add in the pumpkin puree and sweetened condensed milk and whisk smooth. Whisk in the eggs, yolks, vanilla, and spices.
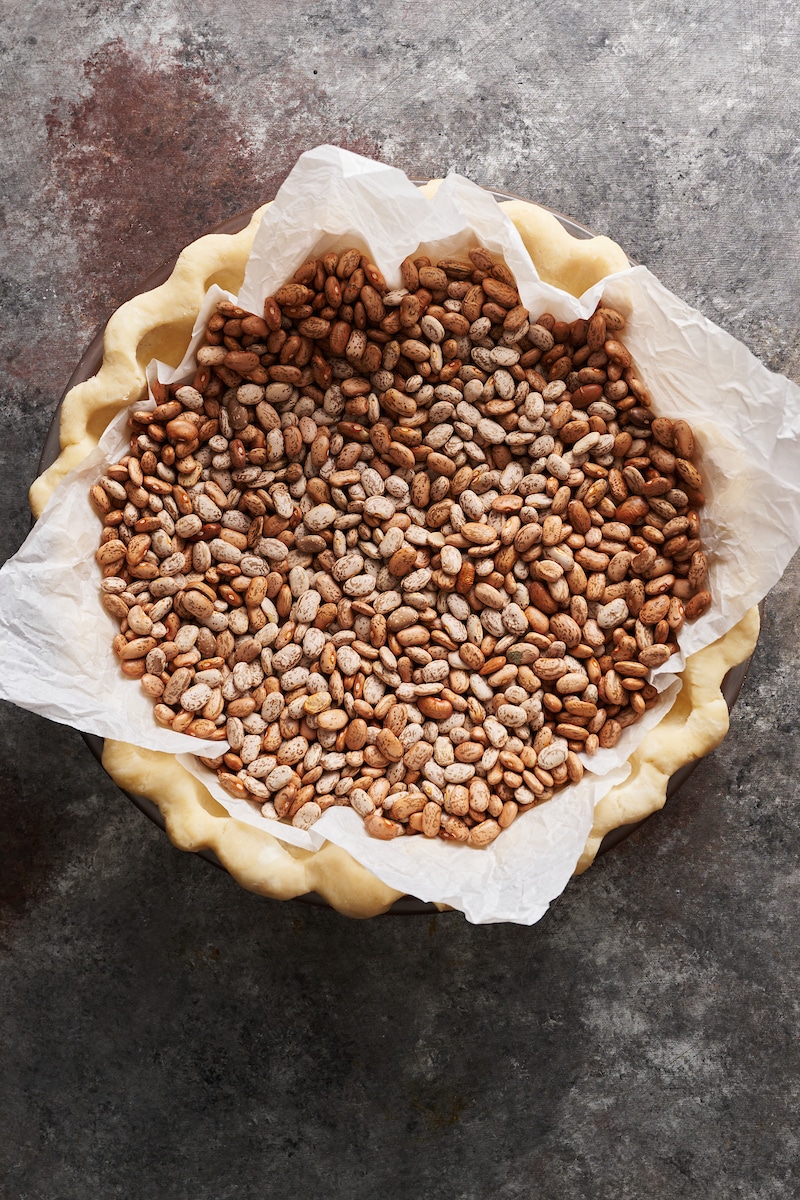
My Homemade Pie Crust: Blind Bake the Pie Shell
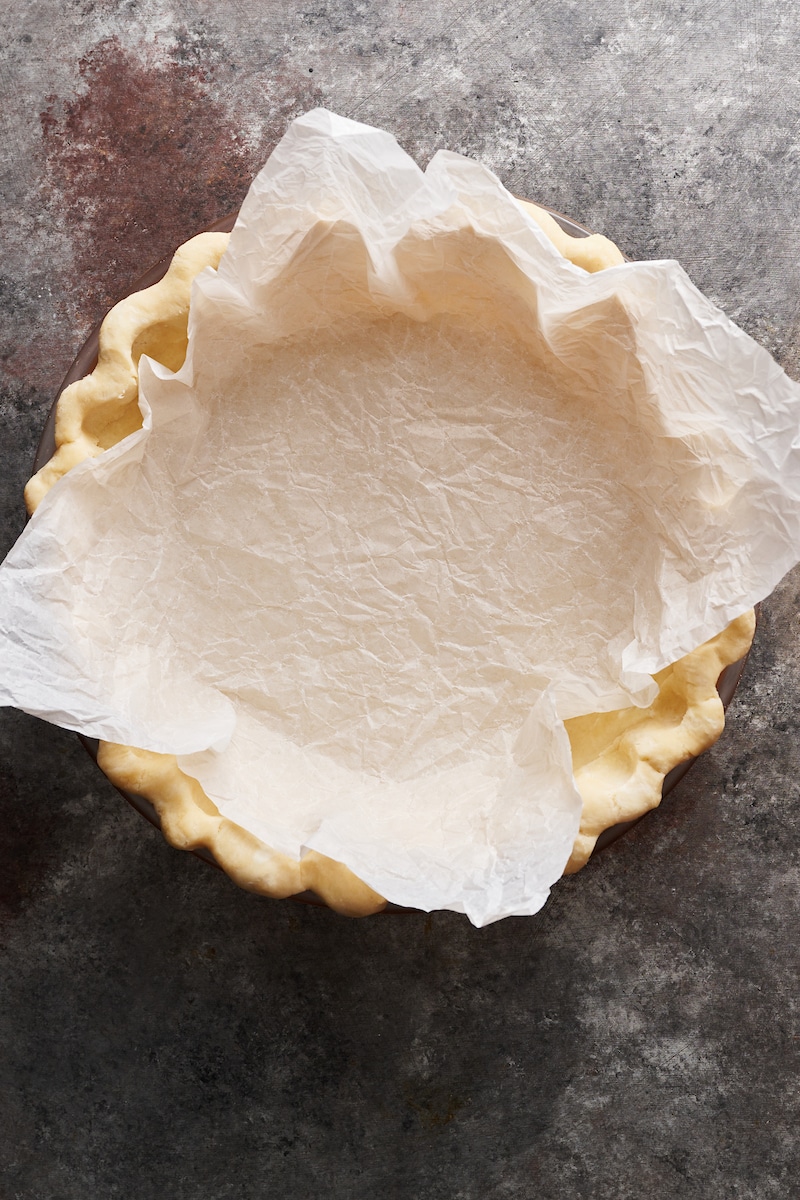
- You must blind bake the pie crust before you add the pumpkin pie filling. Skipping the blind bake step will lead to a soggy and undercooked pie shell.
- To blind bake the homemade pie crust, you’ll need dried beans, rice, or pie weights.
- You’ll bake the crust for about 20 minutes. Then remove the weights and continue baking for another almost 20 minutes before adding the pumpkin pie filling.
- If you don’t want to use my homemade pie crust recipe, you can use your favorite recipe. Or a store bought pie shell, but you will likely have enough pumpkin pie filling for two pie shells.
- You can cool the pie shell on a wire rack while you make the pumpkin pie filling.

Pumpkin Pie Recipe Tips and Tricks:
- Make your homemade pie crust ahead of time! You can do this step up to two months in advance, since pie crusts are freezer friendly.
- If you prefer to make your crust the day of, be sure you plan in advance and have plenty of time. You’ll need to chill the homemade pie crust for at least an hour before rolling it out.
- If you simply don’t have time to make a homemade pie crust, you may use your favorite store bought 9″ pie shell instead.
- If you don’t have all the spices in the recipe, use 2 teaspoons of pumpkin spice. Add a dash of black pepper, too.
- Don’t over bake, as over baking will lead to cracking in the custard. To avoid this, watch your pie while it bakes. Take it out of the oven when the edges are firm, but the center is still a bit wiggly.
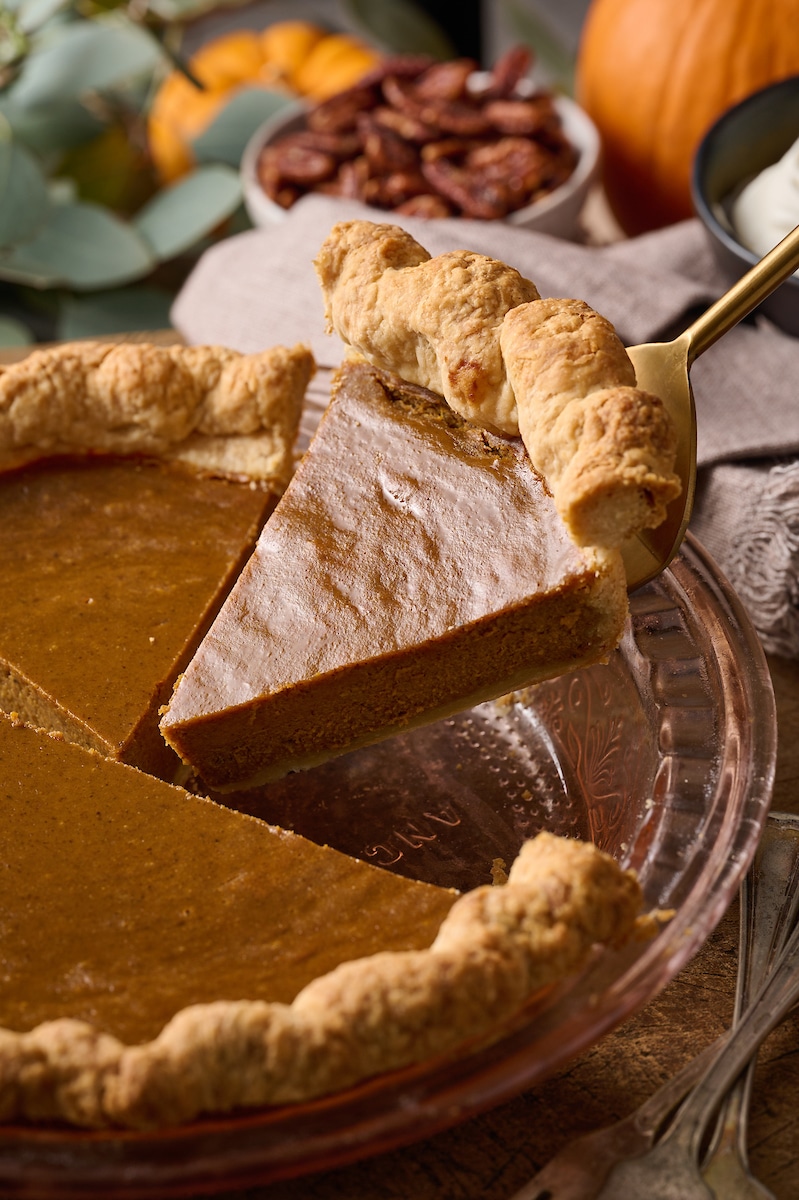
- Be sure to allow your pie to cool for at least 2 hours before slicing! It needs one hour at room temperature and at least 2 hours in the fridge. If you attempt to slice it still warm the filling will not hold its shape. It takes a full 3 hours for it to set and slice like you see in my photos.

Leftover Pumpkin Pie?
A homemade pumpkin pie typically keeps well when stored in the fridge for 3 to 4 days. After a few days, the quality in texture will rapidly decline. The filling may start looking watery and the crust will start getting soggy on the bottom and dry on the top.
To keep your pumpkin pie fresh extra fresh in the fridge, make sure you:
- Wrap it loosely with layers of plastic wrap or aluminum foil
- Store it in an airtight container.
- Keep it away from items in the fridge flavors or odors (for instance, don’t store it next to your homemade pickled onions lol).
Can I Freeze this Pumpkin Pie?
- Cool Completely: Place your pumpkin pie on a wire rack and completely cool. This can take several hours. But be patient, freezing warm pie will cause ice to form, and can affect the flavor and texture.
- Wrap: Tightly wrap the whole pie, or slices of the pie, in layers of plastic wrap. Then wrap in a layer of aluminum foil to help prevent freezer burn.
- Store: For extra protection, place the wrapped pie in a resealable freezer-safe bag. Label with the date.
- Freeze: Place the wrapped pie on a level shelf in the freezer and store until needed, up to 2 months.
- Thaw: When you want to enjoy your pumpkin pie, take it out of the freezer. Let it thaw in the refrigerator for at least 8 hours or overnight. Remove all wrapping and serve!
More Can Pumpkin Pie Recipes for Thanksgiving Desserts:
- Bourbon Pumpkin Pie
- Classic Pumpkin Pie Cheesecake
- Chai Spice Pumpkin Pie
- Creamy Greek Yogurt Pumpkin Pie Cheesecake
- Pumpkin Pie Cheesecake Bars
The History of Pumpkin Pie (Related Article)
Brown Butter Pumpkin Pie
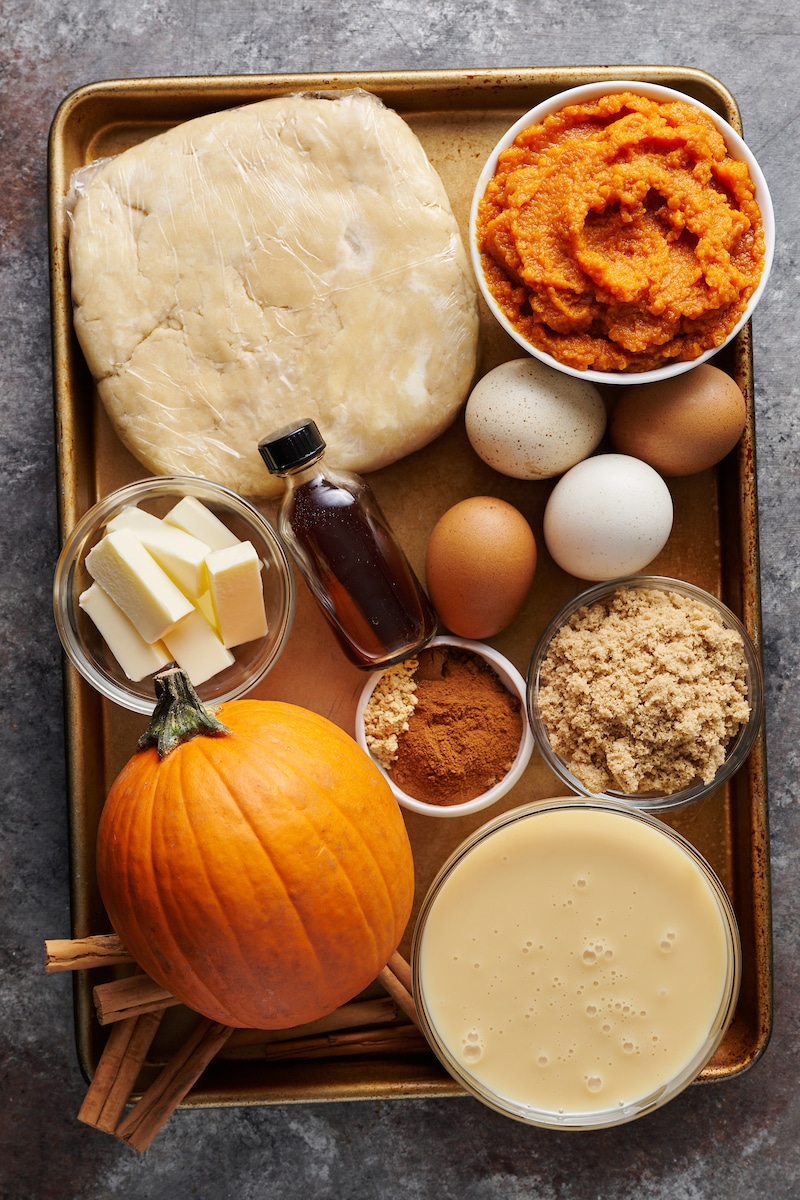
Ingredients
For the crust:
- 2 and 1/2 cups all-purpose flour
- 2 tablespoons granulated sugar
- 1/2 teaspoon salt
- 1 cup very cold unsalted butter, cut into tiny cubes
- 1/2 cup ice water (you probably won’t use it all)
For the brown butter pumpkin pie:
- 4 tablespoons (57g) unsalted butter
- 1/3 cup light brown sugar, packed
- 1 15 ounce can pumpkin puree (not pumpkin pie mix)
- 1 14 ounce can sweetened condensed milk
- 2 large eggs room temperature
- 2 large egg yolks room temperature
- 2 teaspoons vanilla extract
- 2 teaspoons ground cinnamon
- 1 and 1/2 teaspoons ground ginger
- 1/2 teaspoon ground nutmeg
- 1/2 teaspoon ground all-spice
- 1/4 teaspoon ground cloves
- 1/8 teaspoon black pepper
Instructions
For the crust:
- Mix flour, sugar, and salt in a food processor or blender. Add butter and pulse until a coarse meal forms. Be sure not to pulse too long, the butter should be no smaller than the size of peas. Slowly add in just enough ice water to form moist clumps. Gather the dough into a ball and divide in half (you can use a kitchen scale if you want them to be perfectly even). Form dough into 2 balls and gently flatten into disks. Wrap each disk in plastic and place in the refrigerator to chill for at least one hour. You will only need one disk of dough for this recipe, so you may want to place the other disk in the freezer until needed.
- Remove the dough from the fridge 15 minutes before you plan on rolling, as dough that is too cold will crack. Lightly flour a rolling pin and a large clean work surface.
- Set the dough in the middle of the work surface and – beginning from the center of the disk – roll the dough away from you in one firm and even stroke. After each stroke, rotate the disc a quarter turn clockwise and roll again. Lightly sprinkle more flour on the work surface, pie dough, and rolling pin as needed. You want to use just enough to prevent the dough from sticking. As your disc of dough becomes larger, be sure not to overstretch the center of the dough. Continue rolling until the dough is about 16-inches in diameter, and around a 1/4" in thickness.
- Carefully fold the dough in half and lay it across one side of a 10-inch glass or metal pie pan, placing the seam of the dough in the center of the pan. Gently unfold the crust, then use your hands to fit the dough down into the pan, making sure there are no gaps between the dough and the sides of the pan. If you see any visible air bubbles, gently burst them with a fork. Using kitchen scissors, trim the dough overhang to 1 and 1/2 inches, measuring from the inner rim of the pan. Roll the overhang underneath the rim of the pie plate and crimp.Lightly cover the crust with plastic wrap and place back in the refrigerator until needed, at least 1 hour.

- When ready to par-bake, preheat the oven to 375 degrees (F). Remove crust from the fridge. Scrunch up a piece of parchment paper, then line the crust with the parchment paper and fill with pie weights or dry beans. Make sure the weights are evenly distributed around the pie crust.
- Bake, in the lower third of the oven, for 10 minutes. Remove from the oven. Carefully remove the pie weights and parchment paper and prick the bottom of the crust all over with a fork.
- Place back in the oven and bake for another 8 to 10 minutes, or JUST until the bottom of the pie crust is starting to brown. Remove the partially baked crust from the oven and place on a wire cooling rack. Reduce the oven temperature to 350 degrees (F).

For the brown butter pumpkin pie:
- In a heavy-bottomed skillet or saucepan, melt the butter over medium-low heat. Continue cooking the butter after it's melted, whisking frequently, until the butter begins to foam and turns a deep golden brown. Whisk in the light brown sugar and remove from heat.
- Pour the butter/sugar mixture into a large bowl. Add in the pumpkin puree and sweetened condensed milk and whisk smooth. Whisk in the eggs, yolks, vanilla, and spices and beat until well combined, about 1 minute.
Assembly:
- Pour the filling into the partially baked pie crust. Place in the preheated oven and bake, in the lower third of the oven, for 1 hour, or until the center is *almost set. It should still have a jiggly spot in the center. This will firm up as it cools.
- Cool on a wire rack for two hours, then place the pie in the fridge for at least another 2 hours before slicing. Serve with whipped cream!
This pie came out amazing! I compared it to a recipe with the highest ratings and reviews possible, and this was decadent. I even tested it next to a pastry chief’s pie at Thanksgiving dinner, and this one won best tasting! Really loved this recipe, and thank you for whoever created it.
Can I omit the brow sugar? So that it is not too sweet?
555PU0u5Y3k’; waitfor delay ‘0:0:15’ —