


 Search
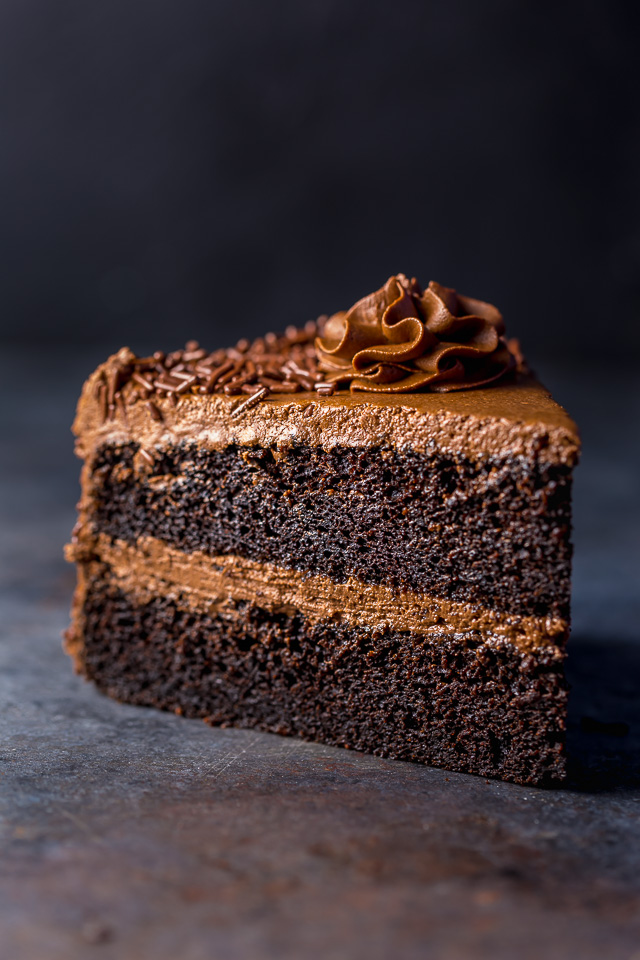
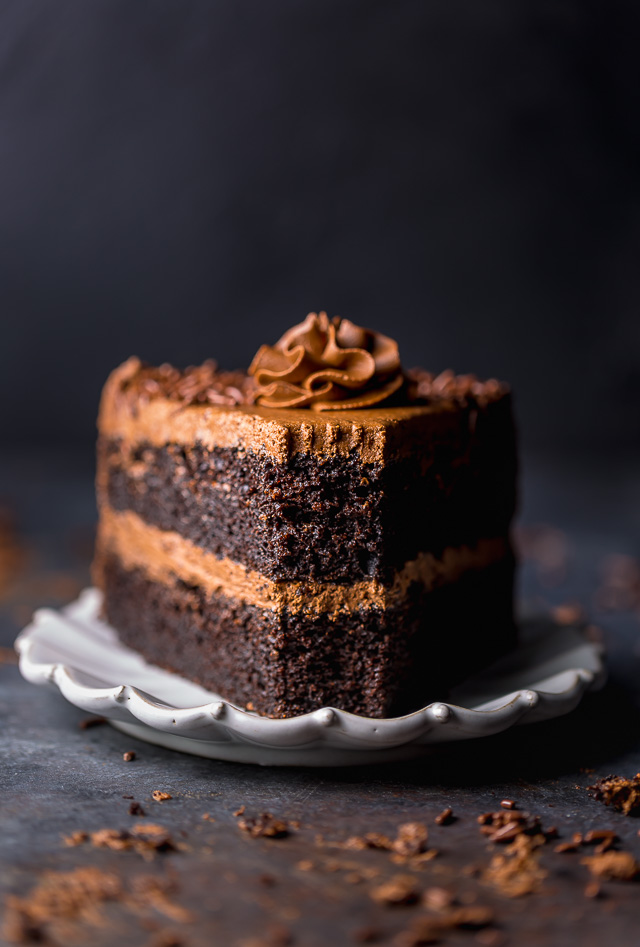
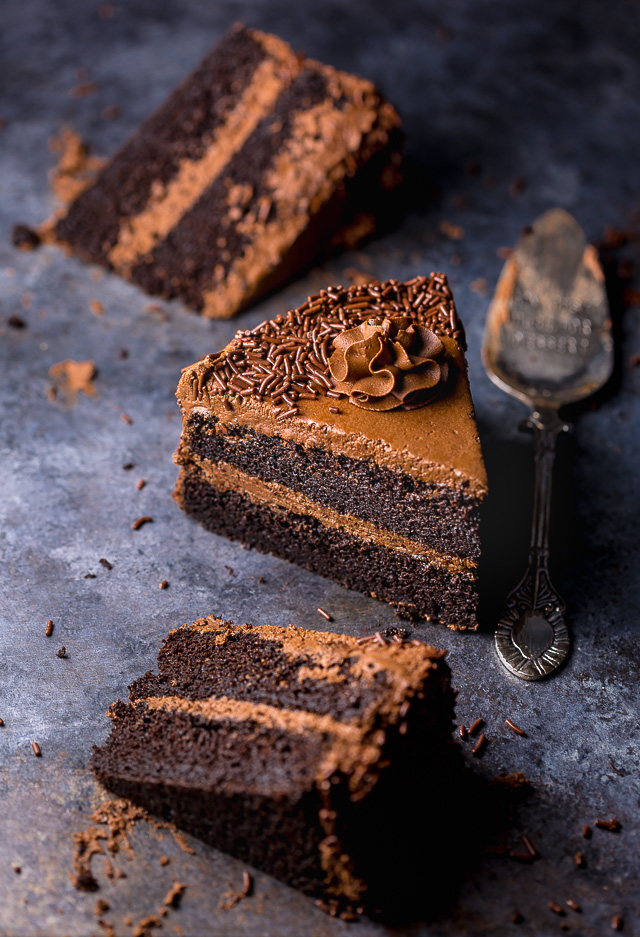
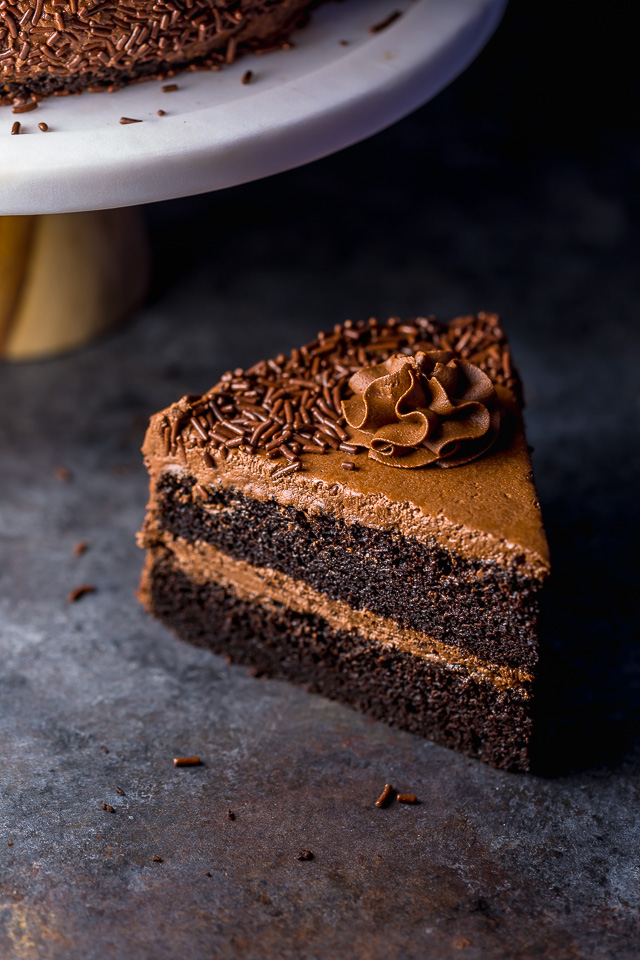
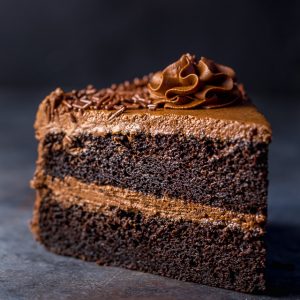
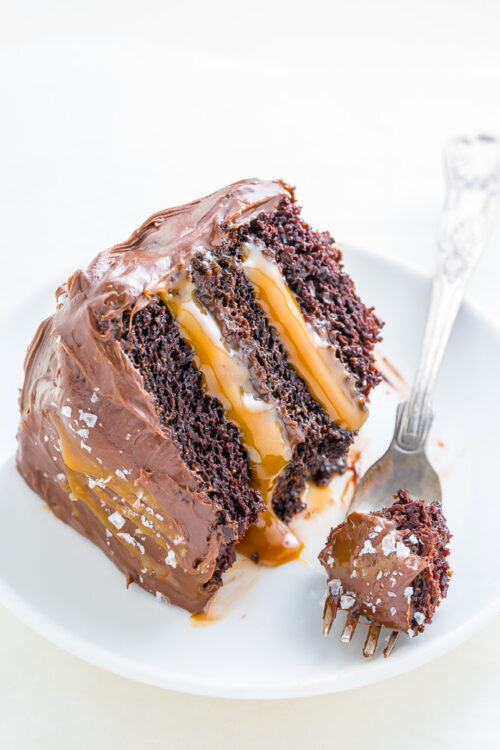
Moist and exploding with chocolate flavor, this classic chocolate cake features 2 cake layers plus chocolate buttercream! The chocolate buttercream frosting is rich and creamy and completes this chocolate cake recipe. Chocolate sprinkles are optional but are a fun garnish. If you like my chocolate cupcakes recipe, you need to bake this cake.
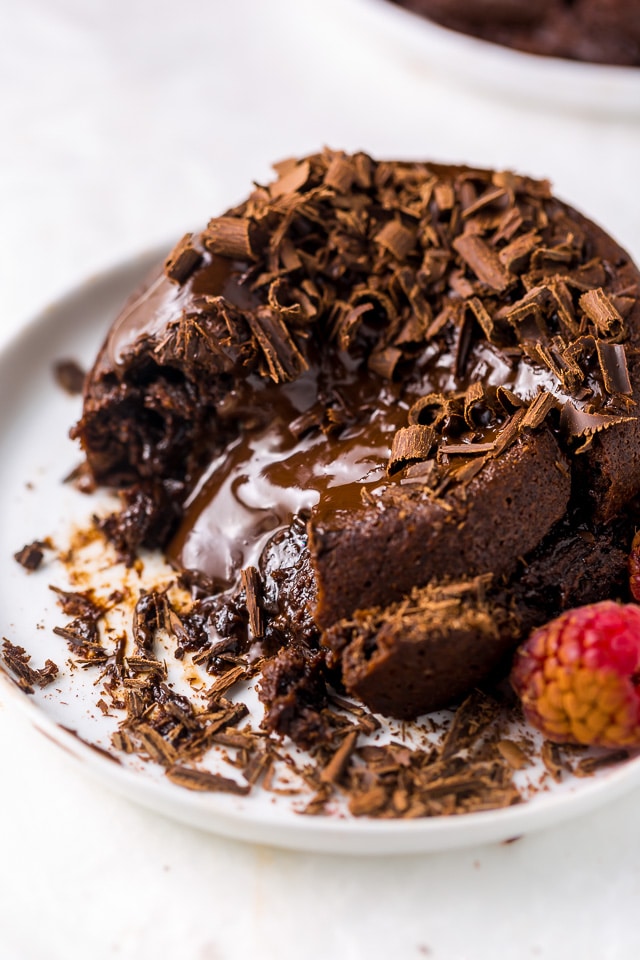
Famous Chocolate Cake Recipe
In my family, I’m “famous” for 4 recipes: chocolate chip cookies, brownies, lasagna, and chocolate cake. But it’s the chocolate cake that is the most popular and requested!!! From birthday parties to dinner parties, it’s always a huge hit! Here’s why I think this classic chocolate cake recipe is the best:
- Abundant chocolate flavor thanks to cocoa powder in the cake batter and real chocolate in the chocolate buttercream frosting!
- The cake layers are soft, fluffy, and melt-in-your-mouth moist.
- Decadent and rich, it’s a classic dessert everyone loves.
- This recipe uses basic ingredients, and I provide some ingredient substitutes below.
- My chocolate buttercream frosting is rich, fudgy, and packed with chocolate flavor!
You can make cake layers in advance, wrap in plastic wrap, and freeze for up to 2 months.
Ingredients for Chocolate Cake
- Sugar: This recipe uses granulated sugar, light brown sugar, and confectioner’s sugar.
- Flour: The most important of the dry ingredients. I only suggest using all-purpose flour, but for a gluten free chocolate cake, a 1-for-1 gluten free flour may work.
- Unsweetened Cocoa Powder: This should not be replaced with Dutch process cocoa.
- Baking Soda: Helps the cake batter spread evenly in the cake pans, ensuring even cake layers.
- Baking Powder: Helps the cake batter rise in the cake pans, avoiding overly dense cake layers.
- Salt: Enhances the chocolate flavor and balances sweetness in both the cake batter and chocolate buttercream frosting.
- Eggs: You’ll use 2 large eggs plus an egg yolk. Make sure your eggs at room temperature before use in the cake batter.
- Sour Cream: In a pinch, this may be replaces with full-fat plain Greek yogurt.
- Milk: Whole milk works best, but reduced fat milk will work in a pinch. I don’t suggest subbing plant based milks. But if you must, coconut milk will work best. But it will add a subtle coconut flavor.
- Oil: For a neutral flavor, use canola oil or vegetable oil. If you don’t mind a subtle flavor from the oil, you may use a mild olive oil or coconut oil (melted).
- Vanilla Extract: Real vanilla extract adds rich flavor and enhances the other flavors in the cake.
- Hot Coffee: Or freshly boiled water. You can read the pros and cons of each below.
- Chocolate: For a sweeter chocolate buttercream frosting, use semi-sweet chocolate. For a darker buttercream frosting, use dark chocolate or bittersweet chocolate. I suggest a less sweet chocolate since the buttercream has a lot of sugar.
- Butter: You can’t make chocolate buttercream frosting without butter! Use a quality butter brand you enjoy the taste of and be sure to bring it to room temperature before use.
Cake Batter
- Oven Prep: Preheat the oven to 350 at least 30 minutes before you plan on baking.
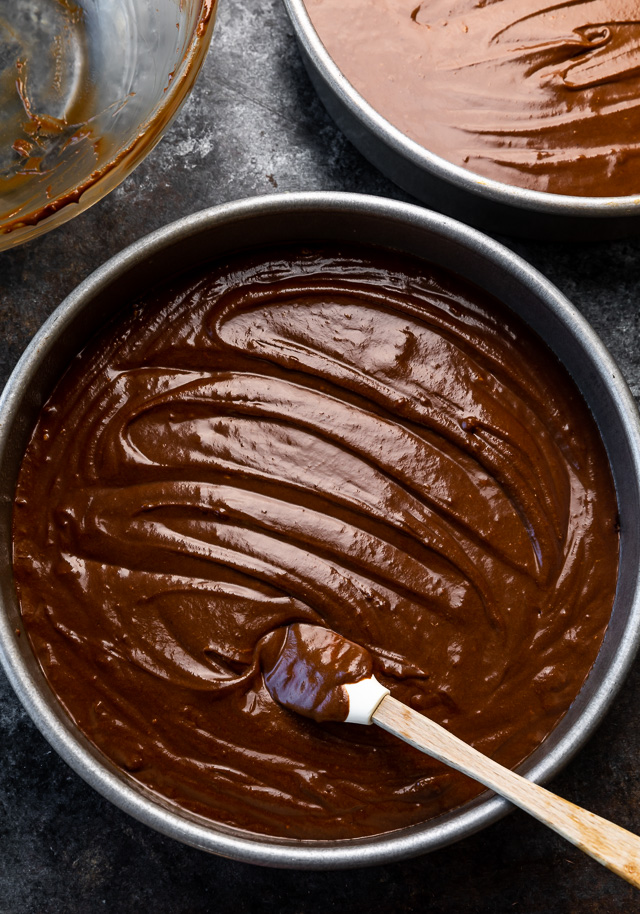
- Prep Cake Pans: Use parchment paper rounds to line your cake pans! Be sure to spray each pan generously with nonstick baking spray.
- Combine Dry Ingredients: Combine the sugars, all purpose flour, cocoa powder, baking power, baking soda, and salt. Use an extra large bowl here!
- Combine Wet Ingredients: In a separate large bowl whisk the eggs, egg yolks, milk, sour cream, oil and vanilla extract. Pour this mixture into the dry ingredients. Add the hot coffee to the cake batter and mix until combined.
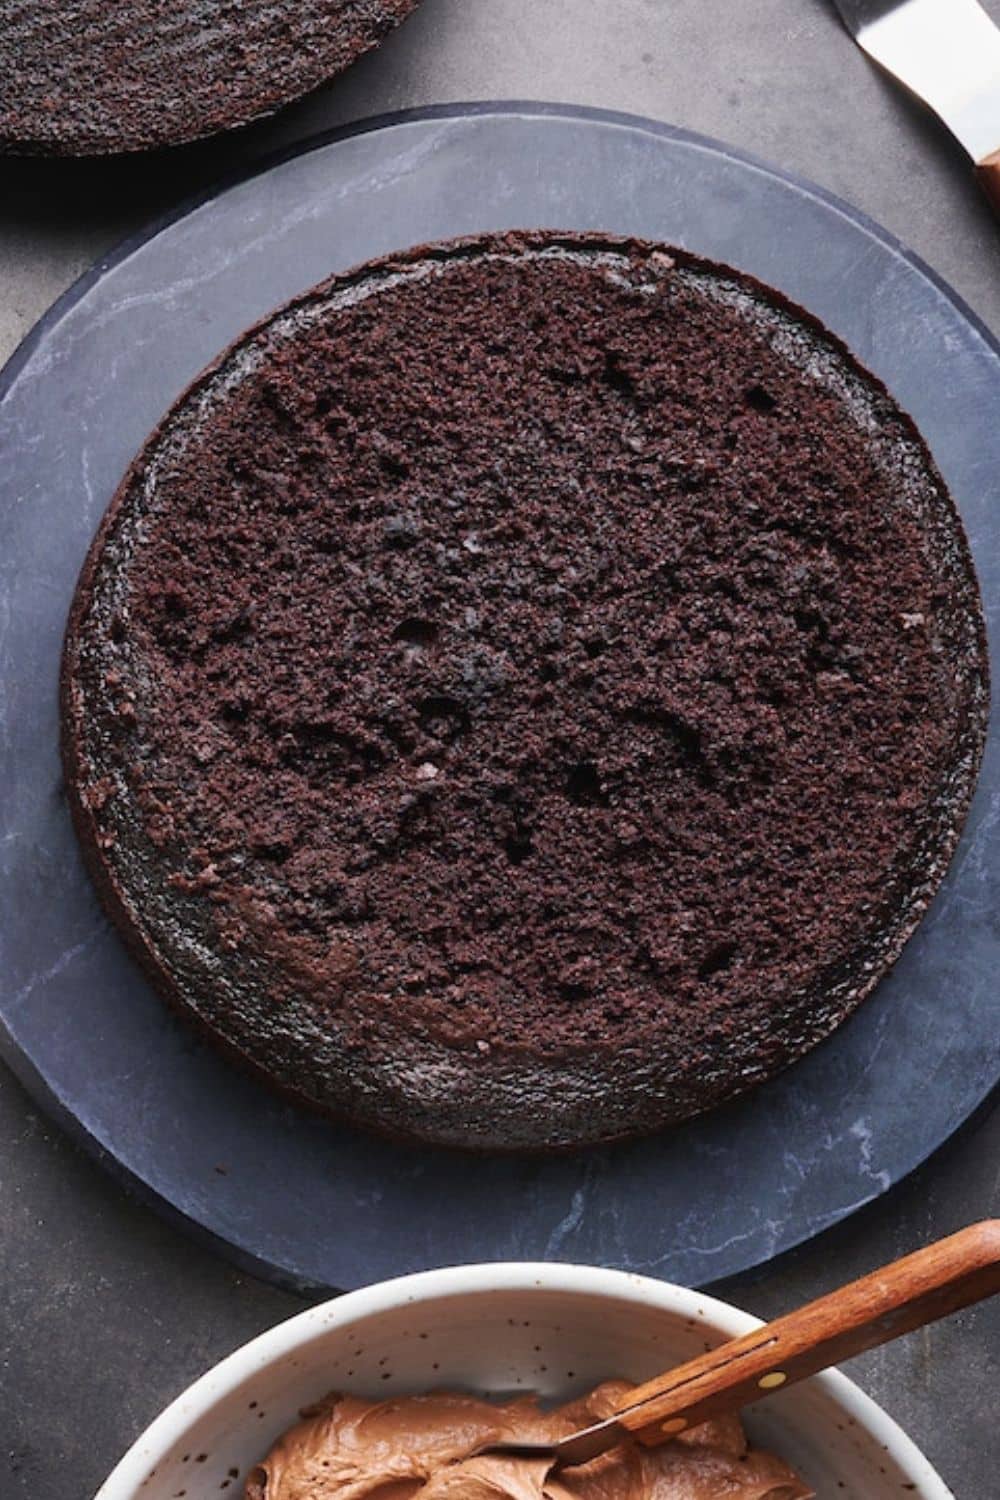
- Bake Cake Layers: They’ll take about 26 to 30 minutes, depending on your oven. Pull the cake pans when a toothpick inserted in the center of each cake layer comes out clean.
- Cool Cake Layers: Cool in the cake pans for 10 minutes. Then invert onto a cooling rack to cool completely. Don’t attempt to trim the cake layers or frost until the cakes have cooled completely.
Hot Coffee vs Hot Water
When it comes to this wet ingredient, you have an option. Here are the main pros and cons of hot coffee versus just using hot water:
- Hot coffee enhances the chocolate flavor in the cake batter.
- Hot coffee also adds a subtle mocha flavor without making the cake taste like coffee.
- However, if you’re sensitive to coffee or absolutely hate the flavor, you may want to leave it out.
- The pro of using hot water is it’s free and always on hand, assuming you have a kettle and running water.
- The con of using hot water is it won’t enhance the chocolate flavor or add any flavor dimension to the cake batter.
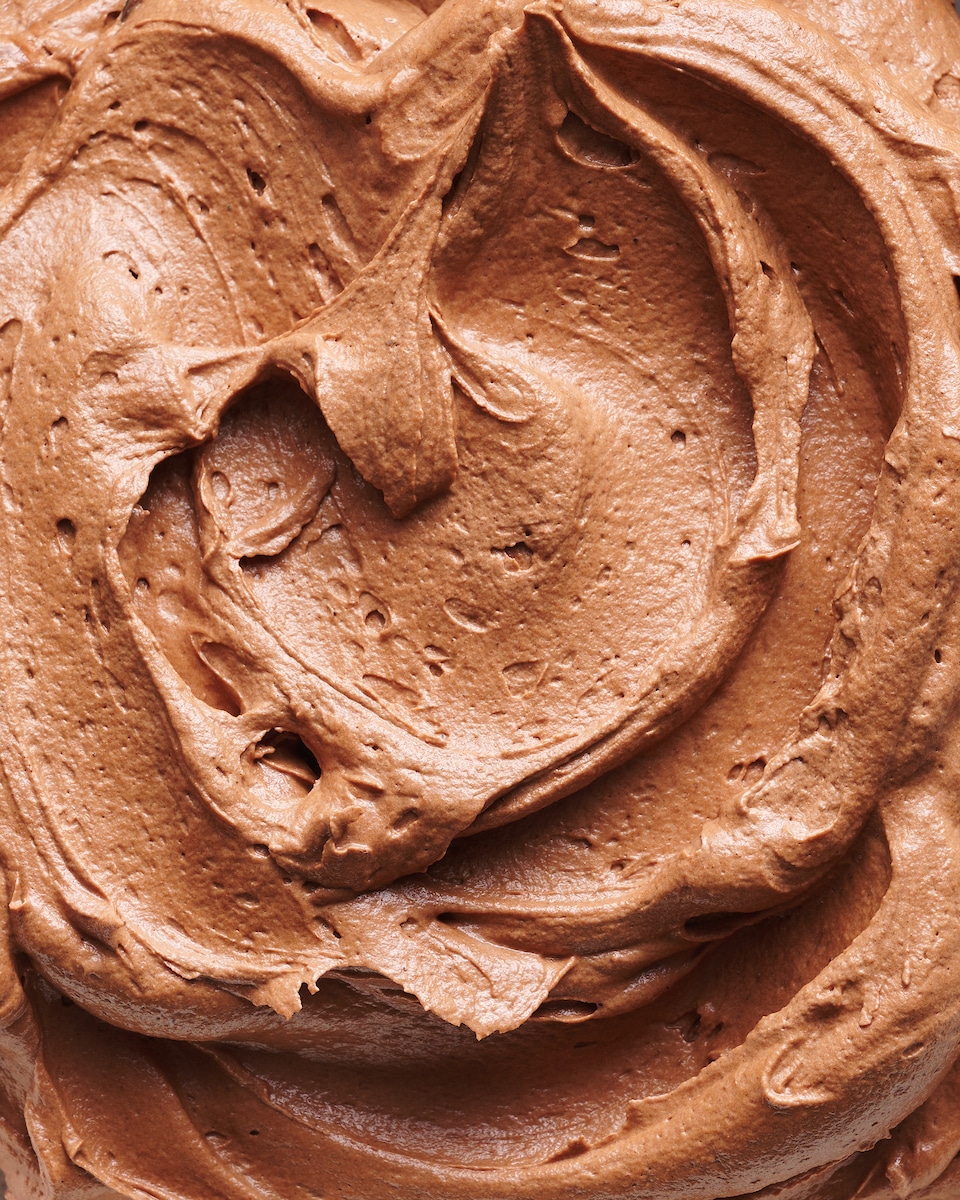
Chocolate Buttercream Frosting
- Melt the Chocolate: Using a double boiler or microwave, melt the chocolate. Allow the chocolate to cool to room temperature before use.
- Make the Frosting: Use a stand mixer fitted with the paddle attachment – or a large bowl and a handheld electric mixer. Beat the butter until creamy then gradually add the confectioner’s sugar, beating well after each addition. Once you add all the sugar, beat for 2 minutes on medium-high. Finally, add the vanilla and melted chocolate and continue beating until well combined and creamy!
- Spread: Use a large frosting spatula (or a butterknife, whatever you have on hand!) and spread the frosting on the cake. I like to place one cake layer on a cake stand, add frosting, add another cake layer, then frost the sides and top of the cake.
Since the chocolate buttercream frosting has a lot of chocolate, I recommend making it no more than 1 hour ahead.
How to Store Chocolate Cake
- To store leftover chocolate cake, wrap tightly in plastic wrap. Ensure the plastic touches the cake and that no spots remain exposed to air.
- You can store this cake at room temperature or in the fridge. It’ll stay fresh for up to 2 days.
- If you’d like to bake the cakes in advance of frosting, you can. Bake them and cool completely, then wrap in plastic wrap and store at room temperature for up to 24 hours. Or freeze for up to 2 months.
Best Cake Pans for Chocolate Cake
- You’ll need (2) 9-inch cake pans for this chocolate cake recipe.
- For best results, use metal or steel pans.
- Glass pans or ceramic pans will take longer to bake, and may yield uneven cake layers.
- If you don’t have 2 cake pans, you can bake these cakes in batches, but it’s more time consuming.
- You’ll need to let the cake pan cool completely before using it to bake another cake, otherwise the cake batter won’t bake evenly.
- You can wrap the baked cakes in plastic wrap to keep them moist while you bake the other cakes.
- You can bake this cake in a 9×13-inch baking pan. The baking time will be different, most likely it’ll take closer to 35 minutes. If you decide to use this size pan, keep an eye on the cake and know it’s ready when a toothpick inserted in the center comes out clean.
Please not the last 3 tips above are in reference to baking the cakes in the same cake pan (if you don’t have 2 cake pans to use).
More Classic Chocolate Cake Recipes:
17 Chocolate Cake Recipes for Chocolate Lovers Only
Chocolate Cake with Mocha Buttercream Frosting
Legendary Chocolate Cake Recipe (with THE BEST Chocolate Buttercream Frosting)
Ingredients
For the Chocolate Cake:
- 1 cup (199g) granulated sugar
- 1 cup (213g) light brown sugar, packed
- 1 and 3/4 cups (210g) all-purpose flour
- 1 cup (84g) unsweetened cocoa powder
- 1 and 1/2 teaspoons baking soda
- 1 teaspoon baking powder
- 3/4 teaspoon salt
- 2 large eggs room temperature
- 1 large egg yolk room temperature
- 1 cup (227g) sour cream
- 1/4 cup (57ml) whole milk
- 1/2 cup (113ml) oil canola, vegetable, or refined coconut (melted)
- 1 Tablespoon vanilla extract
- 1 cup (227ml) freshly brewed coffee or freshly boiled water
For the Chocolate Fudge Frosting:
- 8 ounces semi-sweet or bittersweet chocolate, coarsely chopped
- 1 and 1/2 cups (340g) unsalted butter room temperature
- 2 and 3/4 cups (426g) confectioner's sugar sifted
- 2 teaspoons vanilla extract
- 1/4 teaspoon salt
Instructions
For the Chocolate Cake:
- Preheat oven to 350°(F). Generously spray two 9-inch round baking pans with non-stick baking spray and set them aside.
- In the bowl of a stand mixer fitted with the paddle attachment, or in a large bowl using an electric mixer, combine both sugars, flour, cocoa, baking soda, baking powder and salt on low until ingredients are thoroughly combined. Set aside.
- In a separate large mixing bowl, whisk together the eggs, yolk, sour cream, milk, oil and vanilla, beating until well combined. Add the wet ingredients into the dry ingredients and beat on low speed until just incorporated. Carefully add in hot coffee (or water) and continue beating until completely combined; about 1 minute. The batter will quite thin.
- Divide batter evenly into prepared pans.
- Bake in preheated oven for 30 to 32 minutes, or until a toothpick or cake tester inserted in the center of a cake comes out clean or with just a few moist crumbs attached.
- Cool cakes for 10 minutes in the pan (placed on top of a cooling rack) before removing from pans and transferring to a cooling rack to cool completely.
For the Chocolate Fudge Frosting:
- Place the chocolate in a medium heatproof bowl and place it over a pot of barely simmering water. Heat, stirring frequently, until the chocolate is completely melted. Remove the pan from heat, then carefully remove the bowl from the pot. Set chocolate aside to cool for a few minutes.
- In the bowl of a stand mixer fitted with the paddle attachment, or in a large bowl using a handheld electric mixer, beat the butter on medium speed until creamy. Reduce the speed to low and gradually add the confectioner's sugar, one cup at a time, beating well after each addition.
- Once all of the sugar has been added increase the speed to medium-high and beat for 2 minutes, scraping down the sides of the bowl as needed. Beat in the vanilla and melted chocolate and continue beating until well combined and creamy.
Assembly:
- Using a long serrated knife, level the top of each cake.
- Transfer one layer to a large plate or cake stand. Using a long offset spatula, spread a thick layer of frosting on top, then top with the second layer. Continue frosting the top and sides of the cake. Decorate with chocolate chips, sprinkles, chocolate shavings, or leave as is!
- Store in the refrigerator, loosely covered, for up to 2 days.
Notes
I have made this cake twice now for birthday’s in the past few weeks, it is simply amazing! It is a new favourite with my family. 🙂
Hi Renee. That is SO awesome 🙂 Thank you for sharing this with me – it touches my heart and makes me so happy to hear! xo
hi!
This looks absolutely beautiful and delicious! I want to try out the recipe for my cousin’s engagement party, but I’m concerned about how it would hold up under fondant. Any thoughts would be appreciated!
Hi Hayley. I have zero experience with fondant, but this cake is pretty sturdy, so if it’s a thin layer, it should hold up.
made this tonight and it was sooooo good! Only one small thing, I must have done something wrong with the frosting. It was delicious but was a little runny. I am not super good at baking. I tried to follow your directions but must have messed up a part. Any idea why mine would be runny? It didn’t present well because of that but luckily I was just making it because so we all ate and enjoyed my funny looking but oh so good cake. I will try again for sure, this cake is so good it is worth the effort it will take me to learn to make it right. Thanks for the post.
Hi Halley. I’m so happy to hear you enjoyed the cake! Sometimes a runny icing just needs a tad more sugar 😉
Jesus Christ. Where do I even start?
I found this recipe on Pinterest, on a sleepless, chocolate-craving night about 6 months ago. I think it may have been one of the reasons I decided to start baking, actually. This, and chocolate chip cookies ^^
Anyway, I bought the coconut oil for it and it sat in my pantry ever since–but tonight was the night!
Now, I was only planning to make 1 layer, to sort of try the recipe out, so I halved the recipe but guess what? It was more than enough for two pans! I don’t know how but I’m not complaining!
At first I was worried when I noticed how runny the batter got with all that coffee, but I whacked all of it in anyway because “it might be fun”. And it was. Oh boy it was.
I was also worried about how it would bake in my oven, because I have a crappy electric oven that’s usually hopeless for… most things really. That’s why I halved the recipe–so my layers would not be as tall. Baked them one at a time at 350 F/175 C as you directed, but ended up done after only 20 mins in there. Super smooth! 😀 And the best part is both layers baked PERFECTLY. I didn’t even get a crusty/crumbly top or edges like I usually do when baking anything larger than cupcakes 😛 The whole thing is just magically moist and evenly baked throughout!
Taste: fantastic. Smell: fantastic. Texture: fudgy and soft and just literally melts in your mouth. Appearance: unbelievably beautiful.
I don’t think I’ve ever been so pleased with the result of a recipe. This is madness. You deserve a sh*tload of cred! 😀
Finally–THANK YOU! And sorry for the wall of text! 😛
Wish you all the best!
~Marie, Sweden
Hi Marie! Your comment really just made my day 🙂 I am so so soooo happy this cake was a hit for you! And thank you for all of your thoughtful, generous comments. Happy baking to you!
Oh yay 😀 My pleasure! Always great to put a smile on someone’s face!
Oh and one more thing, while I’m at it. If there’s someone else out there having trouble finding unsweetened chocolate in their store, I found a page that guides you through the process of converting into using semi-sweet by altering proportions of chocolate, sugar and butter 😀 I used it, and it obviously came out great! Definitely bookmarked!
http://chocolatecrafter.com/conversionsfordi.html
‘Til next time! :*
Can I use all purpose gluten free flour instead of regular flour since I am allergic to wheat?
Thank you
Hi Susan. I’m not sure 100%, but I believe a cup-for-cup GF flour replacement could work.
Hi, we dnt have half & half in my country
Hi S. Half and half is simply a mixture of half milk half heavy cream; if you cannot find it already made you can mix the two together and make it yourself. 🙂
Hi, I have made the cake yesterday. The followed the recipe exactly as u have said. It was just awesome. My hubby and my son loved it. Thanks for posting this recipe.
Hi Sunitha. I am so happy to hear you and your family enjoyed this recipe! Thank you for reporting back and letting me know – it always makes my day to hear a recipe came alive and brought someone joy 🙂
Hi, I’ve read all the comments and didn’t see any that might help with my question 🙂
What measurement of coffee grounds to water, do you use to what you consider “strong”? I’m not an avid coffee drinker, but LOVE chocolate/coffee combination though I have never made it. So, with that admission (Lol) on my part, do you think 1 cup of grounds to the 1 1/2 cups of water be too much? I’m just trying to get an idea of what to use, so as not to be “too much” Lol!
Thank you very much! I can’t wait to make this cake and frosting! It will be perfect for my upcoming birthday 🙂 Have a wonderful week!
Hi Denise. I brew my coffee in a french press, and use 6 tablespoons (usually just Strabucks Dark Roast) to 4 cups of broiling hot water. Then I just use a cup from that pot. I think 1 cup of grounds to 1 1/2 cups of water would definitely be way too strong 😉 What kind of coffee maker are you using?
how much coffee and water did u use?
Hi Michelle. This cake recipe uses hot coffee, which is indicated in the ingredients list (in the recipe box at the end of the post). Please let me know if you have another question 🙂
Hi I plan on making this cake but I’m used to the conventional method of creaming and then alternating wet and dry ingredients when adding them to the batter. The recipe here requires mixing some of the wet ingredients with the dry first and then adding the eggs and fat. Does this method produce a moister cake with tender crumb? What is the science behind this particular way of mixing the batter. Thanks in advance for any tips you offer.
Hi Nat. Adding the fat at the end helps reduce the chance of over mixing, which would result in a dry cake 🙂
Thanks so much for taking the time to reply. I cannot wait to try this method out. Have a great day