


 Search
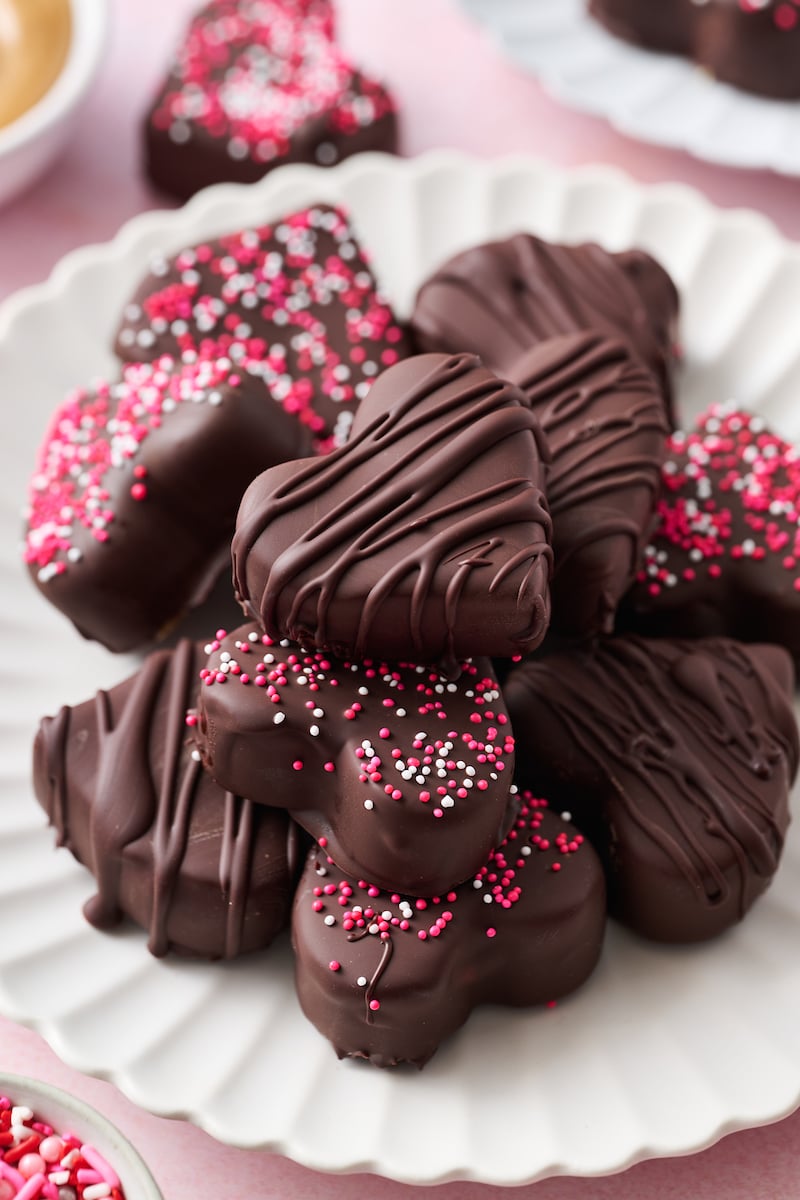
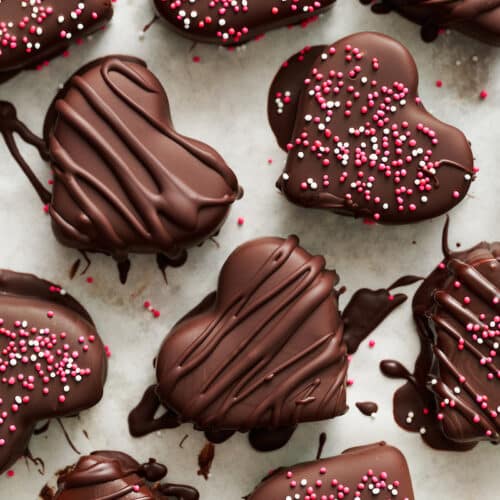
Chocolate Covered Peanut Butter Hearts are PERFECT for Valentine’s Day! They taste just like a Reese’s milk chocolate peanut butter heart… but a million times better because they’re homemade! And their adorable heart shape is sure to make anyone swoon!
Chocolate and Peanut Butter Hearts
Valentine’s day is quickly approaching, my friends! Instead of buying boxed chocolate from the sweet shop (or worse, grocery store), let’s make some, ok?
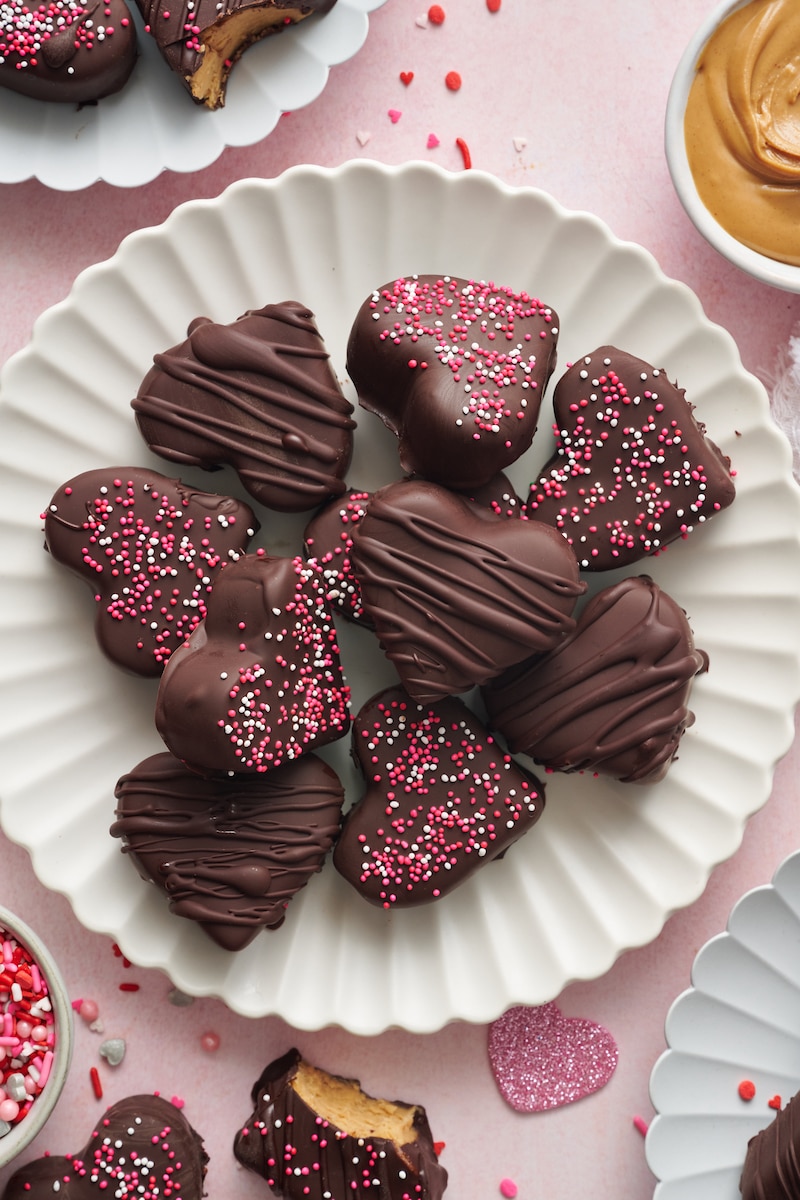
Making homemade candy is a fun and rewarding process. And I think the results speak for themselves! I mean, just look at these gorgeous chocolate covered peanut butter hearts!!! Who wouldn’t swoon over a box of these?! I make them – along with my lemon sugar cookie hearts – every year!
Peanut Butter Hearts: Ingredients
- Confectioner’s Sugar: For the best results, sift the sugar before use.
- Creamy Peanut Butter: My brand recommendation is JIF. Don’t sub chunky peanut butter or natural peanut butter in this recipe.
- Unsalted Butter: Bring it to room temperature before use.
- Salt: Fine sea salt works best.
- Vanilla Extract: In a pinch, you can skip this.
- Milk: Whole milk works best but any milk will work.
- Chocolate: Use dark or milk chocolate, based on your taste preference.
- Pink Nonpareils: If you can find them, they add a cute festive feel to these peanut butter hearts.
Shaping the Hearts
- You want your dough to be soft and easily pinched together, without being wet or sticky. I like to think of it as playdoh; it should be just a little crumbly but effortlessly obey your hands when molded into shape.
- If the dough feels too sticky, simply add a little more confectioners’ sugar. If the dough is too dry a splash of milk is your friend.
- You can use a small heart shaped cookie cutter to make the peanut butter hearts.
- Or scoop out a ball of the filling, press flat with the palm of your hand., and shape it into a heart.
- The most important part is just remember not to make them too thin. They should be at least 1/4 of an inch in thickness. This helps them keep their shape during the chocolate dipping process.
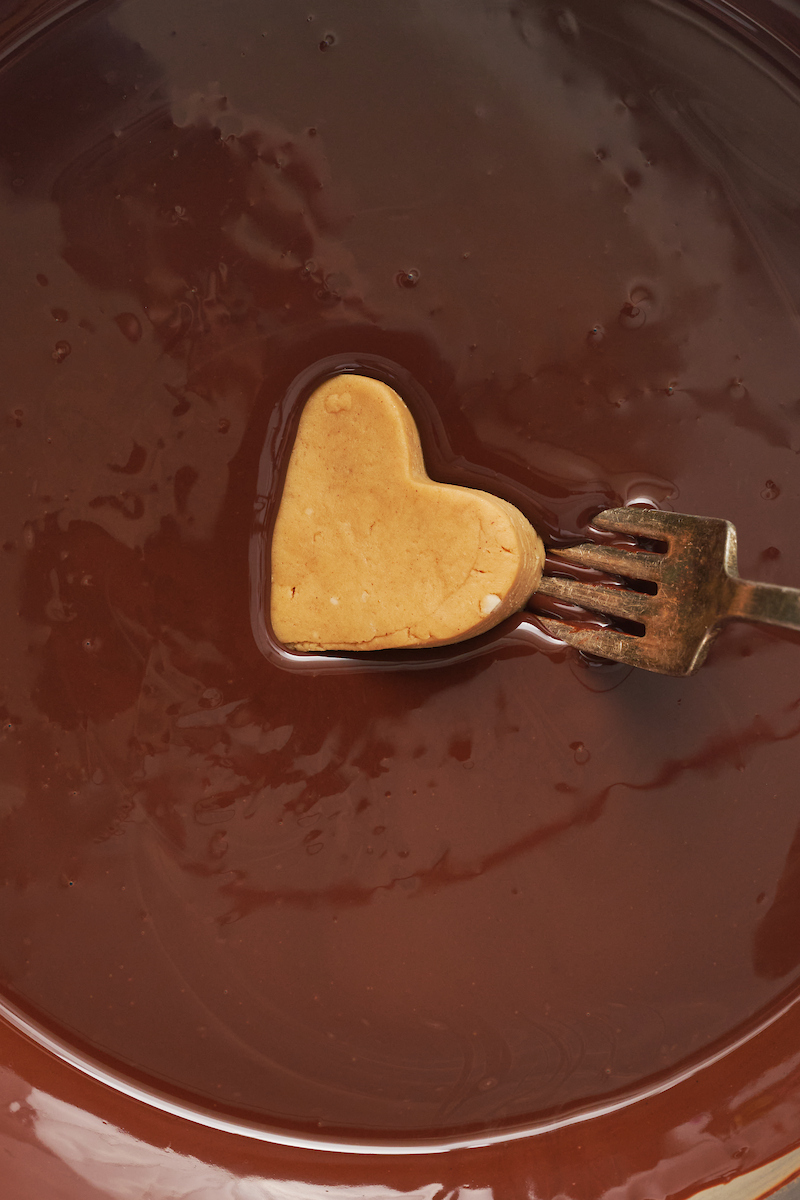
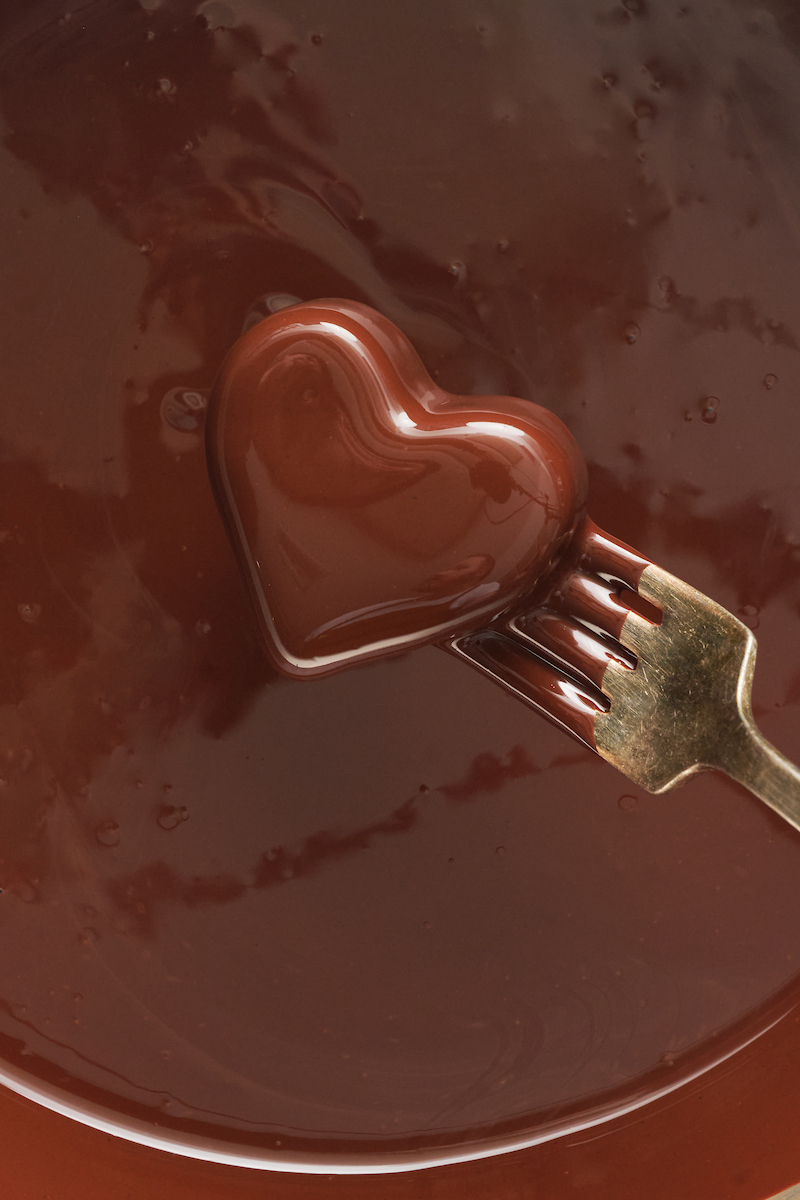
Dip the Hearts in Chocolate
- You’ll dip the hearts after you shape and freeze them. You need to freeze them for about an hour and a half.
- Freezing is important because the dough is soft and will easily loose it’s shape if you dunk it before they’re frozen.
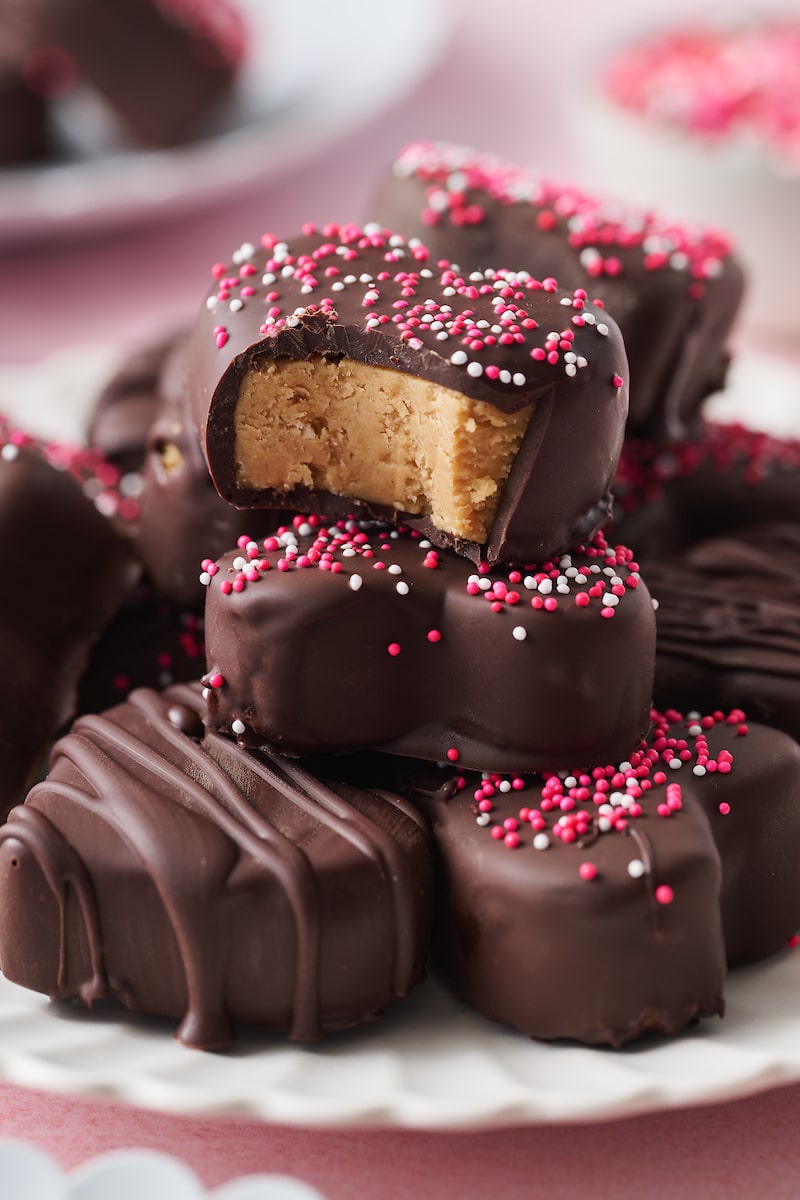
- I prefer semi-sweet or dark chocolate for this recipe, since the peanut butter filling is already quite sweet. But you can use milk chocolate if desired.
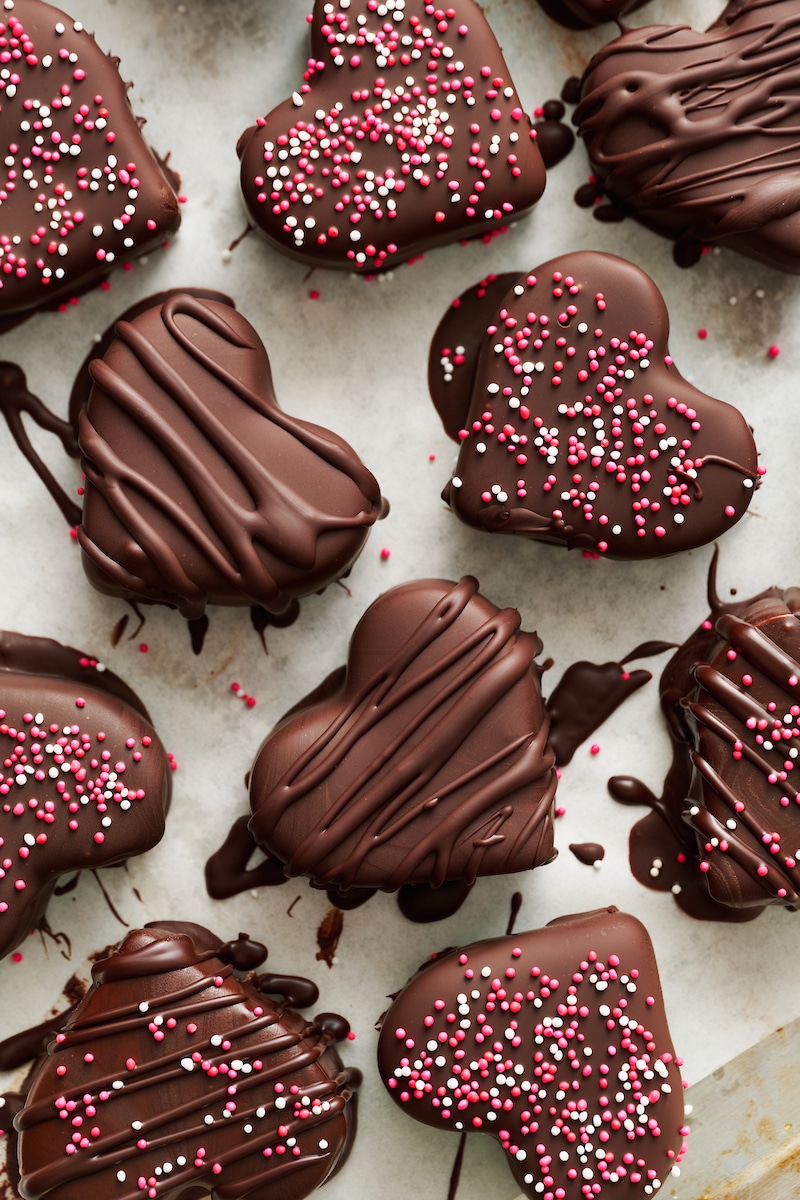
- You can decorate the hearts with pink and white sprinkles, flaky sea salt, or leave them plain.
I adapted this recipe from my Salted Chocolate Covered Peanut Butter Eggs!
More Peanut Butter Recipes:
- Chocolate Covered Peanut Butter Cheesecake
- 5-Ingredient Peanut Butter Cups
- Peanut Butter Cup Brownies
- Easy Peanut Butter Fudge
- Reese’s Pieces Peanut Butter Truffles
Homemade Reese’s Peanut Butter Hearts
Ingredients
- 3 cups (340g) confectioners' sugar sifted
- 1 16 ounce jar (454g) creamy peanut butter JIF or something similar
- 1/4 cup (57g) unsalted butter room temperature
- 1/4 teaspoon fine sea salt
- 1 teaspoon vanilla extract
- 3 Tablespoons (42ml) whole milk
- 20 ounces semi-sweet chocolate chopped
- 2 teaspoons coconut oil optional
Instructions
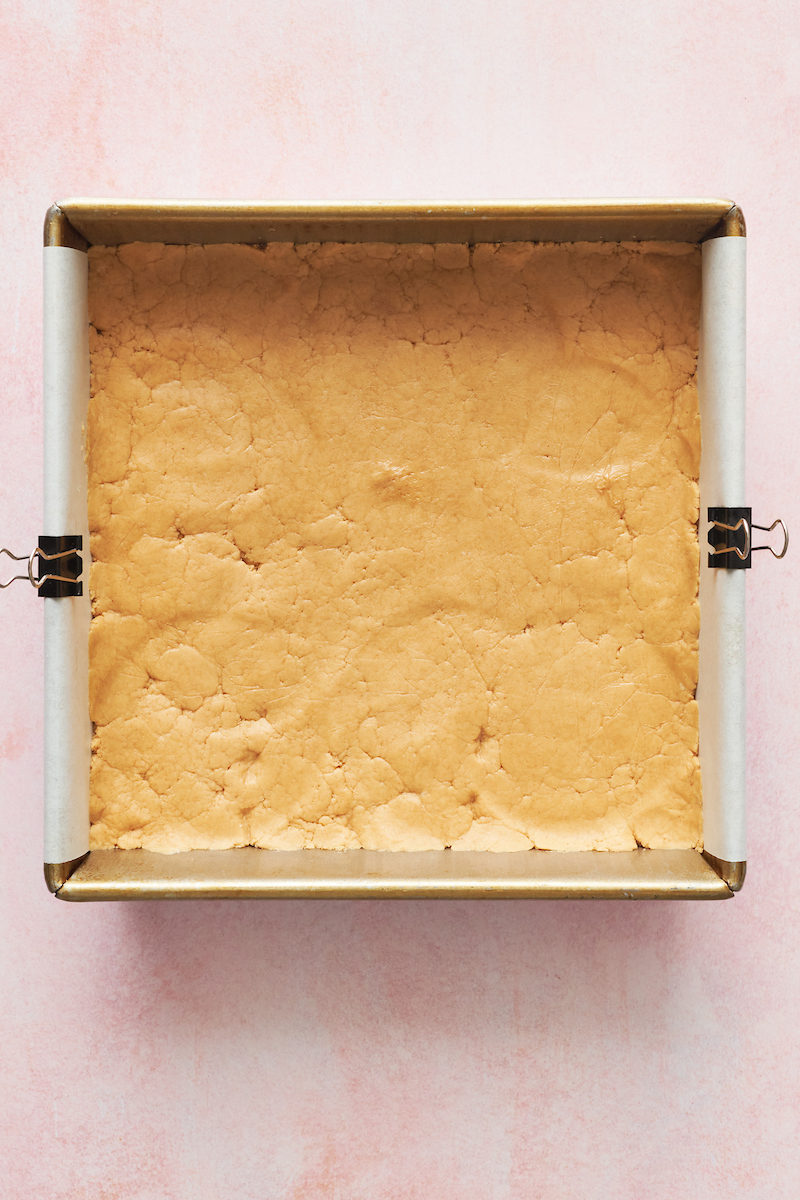
- Line an 8×8-inch baking pan with parchment paper, allowing the paper to overhang on two of the sides, you’ll use them as handles to easily remove the mixture later. Set aside until needed.
- In a large bowl using an electric handheld mixer, or in the body of a stand mixer fitted with the whisk attachment, combine the confectioners’ sugar, peanut butter, butter, sea salt, and vanilla. Beat on medium-low speed until well combined, scraping the sides and bottom of the bowl as needed.
- Add in the milk, one tablespoon at a time, until it becomes a nice workable dough. It should be a little sticky, but easy to work with. The texture should be similar to play-dough. If it’s too sticky, add in more confectioner’s sugar, a tablespoon at a time, until desired consistency is reached. If it’s too dry, add in more milk, a teaspoon at a time, until desired consistency is reached.
- Press the peanut butter mixture into the prepared baking pan. Smooth into the pan by placing a sheet of plastic wrap over the surface, then gently pressing it with your hands until it’s evenly spread across the bottom of the pan.
- Place the pan in the freezer and chill for exactly 90 minutes. In the meantime, line a large baking sheet with parchment paper and set aside.
- Once the 90 minutes are up, remove the pan from the freezer. Then use the parchment paper handles to remove the peanut butter mixture from the pan.
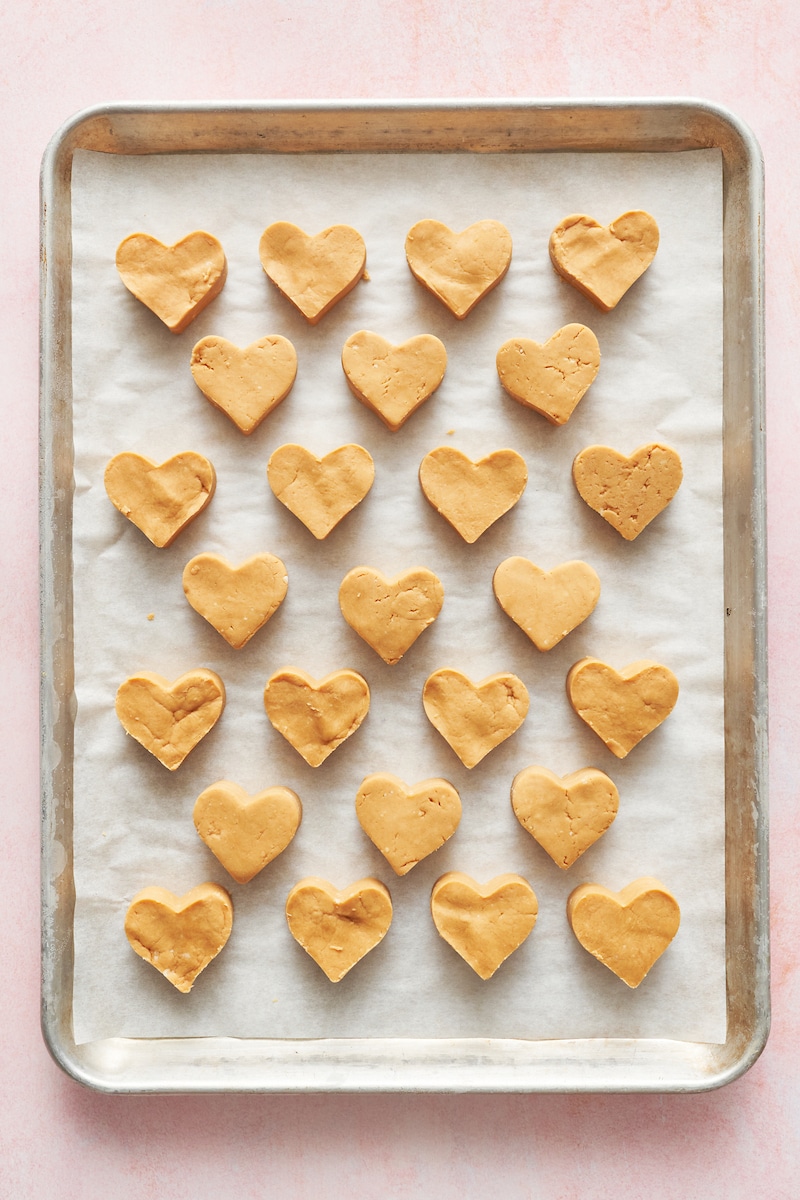
- Using a 2” heart shaped cookie cutter, cut out as many hearts as you can. Don’t waste any peanut butter mixture, instead gather the scraps, gently knead them into a ball, and press back into a flat surface. This little trick should get you about 5 extra hearts.
- Carefully transfer the cut hearts to the prepared baking sheet, then place them back in the freezer for another 90 minutes, or until completely firm.
- About 20 minutes before you plan on dipping your hearts, melt your chocolate.
- Heat the chocolate and coconut oil (if using) in a double boiler over simmering water. Cook until the chocolate is completely melted. Carefully remove bowl from heat and set aside.
- Place the bottom of a peanut butter heart onto a fork, and dip it into the chocolate, letting it completely submerge before pulling it back up and placing it back on the parchment lined sheet. Sprinkle with nonpareils if using. Then repeat with all hearts.
- Place the chocolate dipped hearts back in the freezer or refrigerator for a few minutes to harden. Store covered, in the refrigerator, for up to 2 weeks, or until needed.
Made these yesterday. Big hit around here! After a couple failed attempts at shaping the hearts, I took a scoop, divided that in two, rolled each piece into a a long shape then squished and end of each together to make the point keeping the upper ends separate and rounding them each to the heart shape. Hope that makes sense!
Yay! Thanks for the tips, Jeana 🙂 And Happy (belated) Valentine’s Day 🙂
Where’s the recipe??
Would love to make those cuties!
Just wanted to add to the already stated issue of the link not working for the hearts recipe 🙁 I have tried it on every device I have and it simply doesn’t work. It takes you to an “oops” page. The link for the peanut butter eggs works perfectly, but the one for the hearts does not. I assume the recipes are the same, however, minus the shape. 🙂
Hi Lena. As stated in the post, the recipe is exactly the same, except you shape them like hearts, which is why I link directly to the egg post. The egg post is what you want to be clicking on. Are you able to get to the egg post? If not I can send you the link ;)http://bakerbynature.com/wp-admin/edit-comments.php#comments-form
The link no longer works and I really want to make this recipe. 🙁
Can anyone help me out?
These look scrumptious! I need measurements though. How much of what to use?
I made a half recipe of these for my kids for Valentine’s Day yesterday. What a huge hit! Even my peanut butter-averse daughter loved them. I’m guessing these will become a new family tradition!
Hi Andrea! I am so thrilled to hear this 🙂 I made some yesterday with my peanut butter hating niece and she too fell for them 😉
Oh my goodness these look incredible!
Shae at
http://www.currenthabits.com
Love the idea shaping the hearts! Yummy!
Great idea! Those look incredible, perfect for any valentine 🙂