


 Search
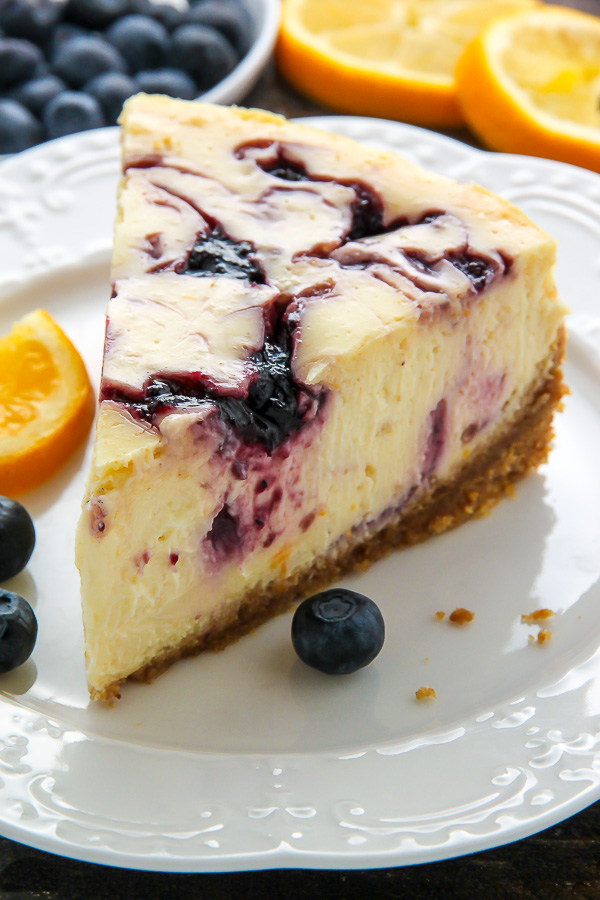
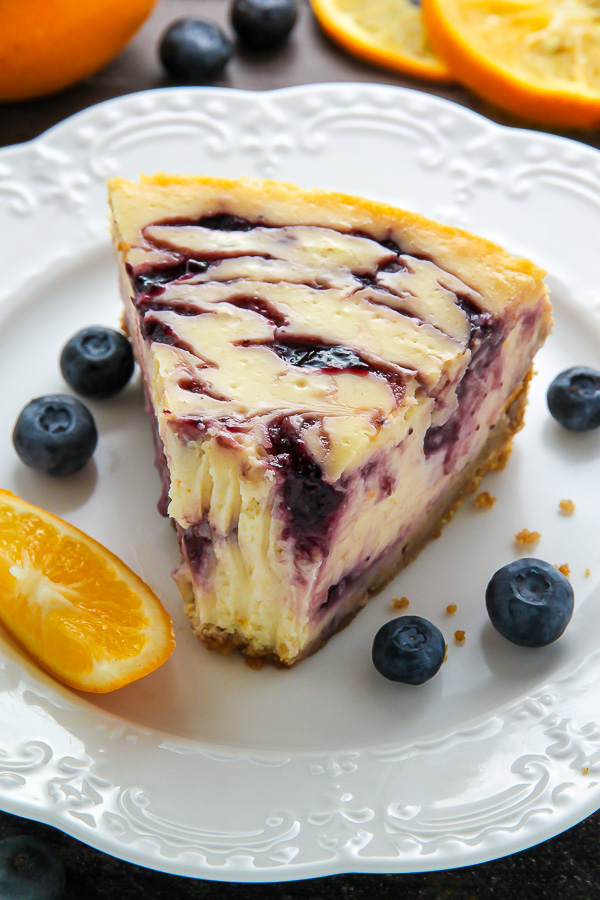
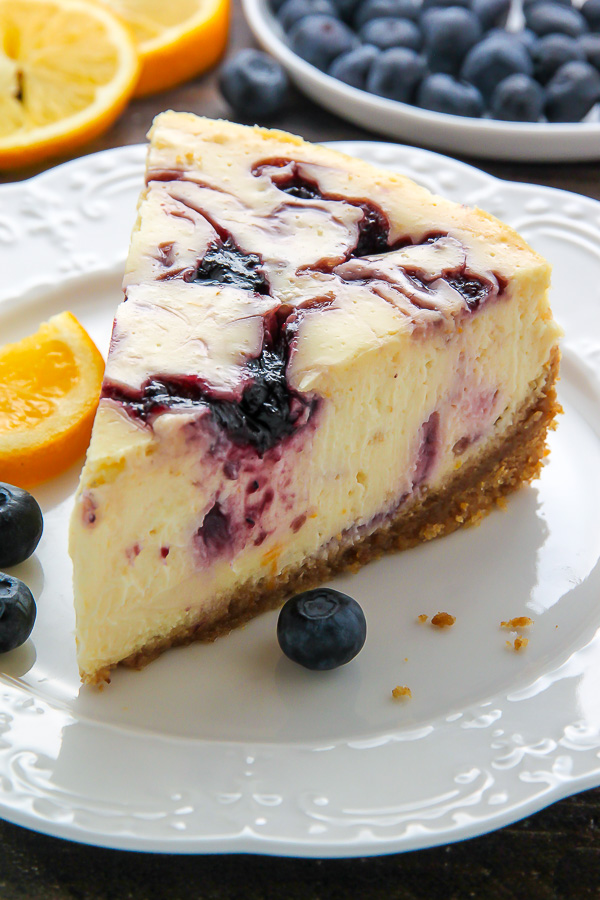
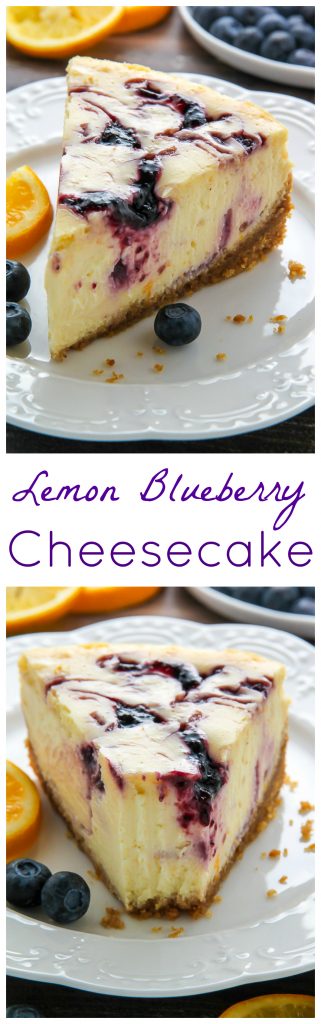
You’ve probably had lemon cheesecake before, but have you ever had a lemon blueberry swirl cheesecake? That’s right – vibrant lemon and sweet blueberry swirls… all in one creamy slice! This recipe is a game changer.
If you’ve been following my blog since the beginning, you probably already know my love for blueberries knows no seasons. They are, without a doubt, my favorite fruit! In the Summer I easily eat 5 pounds a week. And when I find them on sale – in the middle of WINTER – I buy in bulk, baby. Last week I hit the jack pot, finding fresh, organic blueberries for just 2 bucks a carton. I have to confess, I cleaned them OUT. So many blueberries = so much happy!
After inhaling a few cartons by the handful, I got to business, baking you some fabulous new recipes. Last week it was these Greek Yogurt Lemon Blueberry Scones, and today? Lemon Blueberry Swirl Cheesecake!!!

Each bite is heaven. Pure heaven. Just look how supremely creamy it is!!! And that swirl. ♥
YES.
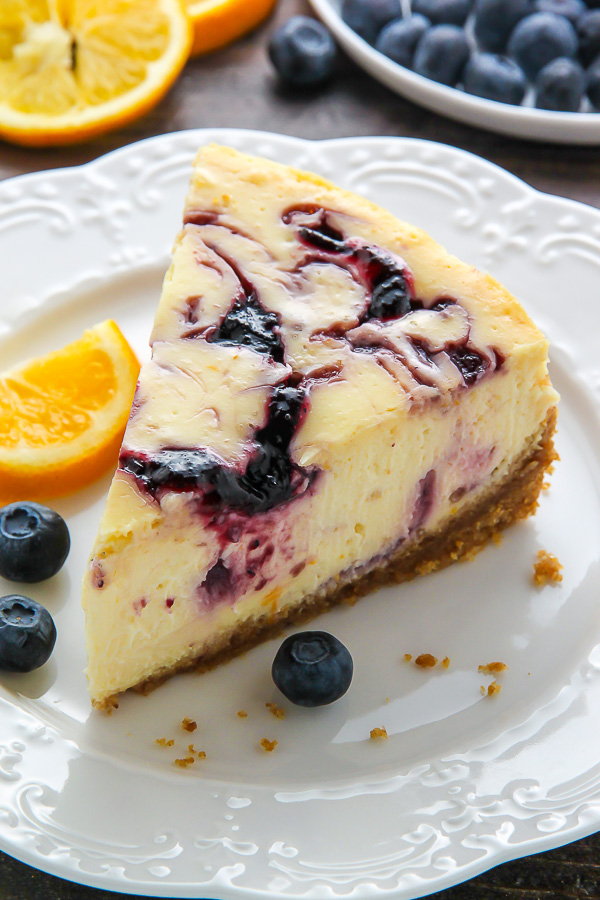
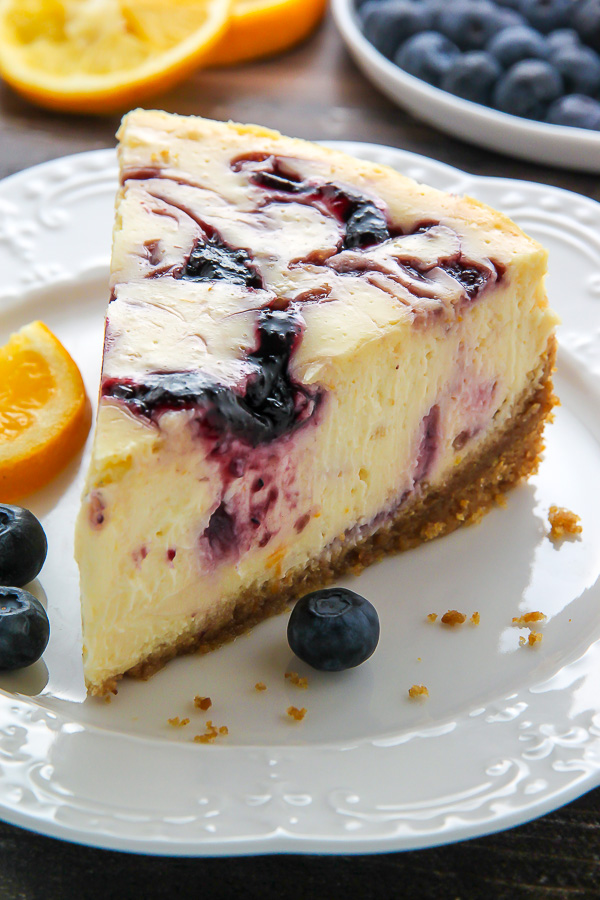
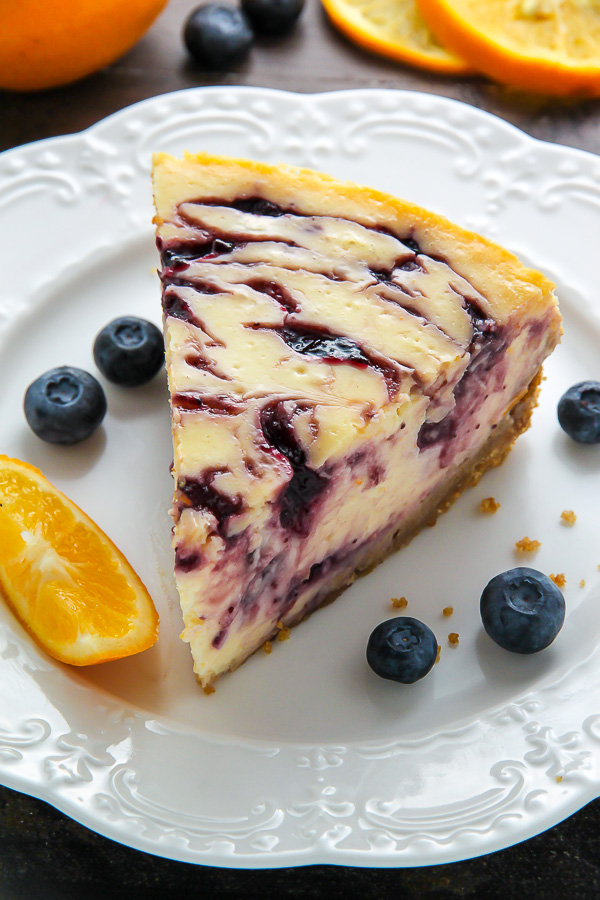
This better-than-the-bakery lemon blueberry cheesecake is made up of 3 parts: the graham cracker crust, the lemon cheesecake filling, and the blueberry swirl sauce. If making a cheesecake from scratch seems intimidating, fret not my friend– I’m going to walk you through each step.
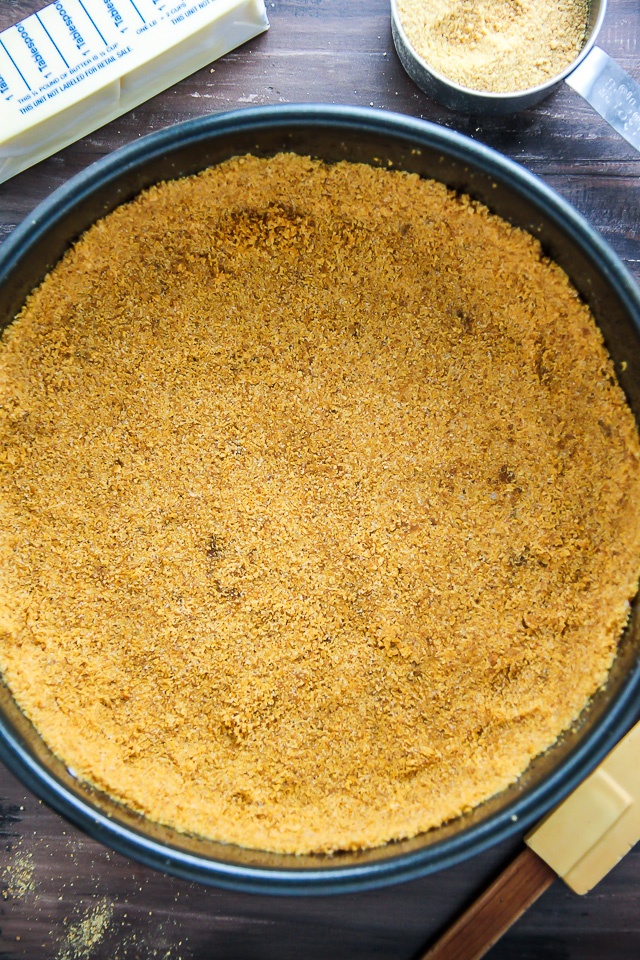
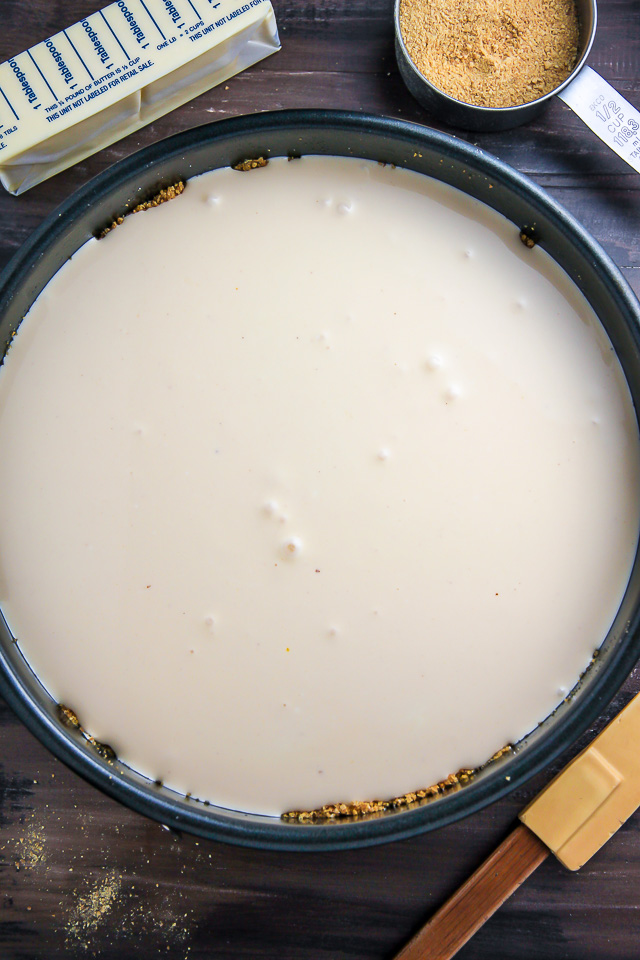
Making the graham cracker crust is the first step in this recipe and it’s an extremely easy one. Ingredient wise you’re going to need graham crackers, melted butter, sugar, and a pinch of salt – that’s it! You will need to pulse the graham crackers into crumbs, or – if you want to make things even easier – you can buy already crushed graham cracker crumbs at the store. I typically find them in the baking aisle, somewhere near the pie fillings. To assemble the crust you’ll combine the cracker crumbs, sugar, and salt, then fold in the melted butter and stir until it’s well combined. You want all of the crumbs to be moist from the butter. Then you’re going to dump the crumb mixture into a lightly greased 9″ springform pan and press it down firmly, working from the center and slightly up the edges.
For the cheesecake filling you’re going to need cream cheese, sour cream, eggs, egg yolks, sugar, vanilla extract, fresh lemon juice, lemon zest, and a spot of flour. A Few important things! Your cream cheese MUST be verrrrry soft before beginning. I typically leave my blocks of cream cheese out on the counter for at least two hours before I plan on baking. It’s also important to have your eggs, egg yolks, and sour cream at room temperature.
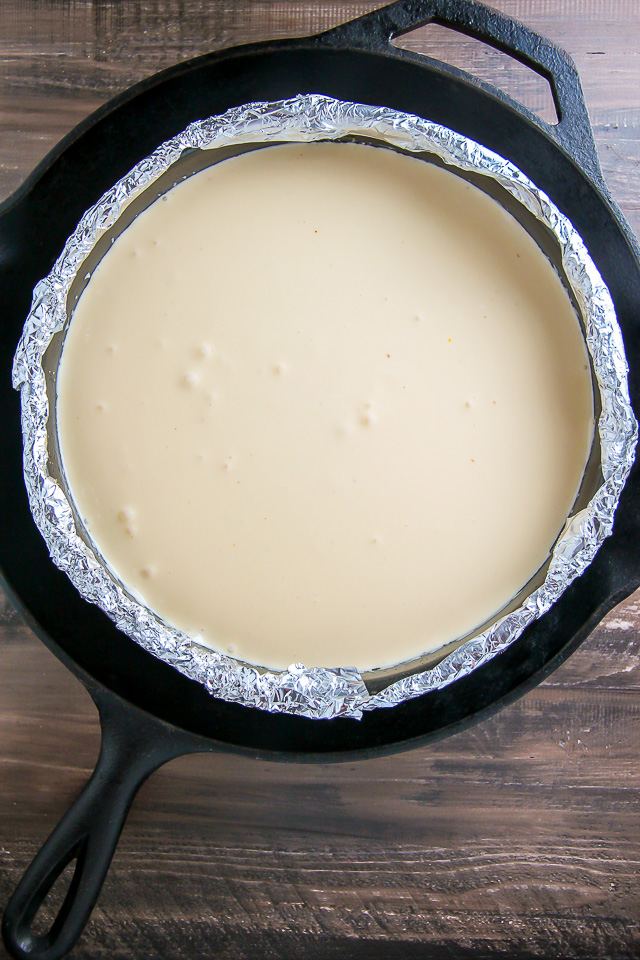
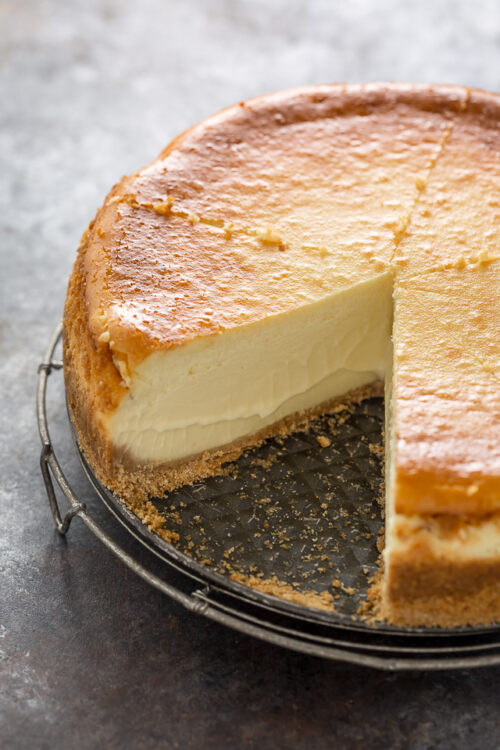
This recipe calls for a water bath.
If you’re unfamiliar with the water bath process, read on! A water bath is, simply, the term bakers use when they place a baking pan (in this case, our cheesecake pan) into a larger pan that’s been filled with hot water. Taking this extra step helps insulate the pan from direct heat on all sides while it bakes. The water bath method helps your cheesecake bake gently, ensuring the finished product doesn’t burn, curdle, or crack. It also helps the cheesecake maintain its silky smooth texture. When it comes to choosing a pan for your water bath, choose one that is as tall as the cheesecake pan and large enough to leave a few inches between the cheesecake pan and the outer rim – you want enough room for the water to circulate easily. When you’re ready to make your water bath, here’s what you do: Adjust an oven rack to the middle position. Preheat oven to called for temperature. When the oven is preheated, carefully (using an oven mitt) pull out the middle rack and place your large pan on it, fill the pan half way with hot water, then place the filled cheesecake pan in the center of the water bath. Slowly slide the rack back to its full inserted position, close the door, and bake the cheesecake according to instructions. If you’re using a spring form pan it’s essential to wrap the pan in heavy-duty tin foil to avoid water seeping in. I wrap my pan from every possible angle pressing the foil in and around to prevent a soggy crust. I use my large skillet as a water bath and it works great. Visual below in case you need it.
The blueberry swirl sauce is probably the easiest part of this entire recipe. You will need a small food processor or blender to blend the the blueberries smooth. Then you’ll press this mixture through a fine mesh strainer, getting rid of the seeds and pulp. Add in a little sugar, and you’re all done. To swirl, you’ll dollop the blueberry mixture on top of the unbaked cheesecake batter by the spoonful, then use a skewers to swirl. I don’t recommend swirling to much, or the end result will look messy.
Keep in mind this cheesecake needs to chill for at least 6 hours before being sliced and serve.
So are you ready for a slice of this cheesecake, or what?
If you try this recipe, let me know! Leave a comment below and don’t forget to snap a pic and tag it #bakerbynature on Instagram! Seeing your kitchen creations makes my day. ♥

Lemon Blueberry Swirl Cheesecake
Ingredients
For the Crust:
- 2 cups Graham Crackers, pulsed into crumbs
- 1/3 cup Granulated Sugar
- 1/4 teaspoon Kosher Salt
- 6 tablespoons Unsalted Butter, melted
For the Lemon Cheesecake Filling:
- 3 (8 ounce) packages Full-Fat Cream Cheese, very soft
- 1 cup Full-Fat Sour Cream, at room temperature
- 1 1/4 cups Granulated Sugar
- 2 teaspoons Pure Vanilla Extract
- 3 large Eggs + 2 Egg Yolks, at room temperature
- 2 tablespoons All-purpose Flour
- 3/4 cup Fresh Lemon Juice
- 2 teaspoons Fresh Lemon Zest
For the blueberry swirl:
- 3/4 cup fresh or frozen blueberries
- 3 tablespoons granulated sugar
Instructions
- Preheat oven to 325 degrees (F).
For the Crust:
- In the body of a blender or food processor, combine graham crackers, sugar, and salt; pulse until the crackers have been completely transformed into fine crumbs. Add melted butter; stir well to combine. Press down into a lightly greased 9-inch springform pan; set aside.
For the Lemon Cheesecake Filling:
- In the body of a high power blender, food processor, stand mixer fitted with the whisk attachment, or in a large bowl using a hand held mixer, beat the softened cream cheese and sour cream until smooth. Add sugar and vanilla; beat until smooth, scraping down the sides and bottom of bowl as needed. Add in the eggs and yolks; beat until smooth. Stir in the flour, mixing just until combined.
- Quickly stir in the lemon juice and zest, mixing just until it's incorporated in the batter.
- Pour filling into prepared crust, and spread the top smooth. Add blueberry swirl. Wrap the bottom of the pan in tin foil (I highly recommend doing several diligent layers here; no one wants a wet/soggy crust).
- Place the cheesecake pan into another large pan (it should be wide enough to comfortably fit the springform pan holding the cheesecake and deep enough to hold a few inches of water without risk of a spill) . Fill the pan up with very hot water; it should rise half way along the cheesecake pan. This is your water bath and will help ensure your cheesecake comes out crack free. Be sure to pour the water in slowly, as you don't want any of it to splash up and get into the actual cheesecake!
- Place pan into the preheated oven and bake for 1 hour and 20 minutes. Turn the oven off and let the cheesecake sit, undisturbed, for 45 minutes inside the oven, with the door shut. The cheesecake should be still slightly wiggly.
- Remove the cheesecake from the oven, run a knife very gently around the edge of the cake, and let it sit in the pan for another 15 minutes before covering loosely with plastic wrap and refrigerating for at least 6 hours.
For the blueberry swirl:
- In a small food processor or blender, puree the blueberries until completely smooth. Press the mixture through a fine mesh strainer, discarding seeds and pulp. Stir in the granulated sugar. Spoon the blueberry mixture on top of the unbaked cheesecake, a few dollops at a time. Use a skewer to swirl the mixture as much or as little as you'd like. Bake cheesecake as directed above.
Notes
- It is very important to bring your ingredients to room temperature when baking cheesecake - especially the cream cheese. I recommend sitting the blocks of cream cheese out on the counter for at least 2 hours prior to baking.
- Full-Fat cream cheese and sour cream is what was used for this recipe and what I find yields the best results. Using reduced-fat or non-fat versions will alter the taste and texture of this recipe.
- Meyer lemons may be used in place of regular lemons (In fact, that is what I used the final time testing this recipe).
- Cheesecake (without any whipped cream on top) may be sliced and frozen for up to one month.
- If you have any questions about the water bath prior to baking, please feel free to ask and I will walk you through it.
- Table salt may be used in place of kosher salt.

Awesome cheesecake- everyone was raving about it at Easter. I left it in the oven for several hours after turning off the heat and made it two days ahead of time and it was perfect.
It worked perfectly. Amazing tast and texture.
My eight year old requested this cheesecake for her “birthday cake” and wow, was it no small feat! Haha!! Once I had it in the oven I began reading the reviews and I must say, with all the *fails* I was quite worried that after allllllll the work I put in, I’d end up with a soggy and/or liquid center! :0
THANK GOODNESS it was a success. Oddly, only a portion of my cheesecake was a little “droopier” on the inside…not sure why in the world this would have occurred. Otherwise, I followed the recipe with only slight modifications (cutting the sugar by several tablespoons here and there, subbing Bob’s Red Mill 1:1 GF flour) and it came out beautifully. I didn’t even go super crazy with the foiling and my crust wasn’t soggy a bit (maybe 3 layers?). I think I’d add 10-20 minutes to the cook time next time in hopes of firming up the cheesecake a smidge more. I let it rest in the fridge for a good 18 hours (it was SOOOO difficult!!! haha!) before diving in. All in all , it was a huge hit amongst the entire family. The tartness was perfect (for us) but I didn’t taste much with respect to the blueberries…the swirl was pretty though!! For reference (not sure how much altitude matters), I live in the Pacific Northwest right at sea level (I do realize ovens account for a lot of variance as well, however),
I’ll for sure make this again! Wish I could attach a pic of this beeauty!
Hello…im planning to try out ur recipe soon..however i could not figure out at what step should i remove the cheesecake pan from the water bath?before 45 min in the oven or after or it should remain in water bath until put in the refrigerator?
I kept the cheesecake in the water bath until it was done resting in the oven. I removed it prior to placing it in the fridge overnight. =)
I made this over Christmas, and it was so delicious! I’m making it again today for my birthday tomorrow so lets hope I can replicate it once again! Thank you for the great recipe!
DELICIOUS !!!!! I am not a baker or a cook but I had to make a cake for our work Bake Off and I chose this as I love cheesecake – I followed the recipe exactly except I used Digestive biscuits instead of Graham – and I always use gluten free flour – but it was absolutely delicious and my workmates LOVED it – thank you I will definitely be making this again.
I bake a lot of cheesecakes and wanted to try this recipe. I do have some advice for those who are having trouble. I never use a water bath, too much hassle and you don’t need it. I used reduced fat cream cheese and reduced fat sour cream, and had no issues. I also changed the eggs to just two eggs and two egg whites. It’s very important to bake cheesecakes until they are fully done. You want a slightly jiggly center, but if the center seems very wet and runny still, it needs more baking time. I thought this cheesecake was ok, but it’s wayyyy too much lemon juice. I like very lemon-y desserts but this was too much. I would reduce the lemon juice to 1/2 cup, possible even less. A decent recipe, but needs some tweaks.
Hi, I’m gluten intolerant, can I leave out the flour?
BEAUTIFUL cheesecake.
I followed the exact recipe, not changing anything.
I even left the cheesecake in the fridge for 12 hrs before slicing. When I did slice the cheesecake, the entire center was runny.
What could I have done wrong?
Is it possible to place this cake in the freezer to chill (but not let completely freeze) in order to speed up the chilling time if I don’t have 6 hours?