


 Search
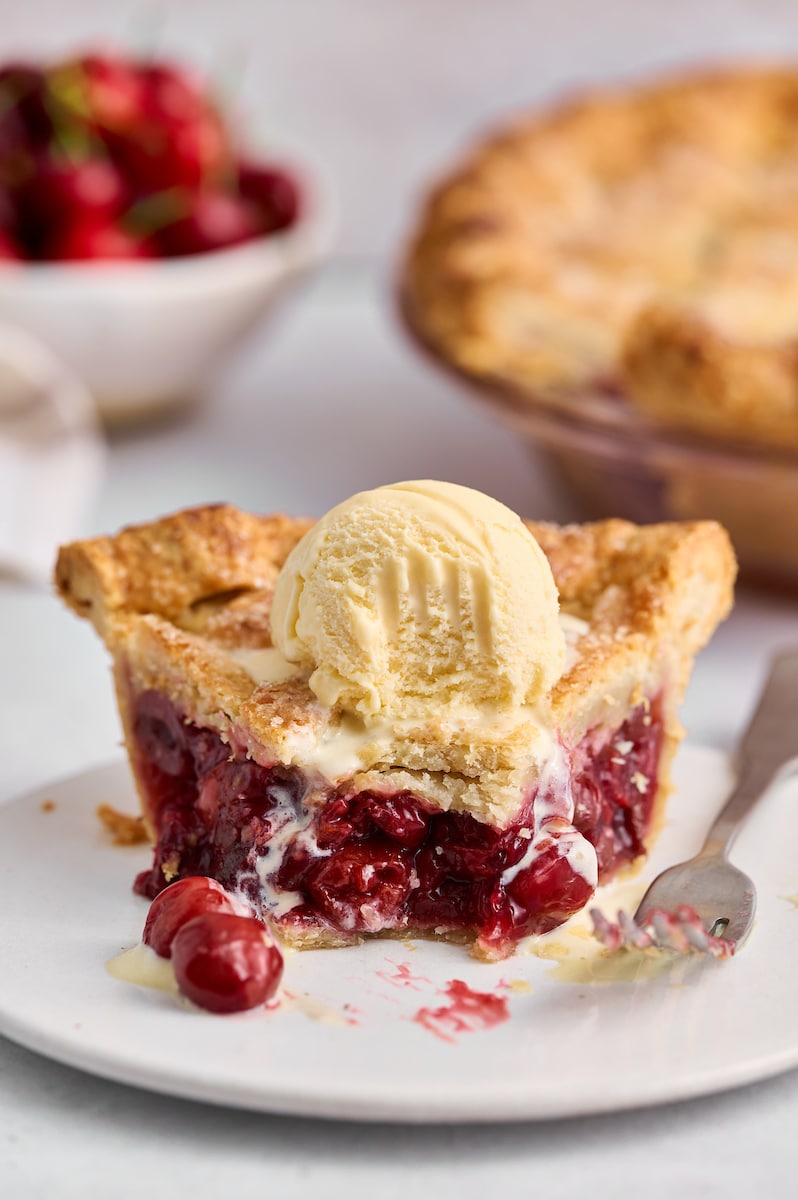
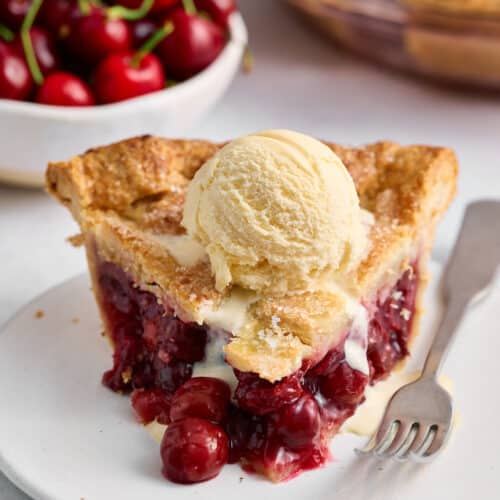
Homemade Cherry Pie is the QUEEN of summer desserts… and a million times better than store bought pie! Use my homemade pie dough for a golden brown all-butter pie crust. And use fresh cherries or frozen cherries for the cherry pie filling. Serve with vanilla ice cream or whipped cream.

Mom’s Cherry Pie Recipe
Originally published in 2018, my mom’s favorite cherry pie has become a favorite recipe of thousands of readers, too! So many of you have made special memories with this recipe. From 4th of July parties to sunny picnics to Christmas dessert… you guys seriously love this pie!
This is especially touching for me, because heartbreakingly, my mom passed away a few years ago. But her beloved pie lives on! And knowing it brings so many of you great joy… well, that’s priceless!

Why You’ll Love this Homemade Cherry Pie
- Use fresh or frozen cherries! And any variety of sweet or tart cherries will work.
- The cherry pie filling is juicy and full of sweet/tart cherry flavor.
- I use a cooking method for the cherry pie filling that leaves just the right amount of cherry juices… it’s juicy but not soupy!
- Assemble the pie dough easily, then wrap it in plastic wrap and refrigerate for up to 2 days before using.
- The best dessert for any summer event… especially when served with ice cream!
- Make the pie, cool completely at room temperature, and wrap in plastic wrap and it’ll stay fresh for up to 2 days! Or 2 months in the freezer.
How to Make Cherry Pie
- Make the Pie Dough: You can make the pie crust recipe up to 2 days in advance. Simply make as directed, then store in the fridge until needed. Or freeze the pie dough for up to 2 months.
- Make the Cherry Pie Filling: Feel free to store this in the fridge for up to 2 days! Just give it a good stir before use.
- Roll out the Pie Dough: You’ll roll the bottom crust into a large circle and fit it into the pie plate. For the top crust, you’ll slice it into strips and create a lattice top crust.
- Make an Egg Wash: This is the key to a golden brown crust! You’ll gently brush the egg wash all over the top crust using a pastry brush.
- Preheat the Oven: For this recipe, you’ll start with the oven at 425 degrees, then reduce then temperature after 15 minutes. Be sure to preheat the oven at least 20 minutes before you plan on baking.
- Assemble the Pie: Place the bottom crust in the pie plate, add the cherry pie filling, then add the top crust. Brush with egg wash and place on a baking sheet.
- Bake the Pie: Place the pie plate in the preheated oven until the crust is golden brown and the cherry juices are bubbling.
- Cool Completely: To get clean slices that don’t ooze everywhere, be sure to cool this pie at room temperature. To cool completely, it’ll take about 3 to 4 hours.
Pie Dough 101: The Best Pie Crust Recipe
- Cold Butter is Key: No matter what pie crust recipe you use, make sure your butter is ice cold before beginning. I suggest placing your sticks of butter in the freezer for 10 to 20 minutes before use.
- Use a Pastry Cutter: But if you don’t have one, you can cut the butter into the pie dough using two forks. Avoid using your fingers if you can, because they can cause the butter to melt.
- Add Just Enough Water: You want the pie dough to be a bit shaggy. It’ll come together once kneaded. Adding too much water will cause a tough and gluey pie crust.
- Chill the Pie Dough: The disks of pie dough need to chill for at least 2 hours, but will keep in the fridge for up to 48 hours.
- Prepare the Lattice Strips: For the top crust, you’ll cut the pie dough into lattice strips. Practice makes perfect here, so be patient with yourself! And don’t worry if it’s not picture perfect.
Cherry Pie Filling: Fresh Cherries vs Frozen Cherries
- Fresh or frozen cherries will work in this cherry pie recipe, so feel free to use either!
- I typically use fresh cherries in the summer and frozen cherries in the winter/fall.
- One major pro for using frozen cherries? You don’t need to wash or pit them. This definitely will save you time… especially if you don’t have a cherry pitter.
- Any variety of cherries will work with this cherry pie filling! But I love using sweet red cherries the best. Rainier cherries will also work great. You can use sour cherries, but you’ll need to add an extra 1/4 cup of sugar.
- My favorite brand of frozen cherries is Wyman’s dark sweet and red tart cherries are *chef’s kiss delicious! And yes, they are available in 2 pound bags, so they are all ready to use in this recipe. I always stock up on them when they go on sale!
- Not all almond extracts are equal in quality, so be sure to choose a pure almond extract for this recipe. If you’re allergic to almonds, you may omit the almond extract completely.
- If omitting the almond extract, I suggest adding an extra teaspoon or two of vanilla extract in its place.
- For best results, use fresh lemon juice! Avoid bottled lemon juice, which tastes artificial. Do not skip the lemon juice; it will not make your pie taste lemony!
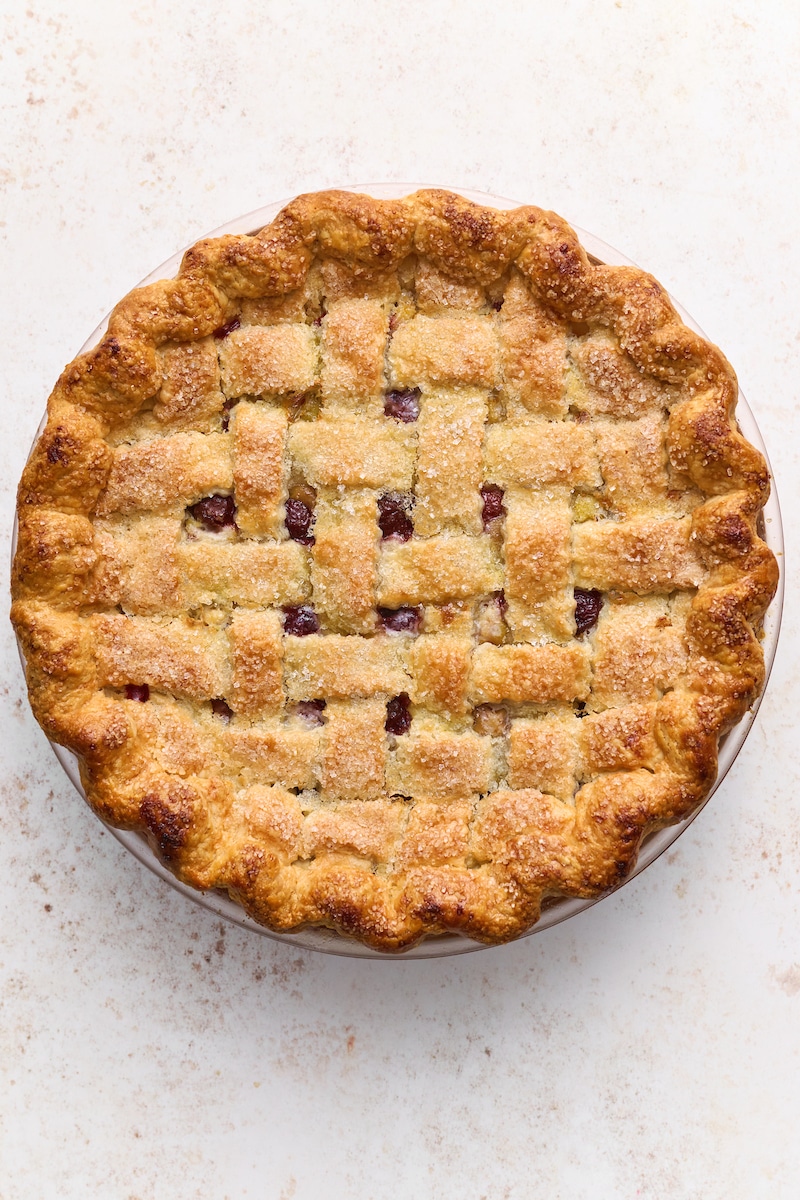
Bake on a Baking Sheet: Until the Crust is Golden Brown
- The cherry juices bubble up as the pie bakes in the oven… and sometimes, they land on the bottom of the oven. My solution? Bake the pie on a baking sheet.
- Baking the pie on a large baking sheet also makes removing the hot pie from the oven easier – and safer!
- You’ll want to bake this pie until the crust is golden brown and the cherry juices bubble up and smell incredible! This typically takes about an hour and 5 minutes.
- If your top crust is getting too brown, you can cover it with a pie shield or lightly tent the top of the pie with aluminum foil. But you shouldn’t need either option.

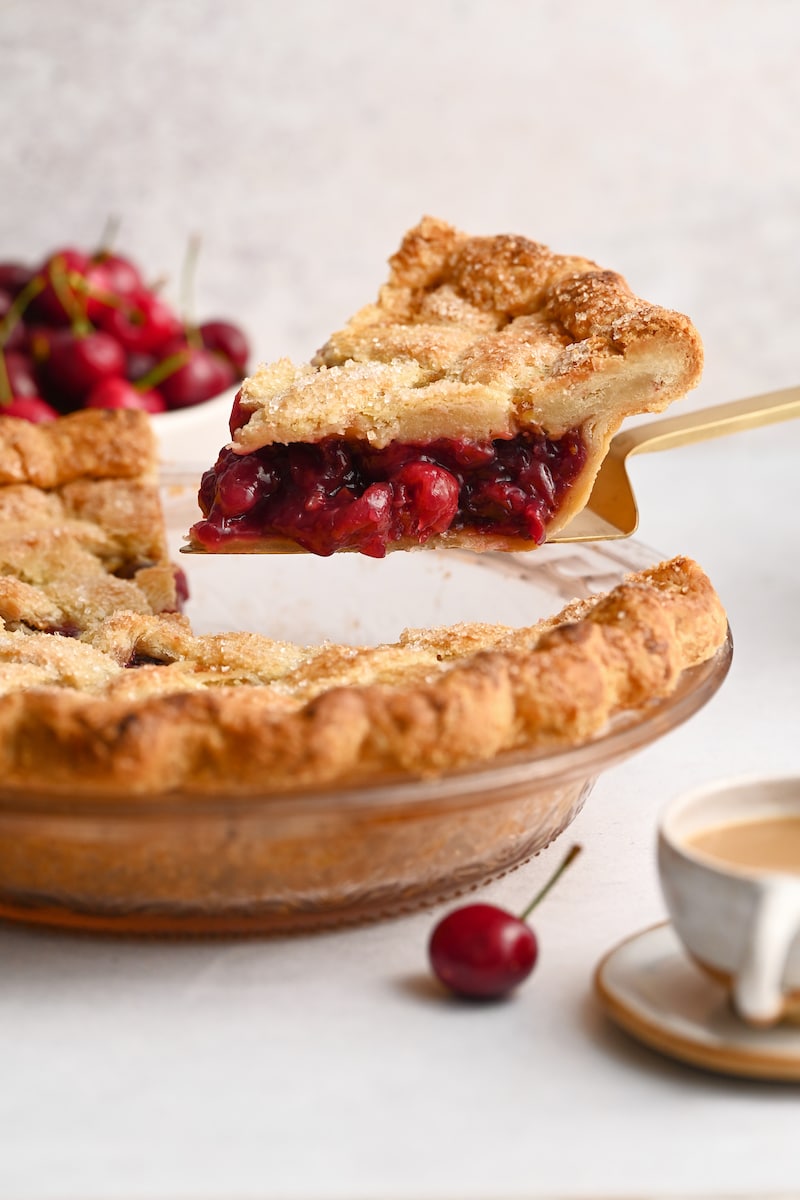
Cool Completely Before Slicing
If you’ve ever cut into a hot pie before… you already know why it’s essential to cool completely before slicing, right? Because hot pies are still mainly liquid! And the filling will flow and ooze and run everywhere.
So be sure to allow this homemade cherry pie to cool completely at room temperature before slicing! This usually takes about 4 hours. But you should be able to get semi-neat slices after 2 hours… if you just can’t wait to dig in.
For picture perfect slices, I suggest making this pie the night before you need it. That way it can chill and firm up overnight. And if you prefer to serve it slightly warm, you can always reheat a slice in the microwave or oven. I ALWAYS do this when I plan on enjoying a piece with a scoop of vanilla ice cream!
More Cherry Pie Recipes:
Foolproof Cherry Pie
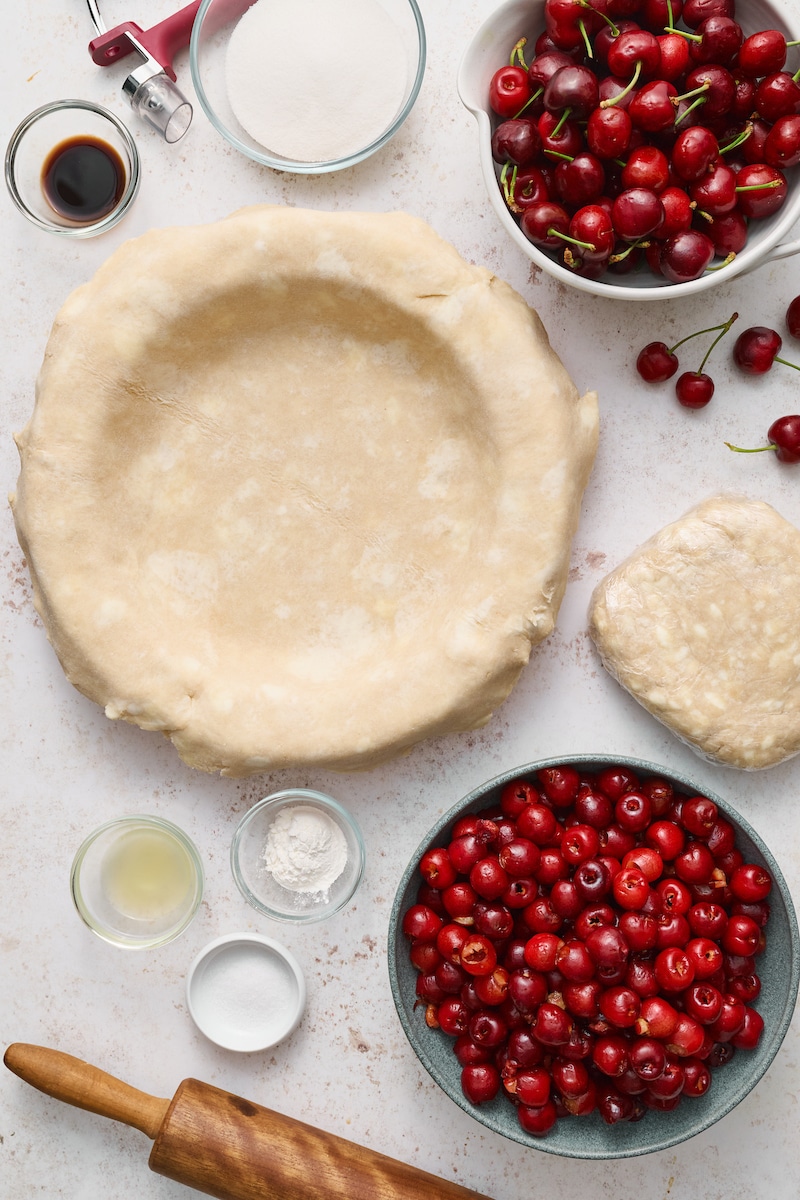
Ingredients
- (2) foolproof all-butter pie crust
- 2 pounds cherries pitted (fresh or frozen)
- 3 Tablespoons cornstarch
- 1/2 cup (99g) granulated sugar
- 1/2 teaspoon salt
- 3 teaspoons vanilla extract
- 1/4 teaspoon almond extract
- 1 Tablespoon freshly squeezed lemon juice
- 2 tablespoons unsalted butter cut into small cubes
- 1 large egg
- 2 teaspoons water
- 2 Tablespoons sparkling sugar optional
Instructions
Prepare the Crust:
- Have ready and refrigerated one batch of foolproof all-butter pie crust.
- Remove the dough from the fridge 10 minutes before you begin rolling, as dough that is too cold will crack. Lightly flour a rolling pin and your work surface. Set the dough in the middle of the work surface and – beginning from the center of the disc – roll the dough away from you in one firm and even stoke. After each stroke, rotate the disc a quarter turn clockwise and roll again. Lightly sprinkle more flour on the work surface, on the dough, and on the rolling pin as needed. You want to use just enough to prevent the dough from sticking. As your disc of dough becomes larger, be sure not to overstretch the center of the dough. Continue rolling until the dough is 3 inches longer than the pan you are using, and around 1/8″ to a 1/4″ in thickness.
- Carefully fold the dough in half and lay it across one side of a buttered pie pan, placing the seam of the dough in the center of the pan. Gently unfold the crust, then use your hands to fit the dough down into the pan, making sure there are no gaps between the dough and the pan. Burst any air bubbles with a fork. Do not pull or stretch the dough here!
- Using kitchen scissors, trim the dough overhang to 1 and 1/2 inches, measuring from the inner rim of the pan.
- Cover the crust with plastic wrap and refrigerate for at least 1 hour, or up to 48 hours. You may also freeze for up to 2 months
Prepare the lattice strips:
- Have ready and refrigerated one batch of foolproof all-butter pie crust.
- Line a small baking sheet with parchment paper; set aside until needed.
- On a lightly floured work surface, roll out the pie dough into a 12-inch circle.
- Using a pastry cutter, slice the dough into 10 strips (the width of the strips is totally up to you. I prefer medium strips so I usually slice them between an inch and an inch and a half wide). Lay the strips on the prepared baking sheet and refrigerate until needed.
For the Cherry Pie Filling:
- Combine the cherries, cornstarch, sugar, salt, vanilla, almond extract, and lemon juice in a large saucepan over medium-high heat. Simmer, stirring almost constantly, until the mixture starts to thicken – about 8 minutes.
- Reduce heat to low and cook for another 2 minutes before removing from the heat. Transfer to a heatproof bowl and cool to room temperature.
For the Egg Wash:
- In a small bowl, beat together the egg and water until well combined. Set aside until needed.
Assembly and Baking:
- Preheat oven to 425 degrees (F).
- Remove the crust and lattice strips from the refrigerator.
- Using a rubber spatula, scrape the cherry pie filling into the pie crust shell. Top with cubes of butter.
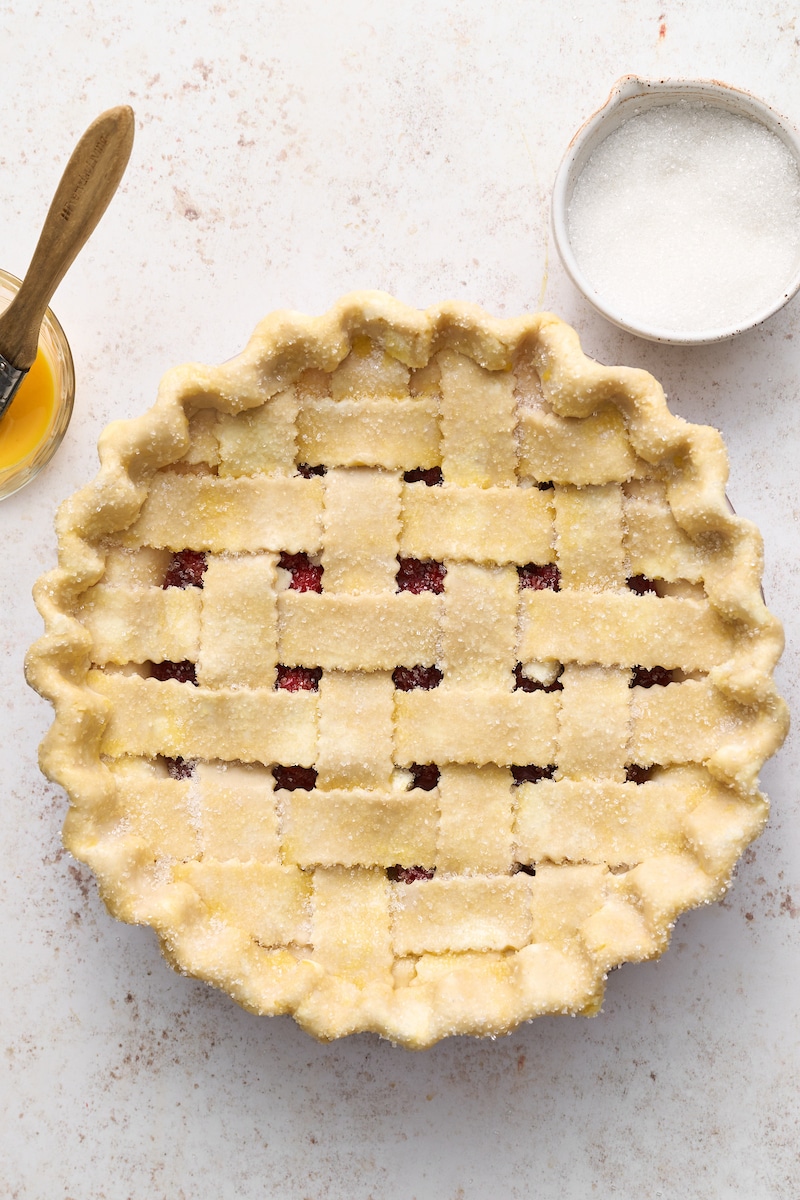
- Lay 6 of the strips parallel on top of the filling, leaving about 1/2-inch between each strip. Fold back every other strip, then place another strip of dough perpendicular to the strips. Unfold the folded strips so they lay over the perpendicular strip. Continue this layering process, weaving the strips over and under each other.
- Trim the edges of the strips, leaving about 1/2 inch overhang. Roll the excess dough up so it’s tightly sitting on the edge of the pie plate, then crimp the edges to secure the strips with the bottom pie crust.
- Brush the edges of the crust with the egg wash and sprinkle with sugar, if using.
- Place the pie on a baking sheet and bake for 15 minutes. Reduce the oven temperature to 350 degrees (F) and continue baking for 50 minutes, or until the crust is golden and the filling is bubbling.
- Place pie plate on a wire rack and cool for at least 2 hours before slicing.

I tried the recipe yesterday, adapted with my own pie crust and cut the sugar in the filling. Everyone loved it. I shared a little story on my Insta if you have a minute 🙂 Thanks again for just another wonderful recipe of yours! Del
Hi, first thanks for such detailed information on why the combinations. I made it and am very pleased with the texture and the flavours of the contents. I did add some reserve fluid of the soaking fresh cherries – seemed like it was going to be a tad dry without that and it tasted perfect for me. The pie crust, I learnt a few things. I have after several abysmal failures years ago, found a fail proof recipe that is close to what you describe in detail. I have never found it necessary to do exact of anything unless its a sponge cake – I like the chemistry of the cooking and the creation of individual. There are some excellent techniques that when used, (again this is after many many failures and learnt things! 😉 ) create effortless perfection. I am trying your cornstarch addition, never thought of that and it may well be a very useful thing to know! I have did not put the egg in my wet mix for the pastry which is what is normally required in my recipe, so this should be interesting to see how it turns out! I do always use a vinegar. Never tried the acv and did not have any on hand so I used rice… guessing it will still be the same result. I suspect this is going to be a very tasty pie with a beautiful presentation! Appreciate your information!!!! Cooking is such wonderful therapy for me and Love to share it the results! Thank you!!! ps… if the folks who kept having a hard time finding what to do with the butter, it does say in the instructions. The issue may be that there is so much reading to do prior to making the recipe, its not like a regular recipe – the butter is dotted on the top just under the lattice!
My mother used to put small pieces of butter on top of fruit pies before baking. I had forgotten about that.
Thank you for the recipe. I made a similar cherry pie for my parents a few years ago to use up some cherries before they got too ripe. The pie turned out perfect but I did not measure or write down the recipe. I remember using tapioca for thickening and almond extract.
My parents really enjoyed the fresh cherry pie and I think your recipe is the same as the one I want to re-create. I bought cherries while they are in season and did a Google search and found your recipe right away. Although I have a large collection of cooking magazines and books, it is such a blessing to be able to look on the internet and print recipes.
Can you freeze the filling?
I followed the recipe mostly but I did add in a couple of things one is a dash of cinnamon and 2 is brown sugar just to give it a little extra flavorthis was the best cherry pie recipe on ever tasted I’m definitely adding it to my book thank you so much for a great recipe
Does the recipe call for sweet or tart cherries? I have only made pies using tart cherties
You can use either, or a combination 🙂
What is the butter used for? Also, In the ingredient list there is 3T and it doesn’t mention what that ingredient is. Please help me on this as I am making it tomorrow.
Thank you.
Hi Karen, Most cherry pie recipes call for little cubes of butter to be placed between the filling and the top crust. I also noticed that she butters her pie pan, so maybe that’s what she means. Good Luck!
So this recipe was really easy to follow with great tips. This is one of the few times my came out looking like the pictures on the first try.
However, the filling was off. It may be that we’re not used to cooking with cornstarch, but the filling tasted too much like corn starch. I followed the recipe exactly so my proportions weren’t off. But like I said if you’re used to cooking with it you may be fine. I usually thicken compotes just by extending the cooking time not adding corn starch. I’m curious how this filling tastes with very little to no added cornstarch.
OMG the crust was amazing!! My son who doesn’t usually even eat crusts was eating the crust first and begging for more! 11 out of 10 stars for the crust. Amazing! And it looked stunning for my first time making a crust from scratch in years (and those were epic fails!).
Thank you for the recipes! I’ll definitely be using that crust recipe for years to come!
Thank you!
Making it now ——- I have always been challenged to have the fruit the correct thickness —— pro at it being runny or jellied!!! Very anxious for the results —– SUPER DIRECTIONS AND PHOTOS —- thanks
Me and my daughter made this together. Lovely recipe, pretty easy to follow personally I prefer grams and ounces rather than cups and tablespoons esp when measurements have to be accurate. Must waiting now for it to cool but smells lovely can’t wait to have a slice. Thank you
Thank you thank you thank yo!!! Finally pastry that is simple and delicious! Pie crust is so hard but your instructions make it so easy! Now for the cherry pie…. WOW! I love it!! Amazing to cook the cherry filling before you put it in the pie crust to bake is awesome!! Delicious!!!