


 Search
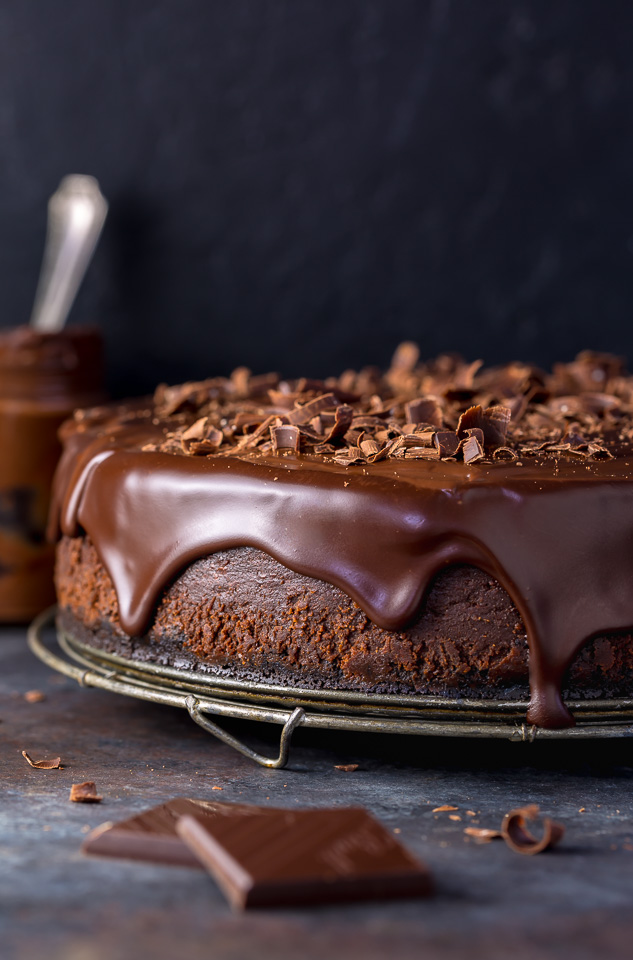
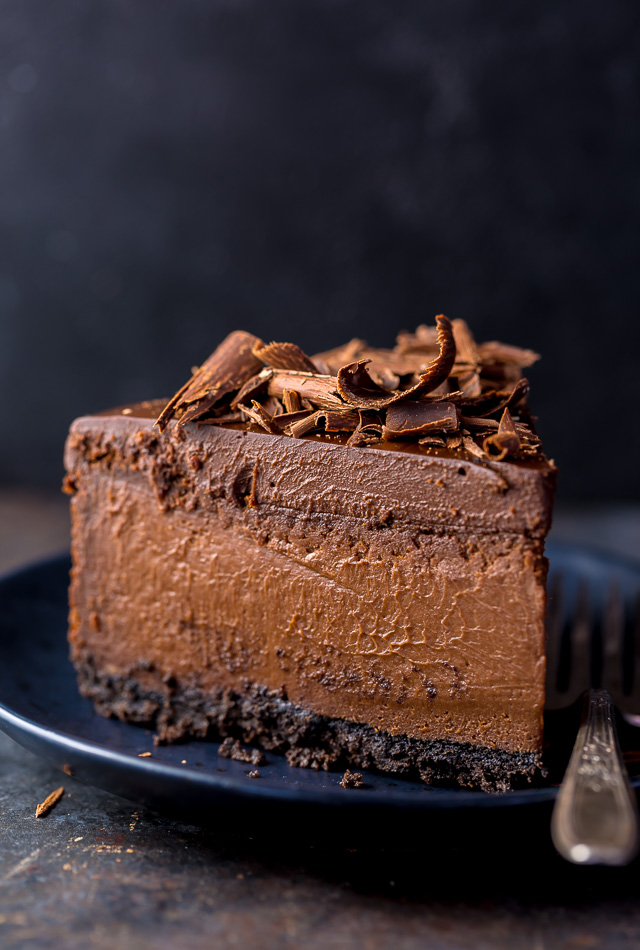
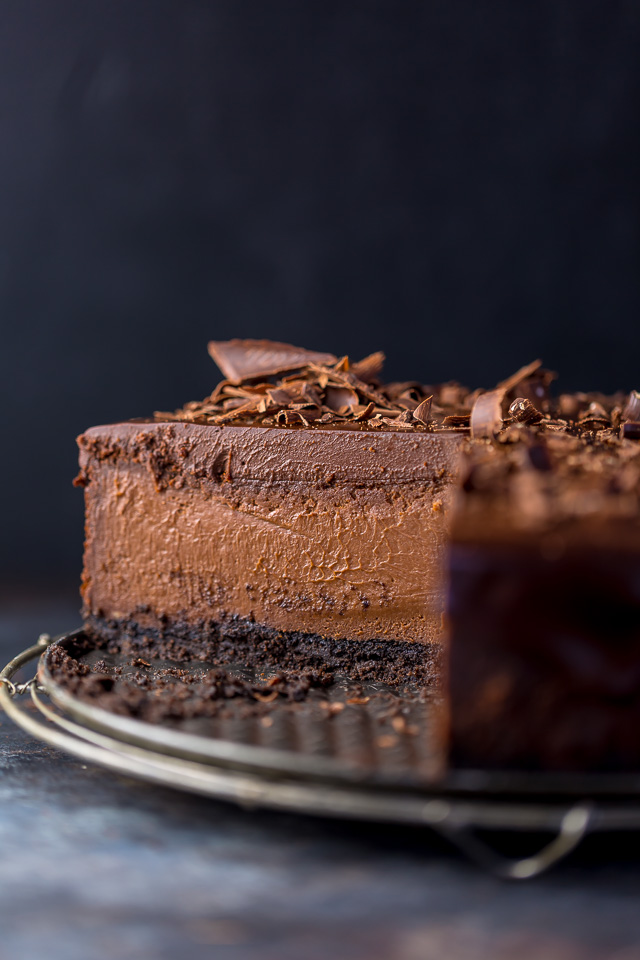
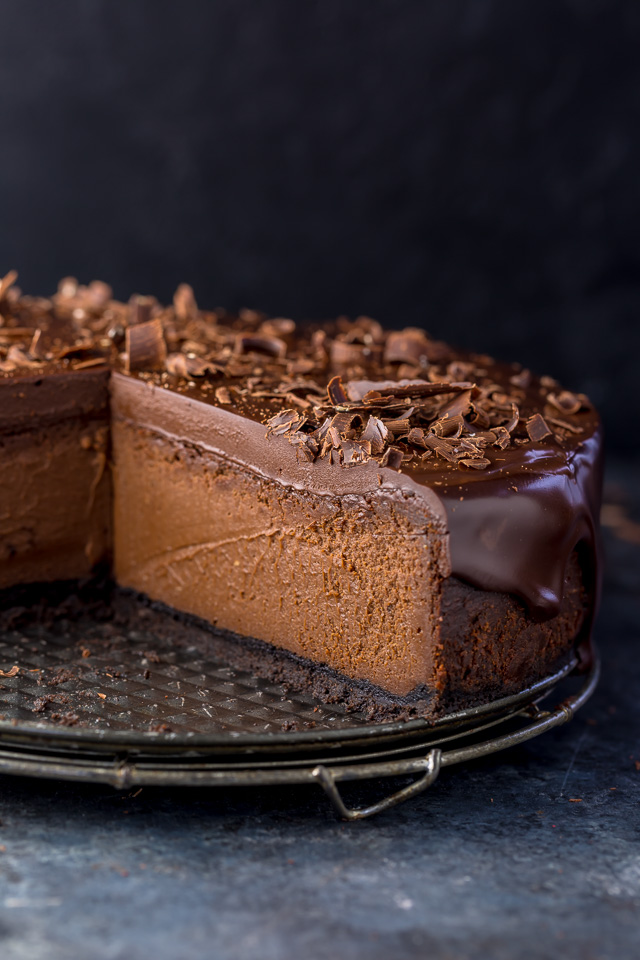
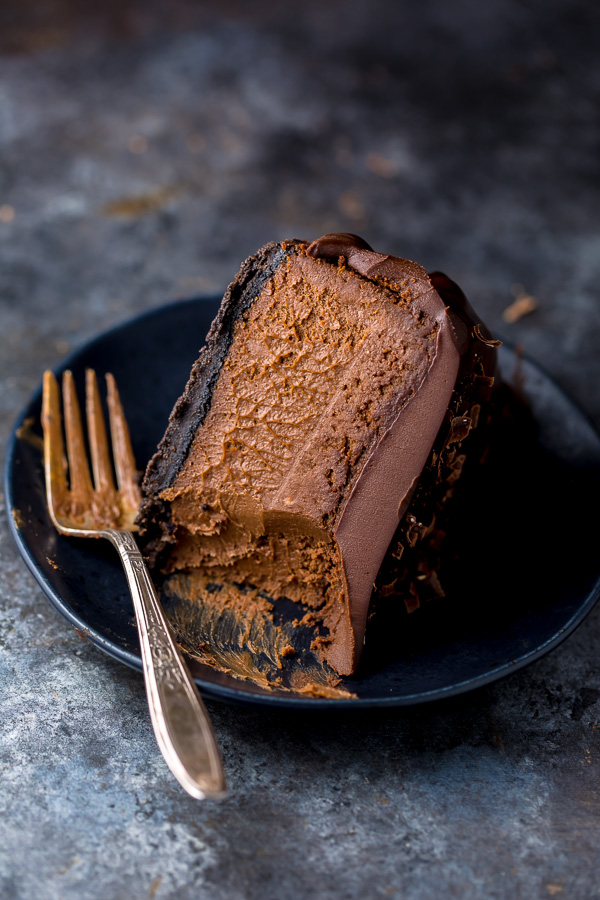
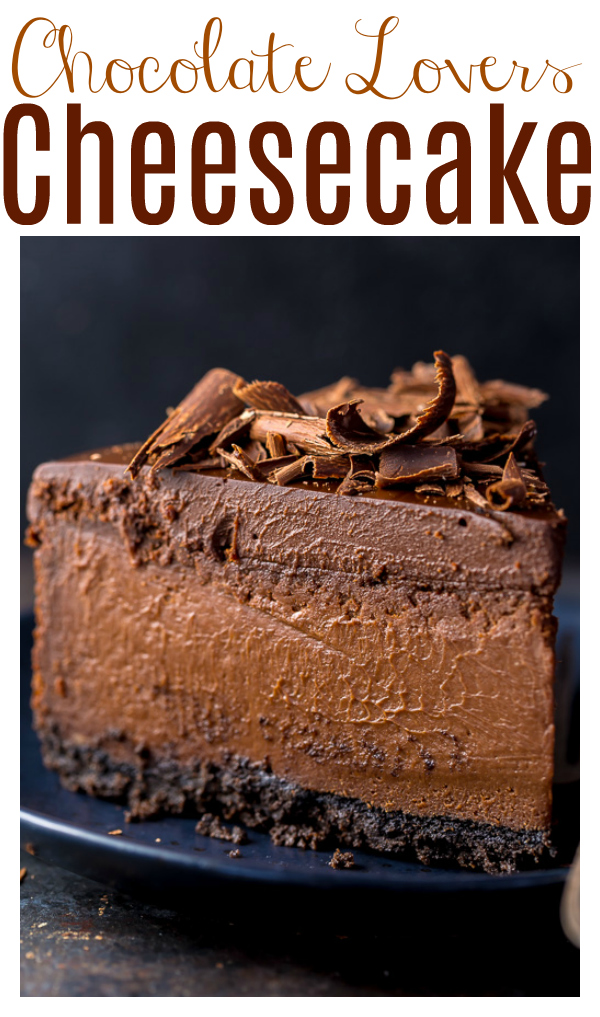
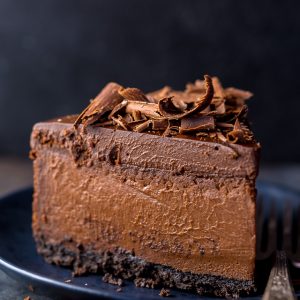
This Ultimate Chocolate Cheesecake features a chocolate cookie crust, creamy chocolate cheesecake filling, chocolate ganache, and shaved chocolate! Made with basic ingredients you probably have in your kitchen right now. Simply put, this is the best chocolate cheesecake recipe you’ll ever try!
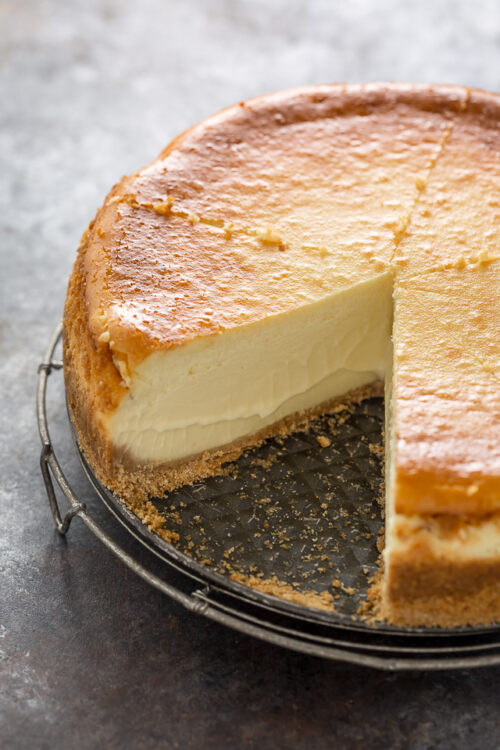
Chocolate Cheesecake Recipe
Best Chocolate Cheesecake
The day has arrived! I’m finally sharing the recipe for my favorite chocolate cheesecake! You know… the one I teased you with on Instastories last week!
And trust me, it was worth the wait, my friend. Because this thick and ultra creamy chocolate cheesecake is one of the best things I’ve ever baked! It’s so smooth and creamy it melts in your mouth. We made it for Christmas Eve last year and everyone wanted the recipe. And I’ve already received multiple requests to make it for our family Valentine’s Day party. I don’t mind one bit because this cheesecake is freezer friendly! Meaning I can make it up to two months in advance and then just pull if out of the freezer when needed. Does it get better than that?!
I’m confident that after one slice, you’ll be equally smitten with this decadent chocolate ganache cheesecake. So, without further ado, let’s dig in!
 Tips and Tricks for Recipe Success:
 Tips and Tricks for Recipe Success:
- The filling for this chocolate cheesecake is so decadent because it’s made with 12 ounces of dark chocolate. You’ll melt the chocolate and slightly cool it before the batter. It only needs a few minutes to cool down.
- Because we want the BEST chocolate flavor, I do not suggest using chocolate chips. But if you can’t stand super dark chocolate, you may use semi-sweet. Almost any of Lindt’s EXCELLENCE Bars work great in this recipe.
- The batter can be made in a food processor, high powered blender, or add all of the ingredients to a bowl and beat with a hand mixer. I use my blender!
- To make the chocolate cookie crust you will need two ingredients: melted butter and chocolate wafer crumbs. You’ll combine the two ingredients in a small bowl, and then pat the mixture into the bottom of your prepared pan. You could also make an Oreo crust or a graham cracker crust!
- This recipe requires a springform pan. If you don’t already own one and need a good place to start, feel free to click here and check out the one I’ve been using for years.
- Because cold cream cheese won’t blend smoothly, it MUST be very soft before you begin assembling this recipe. I typically leave it out on the counter for at least two hours before I plan on baking.
- And you should also bring your eggs and cream to room temperature, because batters made with cold ingredients don’t come together smoothly.
- As for the chocolate, it will need to be melted and slightly cooled, 10 minutes or so should do the job.
- Finally, you’ll want to be sure you chill your cheesecake on a wire rack until it’s at room temperature, and then refrigerate for at least 6 hours in the fridge before slicing and serving. Otherwise it’ll be too soft and mushy. Yuck.
How to make a Water Bath:
A water bath is simply the term bakers use when they place a baking pan – in this case, our spring form pan – into a larger pan that’s been filled partially with hot water. Taking this extra step helps insulate the pan from direct heat on all sides while it bakes. The water bath method helps your cheesecake bake gently, ensuring the finished product doesn’t burn, curdle, or crack. It also helps the cheesecake maintain its silky smooth texture.
When it comes to choosing a pan or large baking sheet for your water bath, choose one that is as tall as the cheesecake pan and large enough to leave a few inches between the cheesecake pan and the outer rim; you want enough room for the water to circulate easily.
IMPORTANT: If you’re using a springform pan, it’s essential to wrap the pan in MULTIPLE LAYERS of heavy-duty aluminum foil. Otherwise water will seep in and destroy your chocolate cheesecake. And that would be a SIN! So I suggest wrapping the pan from every angle and pressing the foil in, up, and around the pans edges.
When you’re ready to make your water bath, here’s what you do:
- Adjust an oven rack to the middle position. Preheat oven to called for temperature. When the oven is preheated, carefully (using an oven mitt) pull out the middle rack and place your large pan on it.
- Fill the pan with 1 and 1/2 inches of boiling hot water, then place the filled cheesecake pan in the center of the water bath.
- Slowly slide the rack back to its full inserted position and close the door. Bake the cheesecake according to instructions.
If you’d like to avoid making a water bath at all costs, you can place the roasting pan on the rack beneath the cheesecake. This work about 70% of the time for me, but occasionally when I do this my cheesecake still gets some little cracks on top. But since you’ll be covering this cheesecake with chocolate ganache, a few cracks aren’t the end of the world.
Pro Tip: Be sure to cool the baked cheesecake in the springform pan until you’re ready to serve it! This includes the time the cheesecake chills in the refrigerator.
Can I Freeze Homemade Cheesecake?
Yes, this amazing cheesecake recipe is freezer friendly! Simply cool the cheesecake completely, then wrap the whole cheesecake, or slices of the cheesecake, in multiple layers of saran wrap, then place in a freezer bag. This cheesecake will keep, stored properly in the freezer, for two months.
How to Defrost Cheesecake:
To defrost this cheesecake, simply thaw the wrapped cheesecake in refrigerator overnight. Do not attempt to thaw cheesecake in the microwave or oven! Otherwise the cooled chocolate ganache topping will melt and make a huge mess.
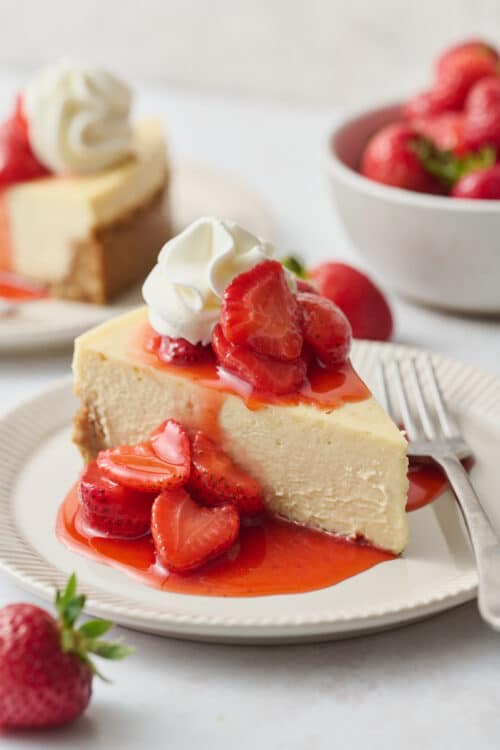
This easy chocolate cheesecake recipe is so delicious it doesn’t need anything on top! But if you’re feeling extra decadent, a dollop of whipped cream on top is delicious! Or try spooning some fresh cherry or strawberry sauce over each slice. We did that for Christmas and it was a huge hit.
With its chocolate cookie base, creamy dark chocolate filling, and easy chocolate ganache topping, this cheesecake is truly a dream come true for chocolate lovers!
If you try this recipe for Chocolate Cheesecake with Chocolate Ganache, let me know what you think! Leave a comment below, and don’t forget to snap a pic and tag it #bakerbynature on instagram! Seeing your creations makes my day ♥
More Chocolate Cheesecake Recipes:
- Mini Chocolate Cheesecakes
- Chocolate Raspberry Cheesecake
- Easy Chocolate Cheesecake Bars
- No-Bake Espresso Chocolate Cheesecake
- Kahlua Chocolate Cheesecake
- Chocolate Mascarpone Cheesecake
Ultimate Chocolate Cheesecake
Ingredients
For the Crust:
- 1 and 1/2 cups (180g/6.3 ounces) Chocolate Wafer Crumbs
- 1/4 cup (57g/2 ounces) unsalted butter, melted
For the Ultimate Chocolate Cheesecake:
- 2 cups (340g/12 ounces) bittersweet chocolate, coarsely chopped
- 1 and 1/2 pounds (680g/24 ounces) full-fat cream cheese, at room temperature
- 1 cup (198g/7 ounces) granulated sugar
- 1/4 cup (53g/1 and 7/8 ounces) light brown sugar, packed
- 3 Tablespoons unsweetened natural cocoa powder
- 4 large eggs plus 2 egg yolks, at room temperature
- 3/4 cup (170g/6 ounces) heavy cream, at room temperature
- 1 teaspoon vanilla extract
For the Chocolate Ganache:
- 1 and 1/3 cups (226g/8 ounces) semi-sweet chocolate, finely chopped
- 1 and 1/4 cups (12 ounces) heavy cream
- 1/4 cup (57g/2 ounces) unsalted butter, at room temperature, cut into cubes
Instructions
For the Crust:
- Preheat oven to 325°F (163°C). Grease the bottom and sides of a 9-inch springform pan. Wrap the outside of the pan in layers of heavy duty aluminum foil. You’ll be placing this pan in a water bath, so be sure the pan has been wrapped from every angle.
- In a medium mixing bowl, combine the chocolate wafer crumbs and melted butter. Pat the mixture firmly into the bottom of the prepared pan. Bake the crust for 10 minutes. Set the pan on a wire rack and cool the crust completely. Leave the oven on.
For the Ultimate Chocolate Cheesecake:
- Fill a medium pot one-third full with water and bring it to a low simmer over medium heat.
- Place a heatproof bowl that will fit on top of the pan snugly, but will not touch the simmering water, on top of the pan. Reduce the heat to low and add the chopped chocolate into the bowl over the pot. Heat until the chocolate is completely melted, stirring occasionally with a silicon spatula. Remove the pot from the heat, leaving the bowl of chocolate over the hot water. Set aside until needed.
- In the bowl of a food processor (or high-powered blender), pulse the cream cheese until completely smooth, scraping down the sides of the bowl as needed, about 2 minutes. Add in both sugars and cocoa powder and beat smooth. Add in the eggs, egg yolks, and heavy cream and mix until just combined, about 20 seconds. Fold in the chocolate. Finally add in the vanilla and pulse for another 20 seconds.
- Remove the bowl from the food processor and, using a rubber spatula, stir the filling several times to ensure it’s evenly blended.
- Scrape the filling over the partially baked crust in the prepared pan.
- Place the springform pan in a roasting pan or large baking pan. Place the roasting pan in the preheated oven and pour enough hot water into the pan to come 1-inch up the sides of the springform pan.
- Bake the cheesecake in the water bath for 1 hour and 10 minutes, or until the center of the cake is set but still slightly jiggly. The cake will set completely as it cools.
- Remove the cake from the water bath and place the pan on a wire rack. Carefully loosen the foil, then immediately run the tip of a knife around the sides of the pan, to prevent the top from cracking. Cool completely (in the pan), then transfer cheesecake to the refrigerator to chill for at least 6 hours before removing from the pan and slicing.
For the Chocolate Ganache:
- Add chopped chocolate to a medium bowl; set aside.
- In a small saucepan over medium-heat, bring the cream to a low simmer. Pour half of the cream on top of the chocolate pieces and set aside for 1 minute. With a whisk, begin to incorporate the melted chocolate into the cream. Slowly add the remaining cream and continue carefully whisking until smooth and glossy.
- Add in the butter and use a spatula to stir until the butter is completely melted. The mixture will be dark and glossy. Set aside, at room temperature, until needed.
- Pour ganache over cooled cheesecake. Set aside until ganache is set, about 1 hour.
- To serve, slice the cheesecake with a thin-bladed sharp knife, wiping the knife clean between each cut.
- Store, loosely covered, in the refrigerator, for up to 5 days.
Hi I am going to make Ultimate chocolate cheesecake with oreo biscuits could you tell me how many oreo biscuits I wlll need an how much butter I will need?
Absolutely delicious! Made it for thanksgiving and it was a hit with everyone.
I have a random question – is there a reason to use a food processor over a mixer when making the batter? I’m thinking to avoid whipping air into the batter, but was curious. Thanks!
Very nice recipe. Will definitely try this at my shop.
Can you share any details about blue velvet cheese cake?
This was my first ever attempt at making a chocolate cheesecake. I have to tell you, I’ve never had anything so silky and decadent in my entire life!! As if it wasn’t rich enough, I also served it with a dollop of bourbon whipped cream. It is a remarkable recipe and I will be keeping it in my recipe files for sure. Will I be making it again? Probably for a very special occasion but not too often, I’d gain 300 pounds having this around because I wouldn’t be able to stay out of it! 🙂
Thank you so much for sharing this with all of us.
This is the MOST AMAZING cheesecake recipe! Thank you so much for sharing! I made this for my sister in law and she loved it so much, she made it for her family. It’s literally loved around the world! This is a dessert that is so decadent and rich without being overly sweet. I only make it for a crowd because a little slice goes a long way. Either that or I end up eating the rest. Make it exactly as directed and you’ll impress everyone.
the batter was runny, is that how it is supposed to be? It’s in the oven now. I’m nervous this isn’t going to turn out!!
My cheesecake is currently chilling in the fridge, in the springform pan ( no cracks and it looks delicious!). Do you pour the ganache on after you remove it from the springform pan? I’ve seen this question a few times but haven’t seen an answer. Thanks for the very detailed instructions and tips!
HI Carrie! If you want a solid chocolate topping with no side drips, I suggest adding it while it’s in the pan. Otherwise, you can pour it over the cheesecake once you remove it from the pan and allow it to drip down the sides 🙂 Which is what I do and you see in these images. But there’s no right or wrong on this one!
May I pour the ganache over the cheesecake and then let it all be in the fridge for 6 house?
As long as you wait for the cheesecake to cool to room temperature, yes, this will work!
The batter got quite thick once I added the chocolate, is that normal?
It’s in the oven now, so we’ll see how it turns out but I’m a little worried.
Hi Janelle. Yes, it’s a thick batter! I hope you enjoyed the cheesecake.
I’m a first time cheesecake maker who got tired of the rubbery ones the supermarkets sell and decided to have a go. An easy and delicious recipe and great instructions. I chose this recipe as it looked delicious on the photos and it does not disappoint. I’m sat here at nearly 11pm eating cheesecake. It’s ridiculously tasty and I had to leave feedback! Thank you!
I’m having proud mama vibes right now! I’m so thrilled this was your first cheesecake… and that it was a success. Thank you so much for taking the time to leave me a review. It made my day!
I made this for a birthday celebration and it was as incredible as the recipe says! I was so afraid to use the water bath method but a friend leant me the pan and said she’d tried that method with cheesecake before and it worked, so I dated myself. I wrapped the pan twice which in hindsight was probably overkill since the baking time literally doubled?!? But as I said it’s a fantastic cake so all in all worth it. No cracking. I refrigerated it once cooled. Took it up to the mountains the next day in a cooler and made the ganache up there. Adorned it with fresh raspberries. Couldn’t find chocolate wafers so used orange cookies which I might do again but add a bit of grated orange rind if I did. Thank you for the amazing recipe, a definite keeper!!!!
Was the video removed? Other commenters asked about it and were told there’s a video under the first paragraph but all l’m seeing are photos….Is there a video still available?
The video is still here! It might shift location, but it’s in our video player, which pops up on every post 🙂