


 Search
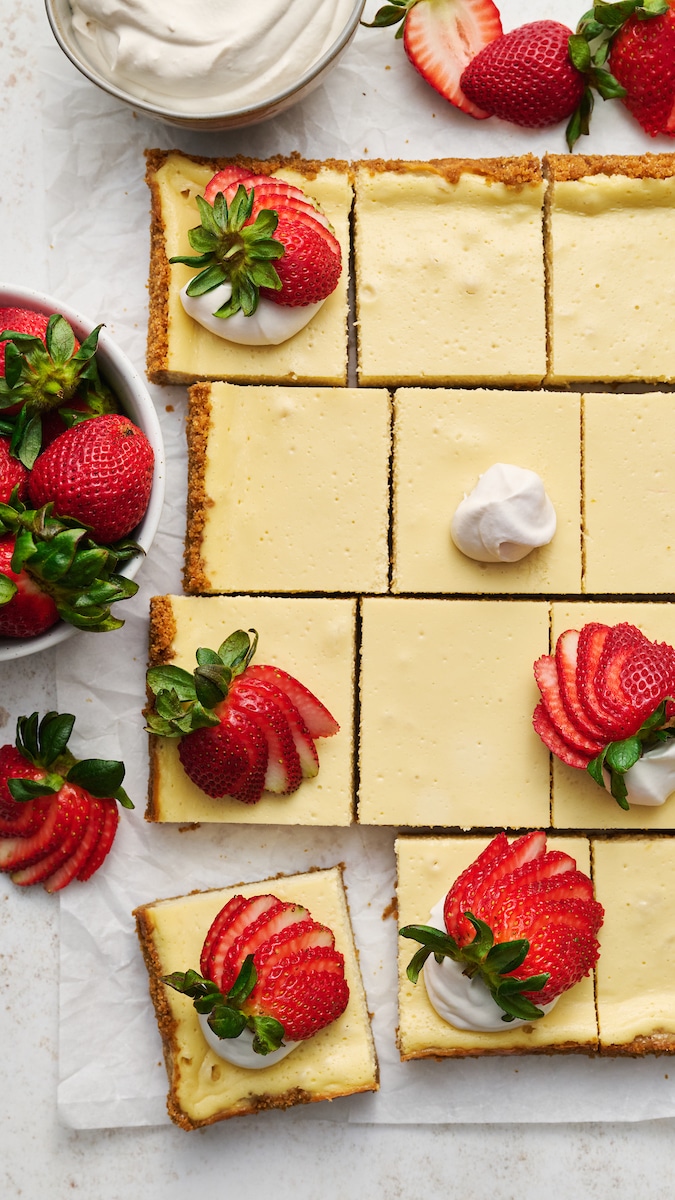
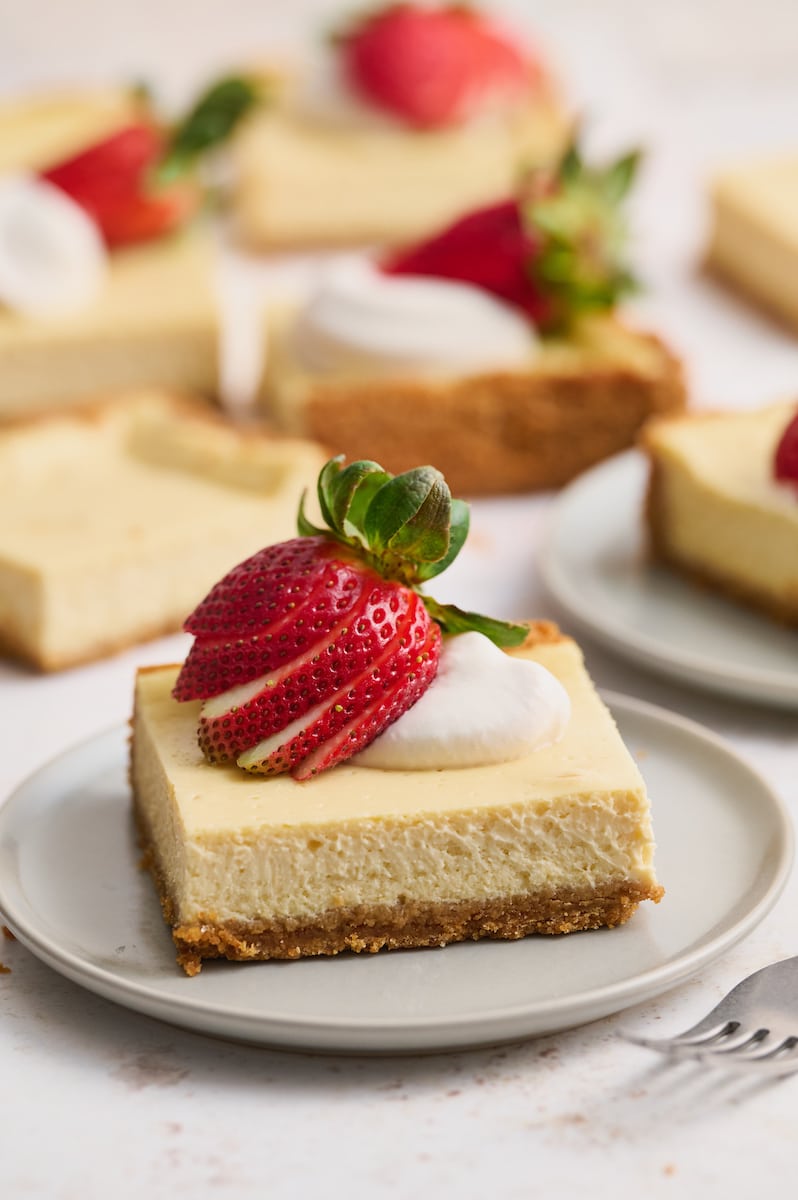
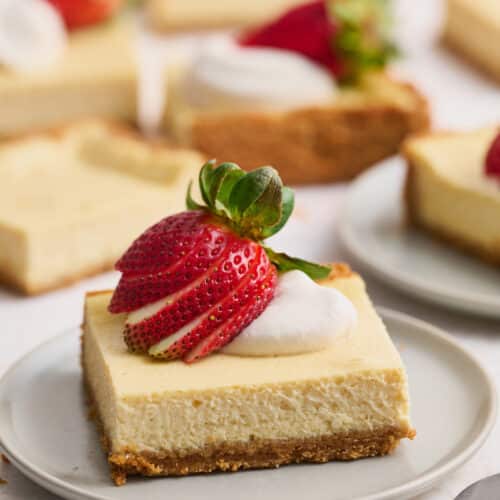
New York-Style Cheesecake Bars have a classic cheesecake filling and crunchy graham cracker crust! Full-fat cream cheese and sour cream are the secret to an ultra creamy cheesecake filling! Cut into squares and top with whipped cream and strawberries for a crowd-pleasing dessert everyone will love.
Like Classic Cheesecake? You’ll Love these Cheesecake Bars!
Next time you’re craving cheesecake, but want an easy dessert, try this recipe instead! These easy cheesecake bars are everything you love about classic cheesecake, but so much easier. Here’s why you’ll absolutely love them:
- Buttery graham cracker crust
- Ultra rich and creamy cheesecake filling
- You can serve them plain or doll them up with whipped cream, strawberries, or even chocolate chips
- No water bath or springform pan required- hooray
- Just like New York cheesecake, but in easy bar form
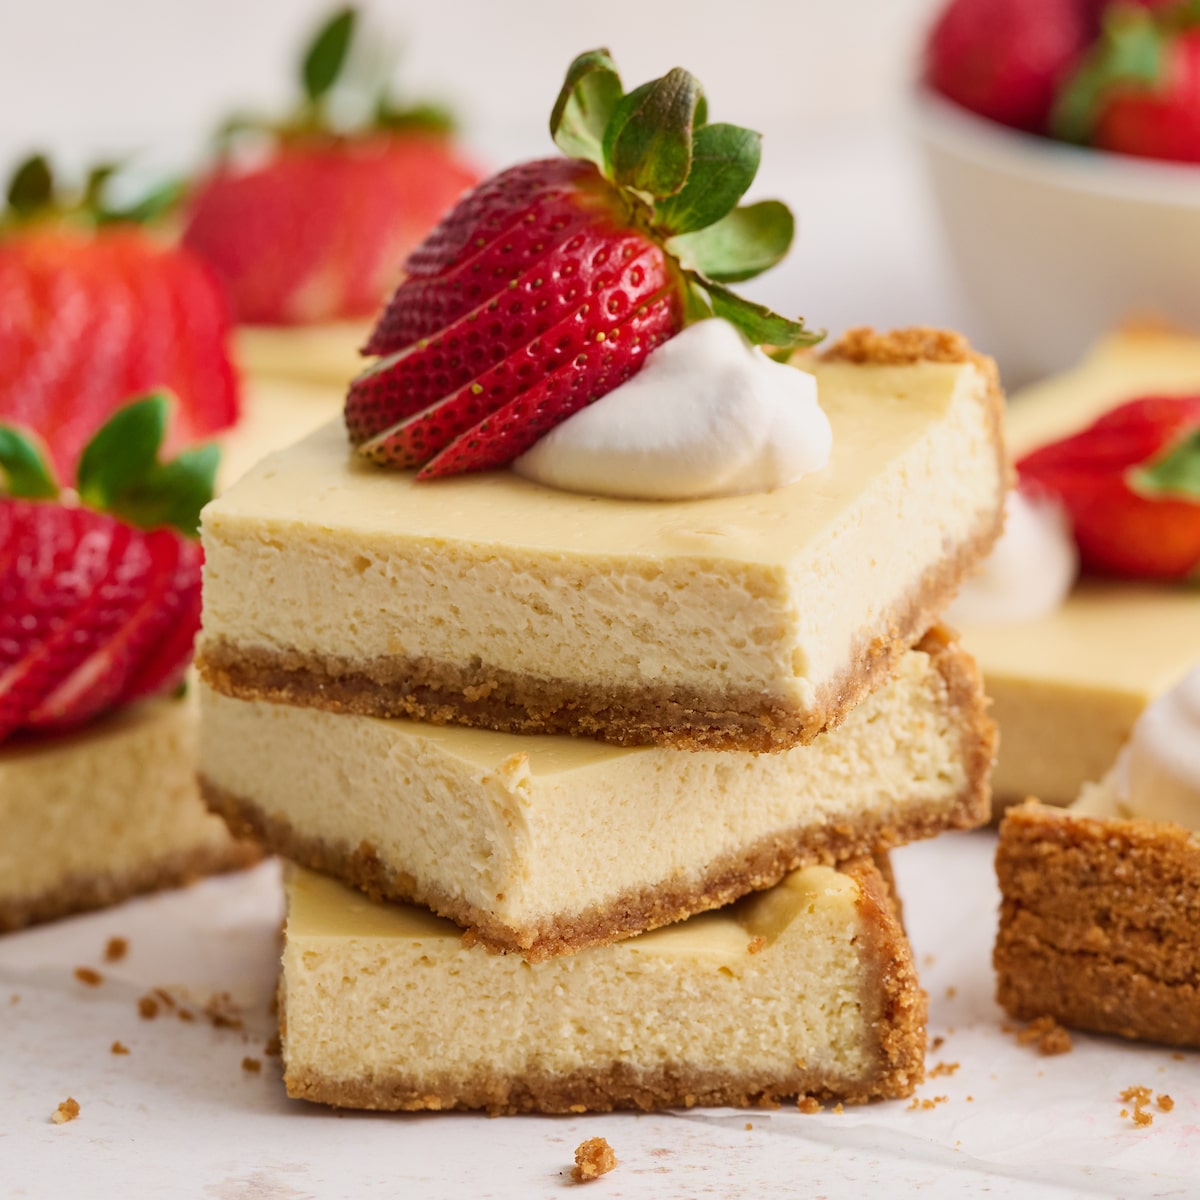
- Cut into squares, these are perfect for potlucks, picnics, and parties
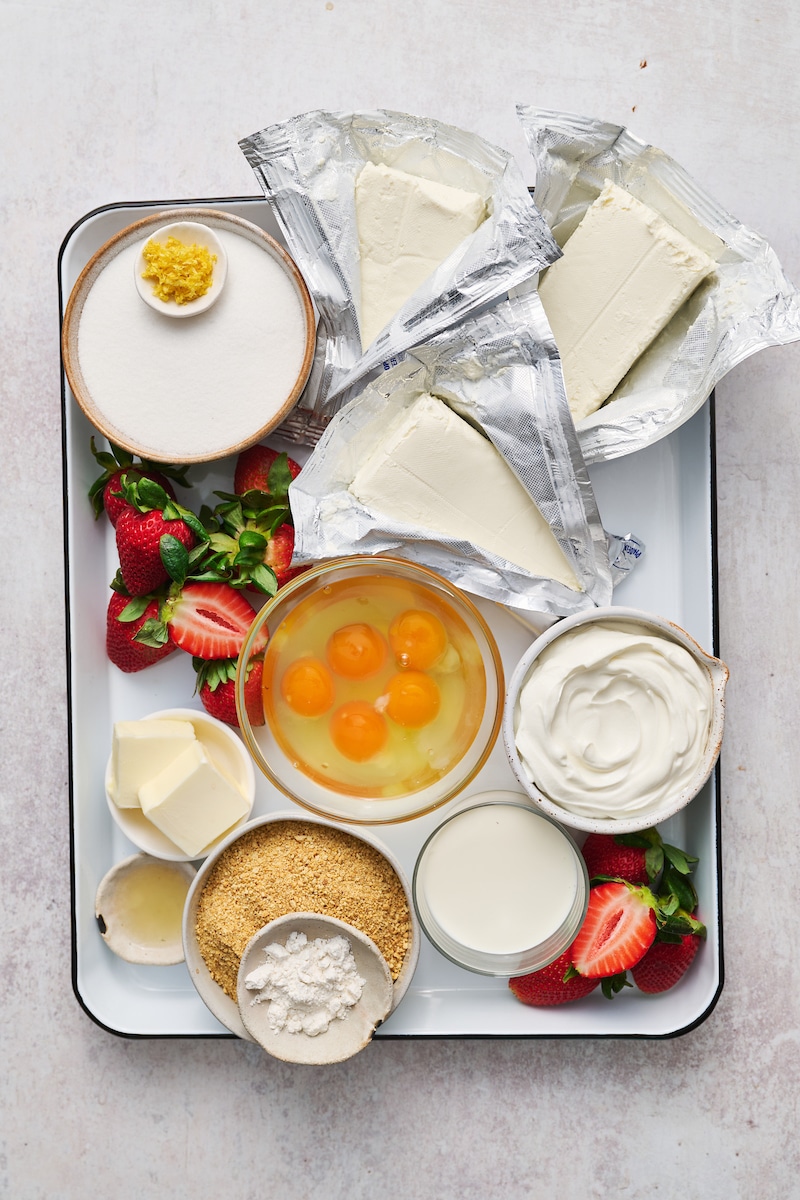
Ingredients for Graham Cracker Crust and Classic Cheesecake Filling
- Graham Crackers: For the graham cracker crust you’ll need 2 cups of graham cracker crumbs. Use pre-crushed graham cracker crumbs or buy sheets of graham crackers and crush them in a blender or food processor.
- Granulated Sugar: You’ll use this in the graham cracker crust as well as the cheesecake filling. You can use brown sugar in the graham cracker crust, but don’t use brown sugar in the cheesecake filling. Because brown sugar will change the taste and color of the filling.
- Butter: Melted butter is the fat and binder in the graham cracker crust. I prefer using unsalted butter but salted butter will work in a pinch.
- Cream Cheese: Brick-style cream cheese works best for this recipe. Make sure to soften it to room temperature.
- Sour Cream: Full-fat sour cream will give the best taste and texture. Make sure it’s at room temperature before use.
- Vanilla Extract: Always use pure vanilla extract and steer clear of artificial or imitation vanilla.
- Eggs: This recipe uses whole eggs as well as egg yolks. Use large eggs that are at room temperature. You can save the leftover egg whites for another recipe.
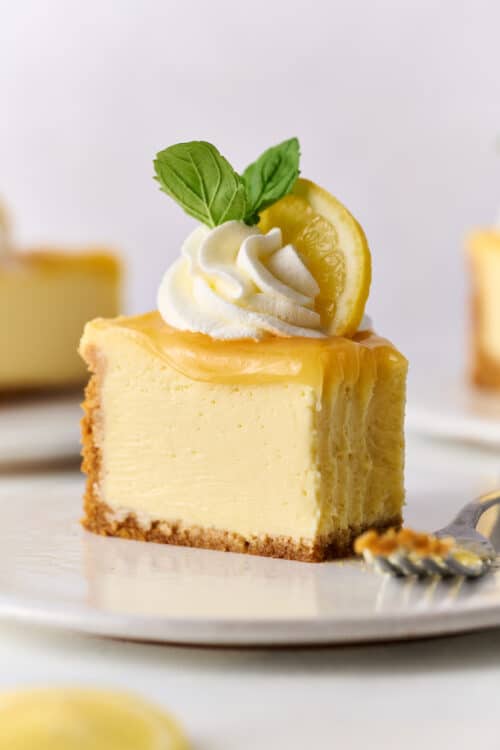
- Lemon: A touch of fresh lemon juice as well as finely grated lemon zest add a pop of freshness. Do not sub bottled lemon juice for the fresh lemon juice.
- All-purpose Flour: The secret to creamy yet dense cheesecake is a touch of flour. If you’re gluten free, you can use a 1 for 1 gluten free flour substitute.
- Heavy Cream: Also known as heavy whipping cream, do not replace with milk or half and half.
Eggs + Cream Cheese + Sour Cream + Heavy Cream: Tips for the Best Cheesecake Filling!
- For the best taste and texture, use full-fat cream cheese, sour cream, and heavy cream!
- If you cannot find sour cream, full-fat plain Greek style yogurt is the best substitute.
- Do not replace heavy cream with milk or half-and-half.
- Brick-style cream cheese works best in this recipe. My recommended cream cheese brand is Philadelphia, but use your favorite brand. Do not use low-fat cream cheese or Neufchâtel
- Room temperature ingredients are crucial to making cheesecake – including these bars! So be sure you bring your cream cheese, sour cream, eggs, yolks, and heavy cream to room temperature before you begin assembling the batter.
- Unlike many classic cheesecake recipes, there’s no need to add the eggs one at a time! However, you must beat them lightly and be careful not to over mix once you have added them to the batter.
How to Make Cheesecake Bars
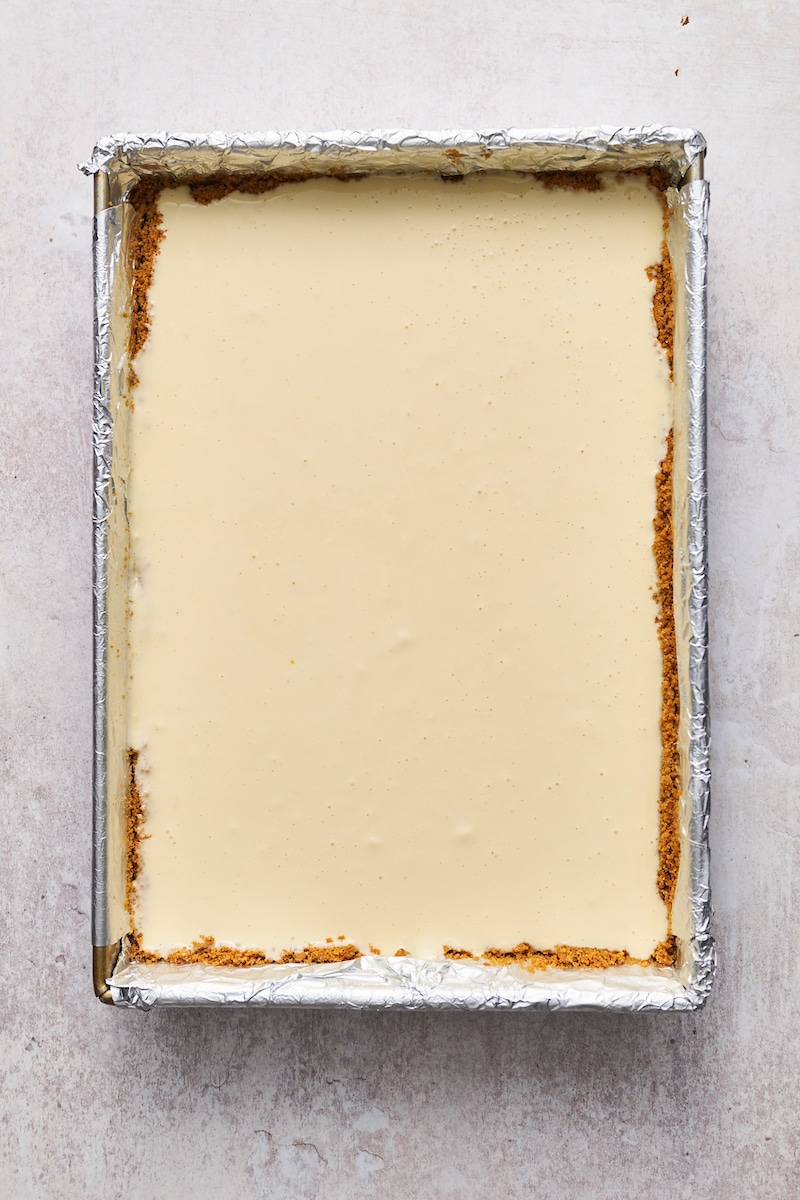
- Baking Prep: Preheat oven to 350 degrees at least 30 minutes before you plan on baking. Line a 9×13-inch baking pan with aluminum foil and spray lightly with nonstick baking spray.
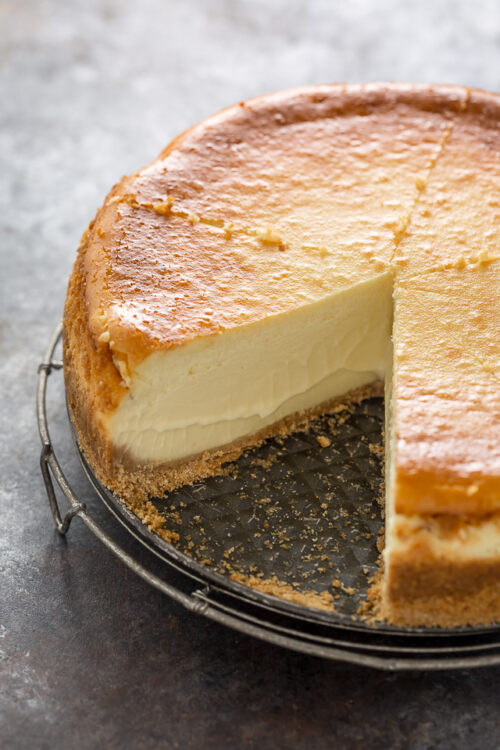
- Make the Graham Cracker Crust: Combine the graham crackers, sugar, and butter. Press the mixture into the prepared pan.
- Bake the Crust: For 10 minutes, then remove the pan from the oven and set aside on until needed. Be SURE to reduce the oven temperature to 325 degrees (F).
- Make the Cheesecake Filling: Use a blender, food processor, stand mixer fitted with whisk attachment, or a large bowl and hand held electric mixer. Then beat the cheesecake filling ingredients together until completely smooth.
- Bake the Cheesecake Bars: Pour the cheesecake filling on top of prepared crust, and spread evenly. Place the pan in the oven and bake until the edges have set but the middle is still a little jiggly. These cheesecake bars will firm up a lot as they cool, so take care not to over bake the bars.
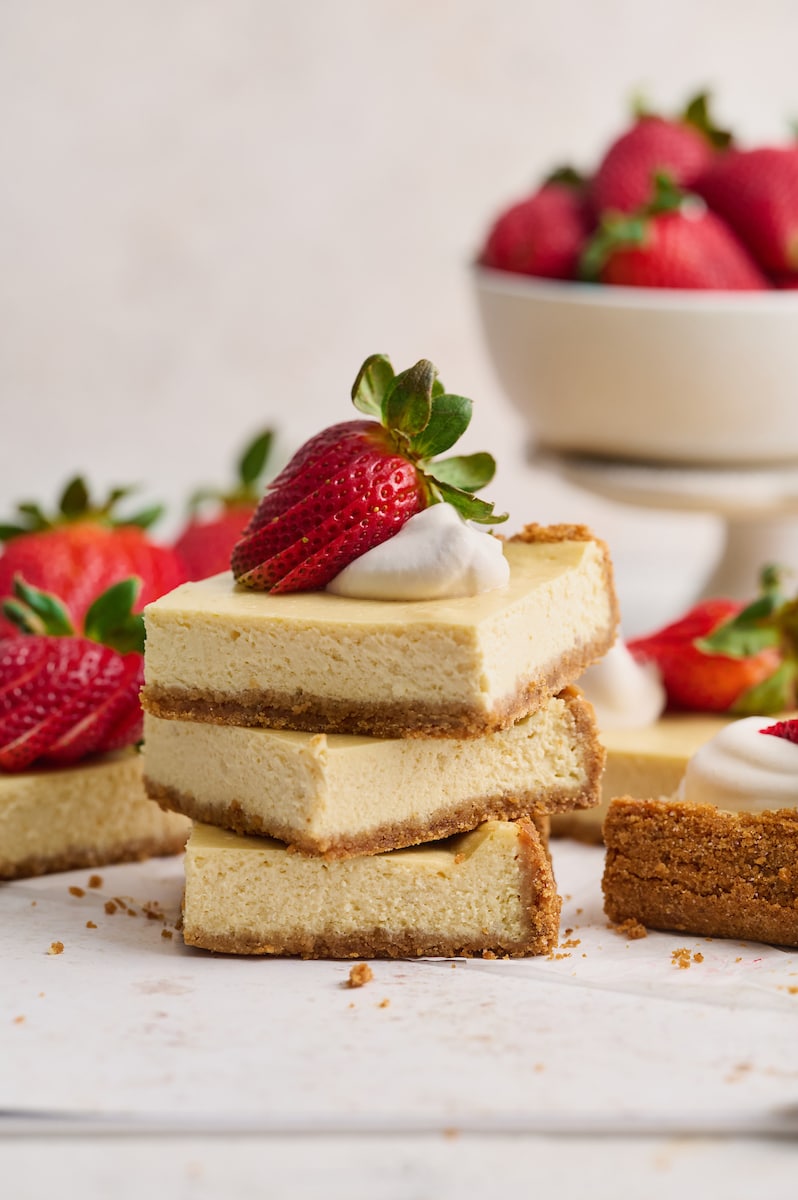
- Cool the Cheesecake Bars: Cool at room temperature then place the pan in the fridge and refrigerate for at least 6 hours – or overnight. And without any toppings, they’ll keep stored in the fridge for about 4 days.
- Slice and Serve: When you’re ready to enjoy your tasty treat, remove the pan from the fridge. Lift the cheesecake bars from the pan and transfer them to a cutting board. Use a large and sharp knife to slice the slab into squares, wiping the knife clean with a damp cloth between slices.
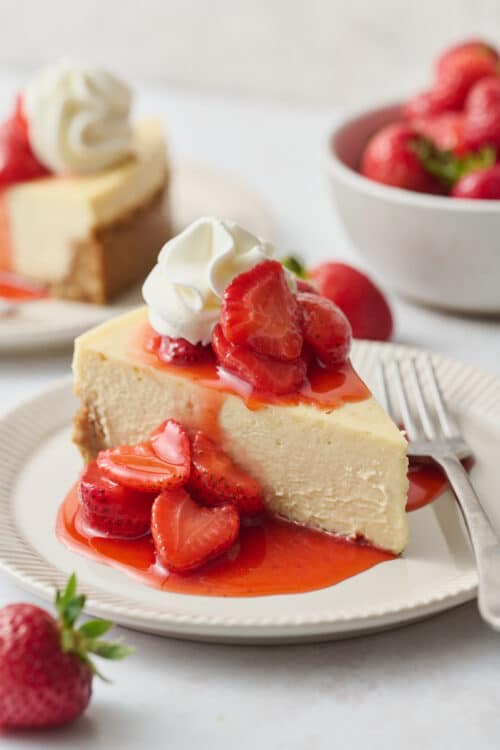
- Optional Idea: Top the cheesecake bars with swirls of freshly whipped cream and chopped strawberries. Or try salted caramel sauce and chocolate chips! These are also delicious topped with chocolate ganache or chocolate fudge sauce.
These cheesecake bars will keep, stored in the refrigerator, for up to 4 days. And if you’d like to make them even further in advance, you can freeze them and save them for a rainy day. Check out the recipe box below for the full freezing details.
Jump to the recipe below for the full recipe and step by step instructions! This post may contain affiliate links.

More Cheesecake Bars Recipes
- Pumpkin Cheesecake Bars
- Lemon Cheesecake Bars
- Easy Chocolate Cheesecake Bars
- Oreo Cheesecake Bars
- Coconut Cheesecake Bars
New York-Style Cheesecake Bars
Ingredients
For the Graham Cracker Crust:
- 2 cups graham cracker crumbs
- 1/3 cup granulated sugar
- 4 ounces unsalted butter, melted
For the New York-Style Cheesecake Bars:
- 3 8-ounce packages full-fat cream cheese room temperature
- 1 cup (227g) full-fat sour cream room temperature
- 1 and 1/4 cups granulated sugar
- 3 teaspoons pure vanilla extract
- 3 large eggs room temperature
- 2 large egg yolks room temperature
- 2 teaspoons lemon juice
- 1 teaspoon lemon zest finely grated
- 2 teaspoons all-purpose flour
- 1/2 cup heavy cream room temperature
Instructions
For the Graham Cracker Crust:
- Preheat oven to 350 degrees (F). Line a 9×13-inch baking pan with heavy-duty aluminum foil, allowing two of the sides to overlap (you want an overhang of at least 2-inches on two sides) and spray lightly with nonstick baking spray. Set aside.
- In a large bowl combine the graham cracker crumbs, sugar, and butter and, using a rubber spatula, mix well to combine. Press the mixture into the bottom – and slightly up the sides – of the prepared pan.
- Bake the crust in preheated oven for 10 minutes. Remove the crust from the oven and set aside on a cooling rack until needed.
- Reduce the oven temperature to 325 degrees (F).
For the New York-Style Cheesecake Bars:
- In the body of a high power blender, food processor, stand mixer fitted with the whisk attachment, or in a large bowl using a hand held electric mixer, beat the cream cheese and sour cream until completely smooth.
- Add sugar and vanilla and beat until smooth, scraping down the sides and bottom of bowl as needed. Add in the eggs and yolks and beat until combined.
- Add in the lemon juice and lemon zest and beat until combined. Stir in the flour, mixing just until combined.
- Using a rubber spatula, fold in the cream, mixing just until it’s incorporated in the batter.
- Pour filling on top of prepared crust, and spread evenly.
- Check to ensure your oven has cooled to 325°F, then place the pan in the oven and bake for 38 to 40 minutes, or until the edges have set and the middle is still a little jiggly. The cheesecake will firm up a lot as they cool.
- Remove the bars from the oven, and cool at room temperature for one hour. Then refrigerate for at least 6 hours, or overnight.
- When you’re ready to serve: use the foil overhang to lift the cheesecake bars from the pan and transfer them to a cutting board. Using a large, sharp knife, slice the slab into squares, wiping the knife clean with a damp cloth between slices. Serve at once.
Easy to make in a hurry and not too sweet. This will be a new go-to dessert for me!
I used greek yogurt instead of sour cream and it worked great. Big hit at my church bake sale!
So creamy!!! I topped with fresh strawberry sauce and everyone went wild.
Was feeling too lazy to make a whole cheesecake so made these instead… best choice ever!!! These are crazy delicious and way easier than making a regular cheesecake. Froze the last few bars and can’t wait to eat them.
I was craving a cheesecake and I came across this recipe. I was so lucky to come across this. The preparation was simple and the outcome was spectacular. Big hit with family and with my colleagues!
Must have made this at least 6-8 times. Its quick to assemble and NO waterbath or springform pan.
I had my daughter, who detests NY Cheesecake ( yes, she’s had Junior’s and others) try this version..she loved it.
I do cheat a bit..I don’t bother with the foil..it easily
releases.. No lemon or zest (matter of preference)
and I’ve forgotten the flour so many times I dont bother any longer
Many thanks for the wonderful recipe!
I’ve never used flour.
Only 2 teaspoons flour? Most cheesecake recipes call for 2 Tablespoons.