


 Search
Easy and infinitely adaptable, these are the best Christmas cookies to bake for the holiday season! One cookie dough gives you endless possibilities, from roll out butter cookies to thumbprint cookies to slice and bake cookies. Decorate your Christmas cookies recipe with food coloring, white chocolate, red and green sprinkles, or icing sugar. And enjoy with a glass of milk!

Easy Christmas Cookies
Thanksgiving is over, so you know what the means, right? It means it’s time to start baking Christmas cookies!
And I’m so excited to be sharing a recipe from my cookbook “Home for the Holidays” with you today! I’ll be sharing 5 recipes from the book with you this week, all which are perfect for the holiday season! And today we’re kicking things off with my famous foolproof Christmas cookies recipe.
You can use this cookie recipe as your base for almost any cookie. A lot of readers have told me they actually use this recipe year round. Because it’s perfect for Valentine’s day cookies, bridal shower cookies, and beyond.
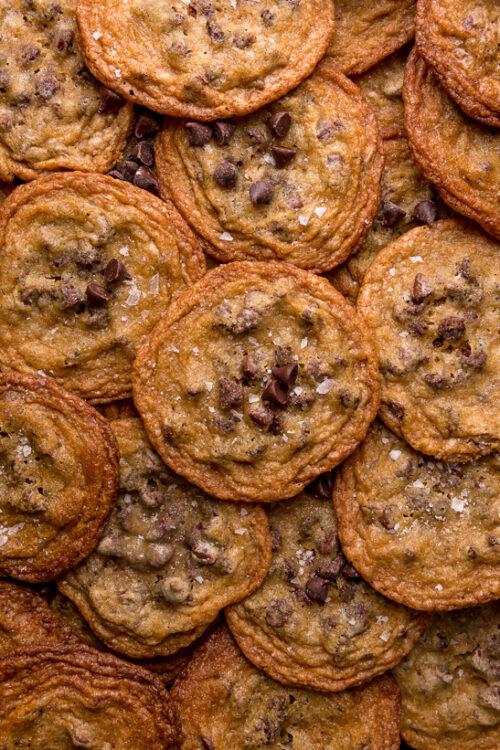
Before I had kids my favorite Christmas cookie… was chocolate chip! But now that I have two little ones, I love baking them these festive and beautifully decorated Christmas cookies. Seeing their eyes light up taking in the exciting colors and textures is so magical, and puts me in the holiday spirit.

They’re also so fun to make and decorate together as a family! And did I mention they’re super easy?! Because they are! But perhaps my favorite part about this recipe is that one batch of dough can make 4 different types of Christmas cookies!
Christmas Cookies You Can Make with This Cookie Dough
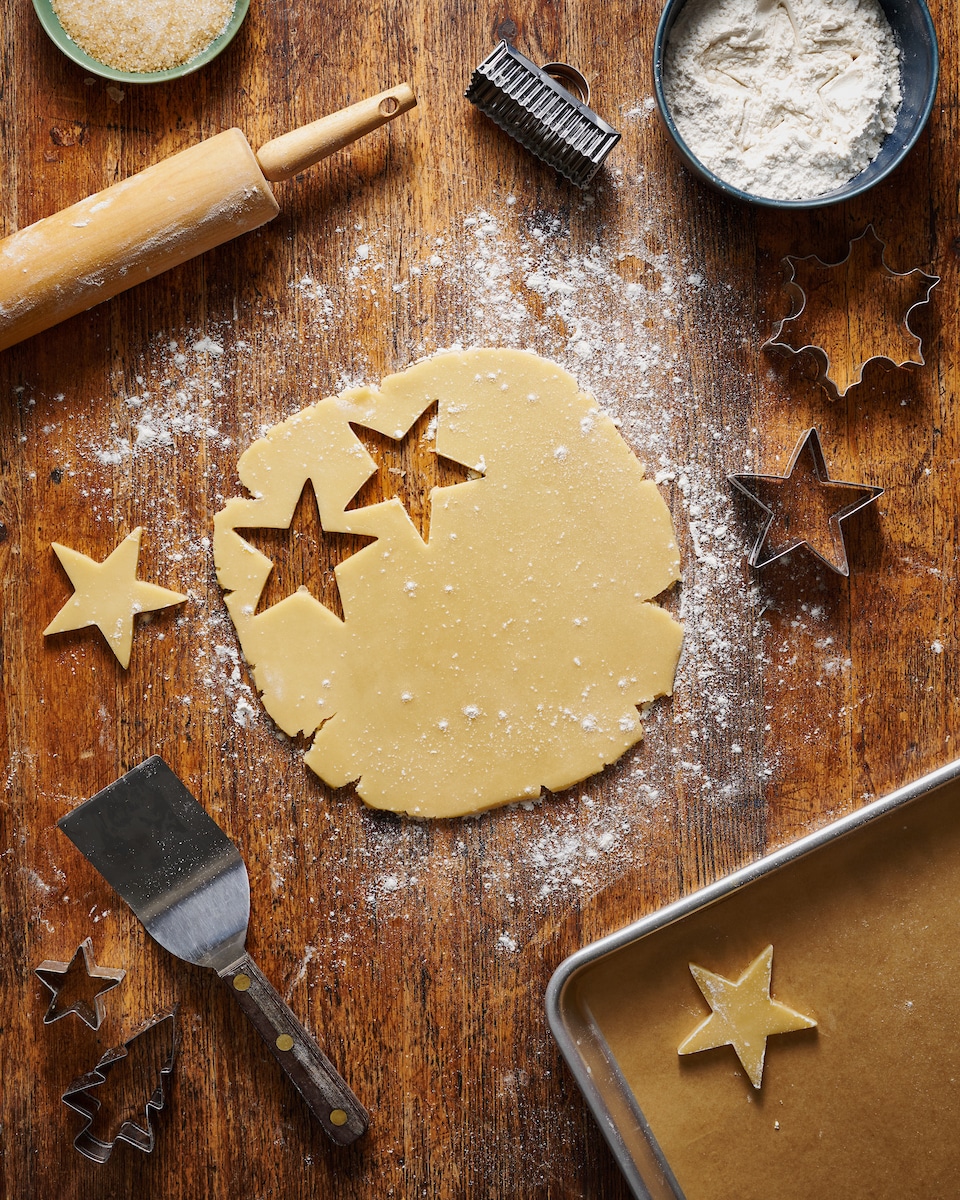
- Cut-Out Cookies: If you like traditional roll-out sugar cookies, you can roll this cookie dough out and cut it with cookie cutters. They’re sweet and buttery and fun to decorate! My kids love making Christmas trees, angels, and snowmen using this method. And we might try candy canes and snowflakes this year!
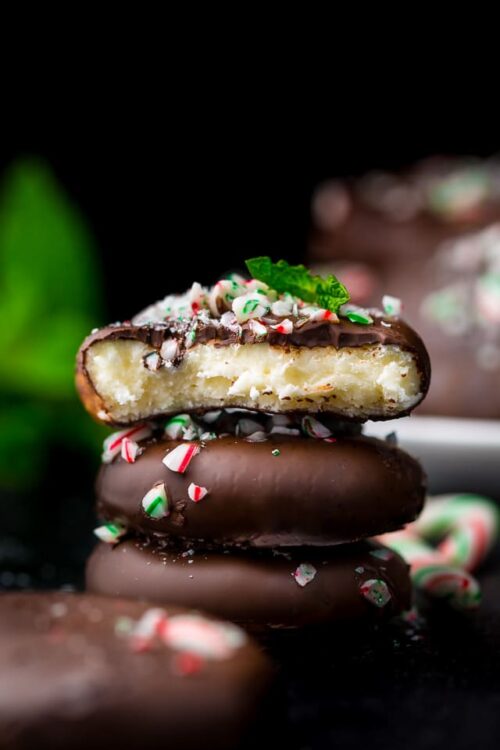
- Slice and Bake Cookies: Instead of rolling the cookie dough out, you’ll form it into a log before chilling. Then you’ll chill as directed, then once chilled, use a sharp knife to slice it into rounds before baking. You can dip the cookie rounds into melted dark or white chocolate and decorate with red and green sprinkles. Or you can use crushed candy canes, nuts, etc.
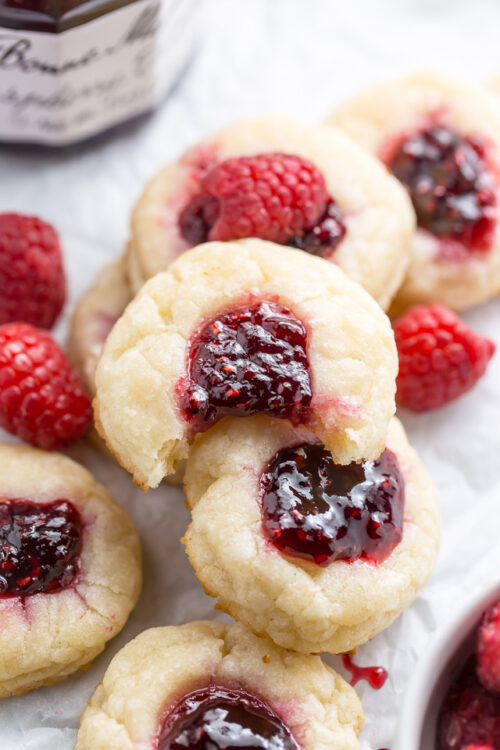
- Thumbprint Cookies: Instead of chilling the cookie dough, you can simply scoop the dough into tablespoon sized portions. Then use your thumb to press an indentation in the middle of each round of cookie. Partially bake the Christmas cookies, then fill with jam, jelly, or Nutella and continue baking. My kids love making raspberry and blackberry thumbprints year round!
- Sandwich Cookies: This method is similar to making sandwich cookies, but you’ll roll the cookie dough slightly thinner. Once you bake the cookies and cool them, spread on side with jam, jelly, or Nutella, then press another cookie on top. This makes a deliciously crunchy Christmas cookie sandwich. You can also dip one side of the sandwich cookies into melted chocolate, if desired.
You can see from the ideas above that there are many ways to change this recipe! I will usually make 3 or 4 batches of the dough and store it in the fridge. Then make tons and tons of variations for our holiday cookie boxes.
Christmas Cookie Dough Ingredients
- Butter: Unsalted butter is my preference but in a pinch, use salted butter and omit the salt called for. Because butter is a main ingredient, I suggest using high-quality butter, such as Plugra, Kate’s, Kerrygold, etc.
- Granulated Sugar: I don’t suggest subbing brown sugar as it will change the color and texture of the cookies. White sugar, aka granulated sugar, works best.
- Eggs: This recipe uses whole eggs and egg yolks. Do not sub all whole eggs. You may save your egg whites for another recipe.
- Vanilla: Adds rich vanilla flavor to the Christmas cookies. Be sure to use pure vanilla extract, not artificial vanilla.
- Flour: This recipe has tested only with all-purpose flour. For best results, use all-purpose flour and weigh it using a digital kitchen scale. I don’t suggest using whole wheat flour or plant/nut flours.
- Salt: A small amount of salt balances sweetness and enhances the other flavors in the cookie dough.
If you’d like, you may alter the recipes flavor by adding a small amount of extract. The most common extracts I add are almond extract, lemon extract, orange extract, maple extract, and peppermint extract. Just keep in mind adding extract will alter the taste of the entire batch of cookie dough.
If you’d prefer to flavor just a small amount of cookie dough, divide the cookie dough into 2 or 3 portions. Then add the extract to part of the cookie dough, gently kneading it in. Just be sure not to overwork the dough or your cookies could become tough and dry.
How to Make Christmas Cookies
Making incredible Christmas cookies is easier than you might think. Just follow the easy steps below and you’ll be on your way to becoming star baker this holiday season! These cookies are so easy but do require a few steps to ensure they come out delicious and picture perfect.
- Make the Cookie Dough: Use an electric mixer to beat the butter and sugar until light and fluffy. You can use a stand mixer fitted with a paddle attachment or an electric hand mixer. Add the eggs and vanilla, then beat in the flour and salt. The cookie dough should be stiff but not dry.
- Knead the Cookie Dough: You’ll only need to knead the cookie dough for 30 seconds or so, just until it comes together. Avoid over working the dough or it could become tough and yield dry cookies.
- Chill the Cookies Dough: Divide the cookie dough in half and wrap tightly in plastic wrap. Refrigerate the dough for at least 3 hours before baking. If you skip this step, your cookie dough may be too soft and spread excessively in the oven when baking. So it’s always a good idea to chill before baking!
- Prep: 30 minutes before you plan on baking your Christmas cookies, preheat the oven and line two baking sheets with parchment paper. If you only have one cookie sheet, don’t worry. Just bake one tray of cookies at a time.
- Roll the Dough: Use a rolling pin to roll the dough out to ¼” thickness. Use cookie cutters to cut out as many shapes as you can. Then place the shapes to the prepared baking sheets and bake until cookies are lightly golden. Roll scraps of cookie dough to bake even more cookies!
- Cool the Cookies: On the baking sheet for 15 minutes then transfer to a cooling rack to cool completely. Don’t attempt to decorate hot or even warm cookies, as the icing or frosting will melt right off. You can place these cookies in the fridge to cool down faster.
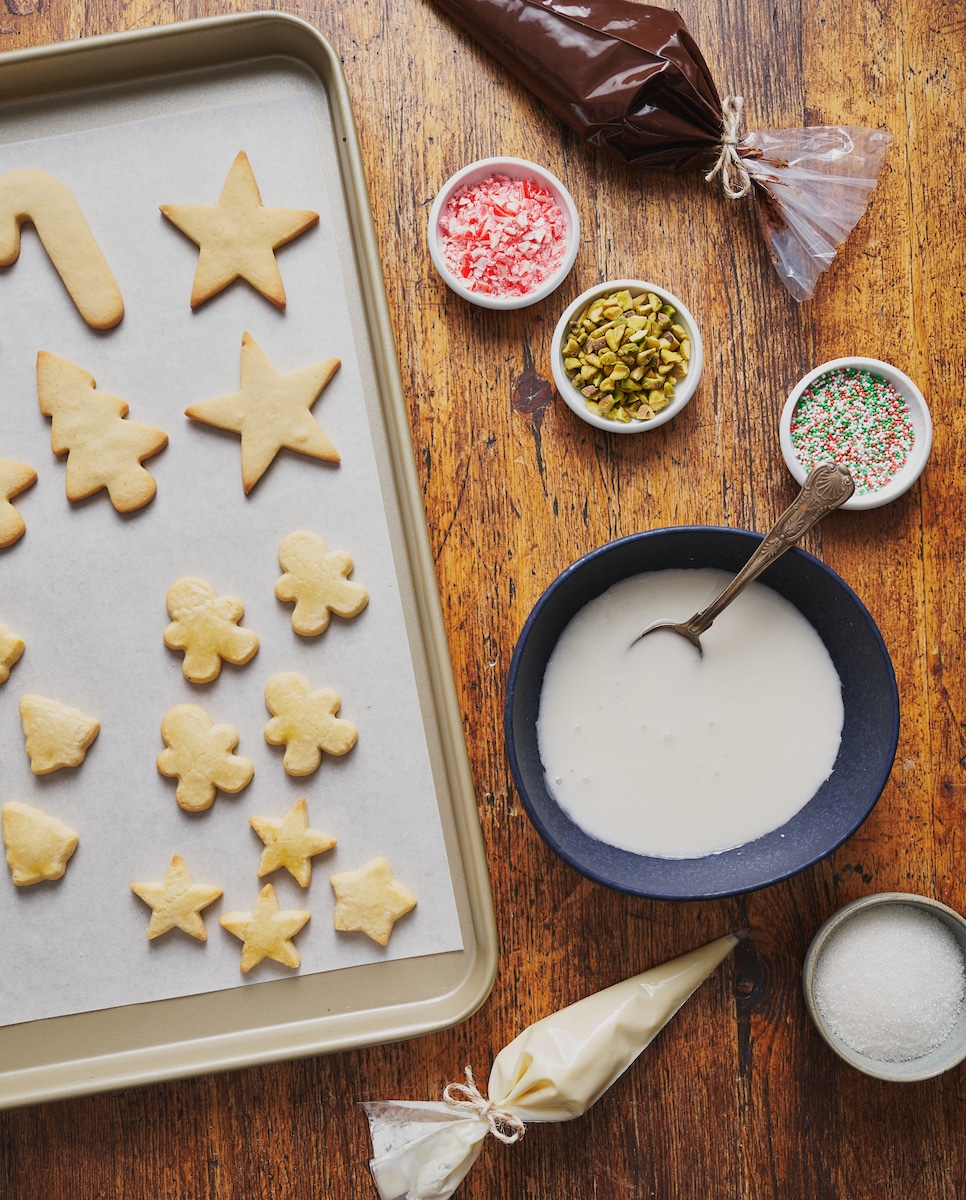
- Decorate the Cookies: Once the cookies are cool, decorate them to your hearts delight! Follow my methods and ideas for decorating, or use your own ideas and inspirations!

Christmas Cookie Tools & Decoration Ideas
- Rolling Pin: It doesn’t need to be fancy, but you will need a rolling pin to roll out the cookie dough. In a pinch, I’ve used a wine bottle but a large glass bottle or reusable water bottle could also work. If using a non-traditional object to roll the dough, place a piece of parchment between the object and the cookie dough.
- Cookie Cutters: Use any shape cookie cutters you’d like. You can use just one design or use a variety of cookie cutters such as snowflakes, mittens, angels, stars, Christmas trees, or candy canes. Or, if you don’t want them to be Christmas themed, used hearts, circles, flowers, etc. The options here are almost endless!
- Candy Canes: I love using crushed candy canes to decorate wet chocolate. It looks so pretty and festive! You could also mix crushed candy canes and mini chocolate chips into the cookie dough and make thumbprints.
- Nuts: Pistachios, pecans, walnuts, almonds, peanuts, hazelnuts, or whatever nut floats your boat. Obviously this is not a good option for anyone allergic to nuts!
- Sprinkles: Use whatever color sprinkles get you excited! We love using red and green and blue and silver. Or if you’d like to avoid food coloring, you could use all white.
- Nonpareils: Red and green nonpareils look so cute sprinkled on top of these cookies and add a delicious crunch. This is one of my favorite additions to Christmas cookies!!!
- Jam: If you are making slice and bake cookies or sandwich cookies, you can fill them with raspberry jam, apricot jam, or Nutella. Avoid thin jellies, which could leak from the middle of the thumbprint cookies or sandwich cookies.
- Icing: A combination of confectioner’s sugar and water creates a simple and easy to use glaze. You can dip the cookies in the glaze or pour it into small bottles and pipe it on the cookies. You could also make a thicker American style frosting or cream cheese frosting for the sugar cookies.

Tips for Working the Cookie Dough
- If the cookie dough is too sticky, place it back in the fridge to chill for another 30 minutes. Then try again, continuing to chill the cookie dough until it’s soft and rollable, but not overly sticky.
- If it seems way too sticky despite chilling, add a 1/4 cup of flour. Knead the flour into the dough and chill. Only add more if absolutely needed! As too much flour creates dry and bland cookies.
- Roll the cookie dough out on a lightly floured surface to prevent sticking. Or, roll it out on parchment paper or a silpat nonstick mat.
- Don’t roll the cookie dough too thin. You want it around a 1/4-inch. This makes it easy to transfer to the baking sheet – and creates beautifully thick cookies. Roll the cookie dough too thin and it’ll be hard to transfer them to the baking sheet in one piece.
- To maximize the amount of cookies, re-roll scraps of cookie dough into a disc. Then wrap the dough in plastic wrap and chill for 30 minutes. Then use the cookie dough as directed in this Christmas cookie recipe. This allows you to get so many more cookies from this recipe!
Watch the Bake Time
Bake times are always just estimates! Bake time can vary for many reasons, from the pan you’re using to your ovens actual temperature. So always keep an eye on your cookies and use your senses to tell when they’re done baking. As soon as they are lightly golden brown, I suggest pulling them out of the oven.
If the cookies seems to be baking up too dark or too fast, lower your oven by 10 to 25 degrees. As soon as they are lightly golden brown, I suggest pulling them out of the oven.

Can I Freeze the Cookie Dough?
Yes, you can absolutely freeze this cookie dough! In fact, making and freezing cookie dough is a brilliant way to get ahead on your holiday baking. Just follow my notes below to freeze cookie dough like a pro!
- Follow the directions in the recipe box below, then freeze the discs of cookie dough for up to 2 months.
- I suggest wrapping the discs of cookie dough in saran wrap, then placing them in a ziplock freezer safe bag.
- Press all excess air out of the bag and tightly seal the bag.
- Write the date and name of recipe on the bag and place in the freezer for up to 2 months.
- When you’re ready to bake, remove the plastic bag from the freezer and transfer it to the fridge. Allow the cookie dough to thaw overnight, or for at least 8 hours, before placing it at room temperature.
- Allow the cookie dough to sit for 15 minutes then roll and bake as directed in the recipe box!
If you’d rather not freeze the cookie dough, you can make it and keep it in the fridge for up to 5 days before baking!
More Easy Christmas Cookie Recipes
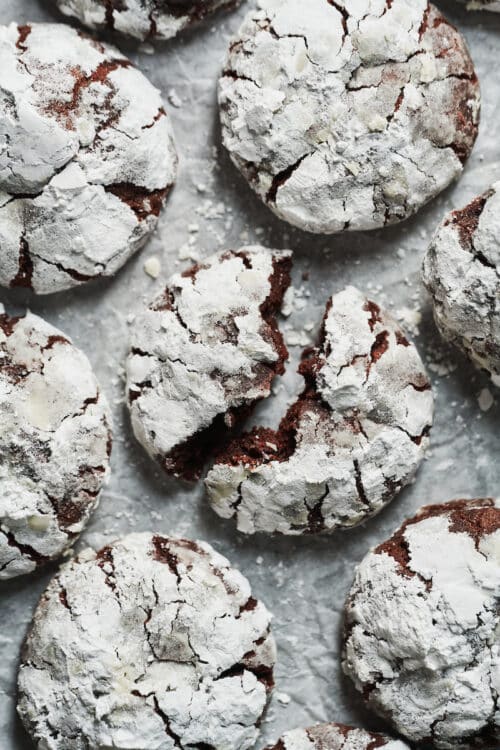
- Chocolate Crinkle Cookies
- Special Edition Christmas Cowboy Cookies
- Brown Butter Gingerbread Men
- Santa’s Favorite Peanut Butter M&M Cookies
- Raspberry Thumbprint Cookies
- Iced Lemon Sugar Cookie Hearts
- Frosted Gingerbread Cookies
No matter what cookie recipe you bake this holiday season, we’re wishing you the sweetest season yet! May the Christmas spirit fill your life with love and happiness… and cookies!

The Best Christmas Cookies Recipe
Ingredients
Cookie Dough:
- 1 cup (227g) unsalted butter room temperature
- 1 cup (199g) granulated sugar
- 1 large egg room temperature
- 2 large egg yolks room temperature
- 3 teaspoons vanilla extract
- 3 and 1/4 cups (380g) all-purpose flour
- 1/4 teaspoon salt
Easy Glaze:
- 1 cup (114g) confectioners' sugar sifted
- 2 Tablespoons (28ml) milk
Chocolate Coating:
- 8 ounces semi-sweet chocolate finely chopped
Garnish Ideas:
- crushed candy canes
- chopped pistachios
- sprinkles: red and green, blue, silver, white, gold, etc
- red and green nonpareils
- raspberry jam
- Nutella
- confectioners' sugar
Instructions
For Roll-Out Cookies:
- In the bowl of a stand mixer fitted with the paddle attachment, or in a large bowl using a handheld electric mixer, beat the butter and sugar on medium-speed until combined. Increase to medium-high speed and continue beating until pale and fluffy, about 1 minute.
- Reduce to medium-speed, then add in the egg, and egg yolks, beating until well combined, and scraping down the sides and bottom of the bowl as needed. Beat in the vanilla.
- On low speed, gradually add in the flour and salt, and beat until combined. Your dough should be stiff.
- Sprinkle 2 Tablespoons of flour on a clean work surface. Scrape the cookie dough onto the surface and gently knead for 30 seconds. Divide the dough in half, (443 grams each disc). Press each portion of cookie dough into a 6”-inch disc.
- Wrap dough tightly in plastic wrap and refrigerate for at least 3 hours (or up to 2 days).
- When you're ready to bake, preheat the oven to 350 degrees (F). Line two large baking sheets with parchment paper.
- Working with one disc at a time, unwrap the dough and transfer to a lightly floured surface. Use a rolling pin to roll the disc out to ¼” thickness. Then use cookie cutters to cut out as many shapes as you can.
- Carefully transfer the shapes to the prepared baking sheet, leaving 1” between cookies. Bake for 12 minutes, or until lightly golden.
- Cool cookies on the baking sheet for 15 minutes before transferring to a cooling rack to cool completely. Repeat with remaining dough. Any dough scraps can be chilled and carefully rolled out again.
- Once the cookies are cool, glaze and decorate!
Glaze:
- In a wide, shallow bowl, whisk together the confectioners’ sugar and milk until well combined. You’re looking for a thick but pourable consistency.
- Dip the top of a fully cooled cookie into the glaze, allowing excess glaze to drip back into the bowl before transferring it to a cooling rack.
- Sprinkle with crushed candy canes, nuts, or sprinkles. Repeat with as many cookies as desired. Allow the glaze to set for at least 1 hour before serving.
Chocolate Coating:
- Melt the chopped chocolate in a double boiler or in the microwave. If using the microwave method, place the chopped chocolate in a medium heat-proof bowl. Melt in the microwave, on low power, in 15 second increments, stirring after each increment until completely melted and smooth.
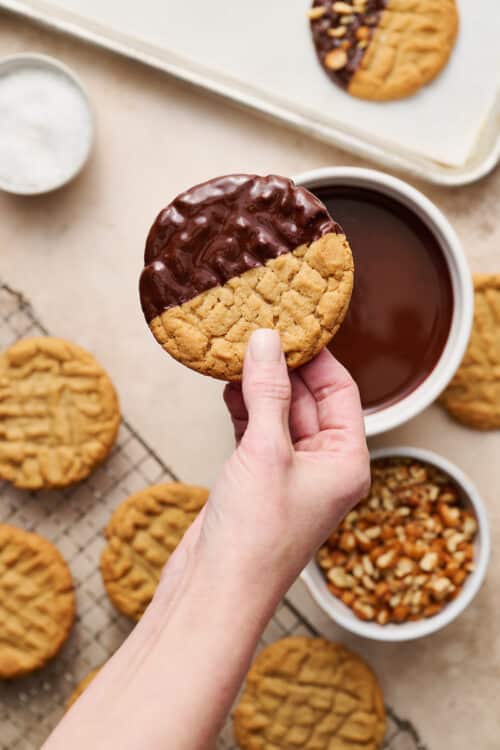
- Dip the cookies halfway into the melted chocolate, allowing excess chocolate to drip back into the bowl, before transferring it to a cooling rack. Sprinkle with crushed candy canes, nuts, or sprinkles. Repeat with as many cookies as desired. You can also dip the top fully in chocolate for a different look.
- Allow the chocolate to fully set before serving, about 1 hour.
Slice & Bake Cookies:
- At step 4, roll each portion of dough into a log that’s roughly 2”-inches in diameter.
- Wrap the dough tightly in plastic wrap and refrigerate for at least 3 hours (or up to 2 days).
- Use a sharp knife to slice the logs of cookie dough into 1/4" rounds. Place the cookies 1/2" apart on the prepared baking sheet, and bake at 350 for 12 minutes, or until lightly golden.
- Cool for 15 minutes on the baking sheet, then transfer to a cooling rack to cool completely. Dip half of each cookie in the chocolate coating, if desired, and sprinkle with candy, sprinkles, or nuts.
Thumbprint Cookies:
- After making the dough, use a small spring loaded spoon to scoop out a heaping Tablespoon (about 30 grams) of the dough. Roll it into a ball and transfer to the prepared baking sheet. Repeat with all dough, leaving 2-inches between each cookie for spreading.
- Use your thumb to make an indentation in the center of each cookie and bake for 10 minutes.
- Remove from the oven and fill each indentation with a teaspoon of jam, then bake for 5 more minutes, or until lightly golden brown. Cool for at least 1 hour on the baking sheet before serving.
Sandwich Cookies:
- Follow instructions for slice and bake cookies, but roll the dough out slightly thinner, getting it to ⅛” thickness. Use round or scalloped round cookie cutters to cut out an even amount of rounds.
- Carefully transfer the rounds to the prepared baking sheet, leaving 1” between cookies. Bake for 8 minutes, or until lightly golden.
- Cool cookies on the baking sheet for 30 minutes before transferring to a cooling rack to cool completely.
- Once completely cool, spread one cookie with a teaspoon or two of nutella or raspberry jam. Sandwich another cookie on top and lightly press together. Repeat with all cookies.
Delightful cookies
I wish I tried this recipe earlier! It’s so easy and definitely replacing my old Christmas cookie recipe. Which honestly seems so bland in comparison with these buttery cookies!
I love how this Christmas cookies recipe offers so much versatility with one dough! The idea of creating different cookie variations like thumbprints and slice-and-bake is brilliant. I can’t wait to try decorating them with festive colors for the holidays!
I used lime zest and homemade blackberry jam (used the sandwich cookie method). Just delicious!!!
Oooh I love this idea! Blackberry and lime is one of my favorite combinations!
These look absolutely perfect! I’m planning to make them for a cookie exchange — do you think they freeze well if I make them a week in advance?
So buttery and delicious! Didn’t spread too much like other cookies.
So happy you enjoyed the buttery flavor! And that they didn’t spread too much!
I cheated and used this cookie dough to make heart cookies for a bridal shower. So easy and they tasted delicious! Will definitely use again for Christmas cookies.
I have your cookbook and can vouch for these cookies! They’re so buttery, crispy, and easy to make. My personal favorite way to use the dough is to make cut out cookies but the slice and bakes are also really good!
I have your cookbook and can vouch for these cookies! They’re so buttery, crispy, and easy to make. My personal favorite way to use the dough is to make cut out cookies but the slice and bakes are also really good.