


 Search
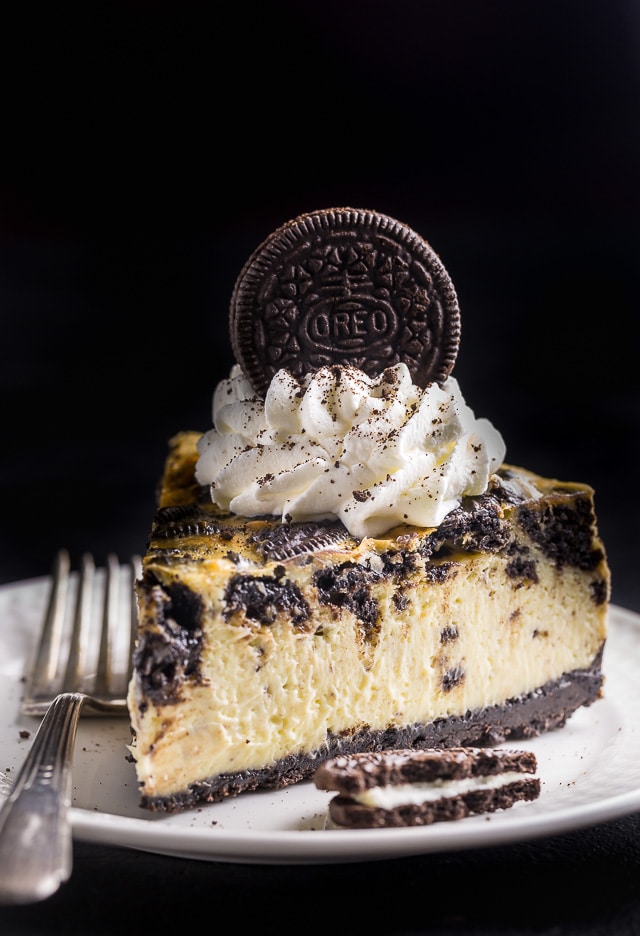
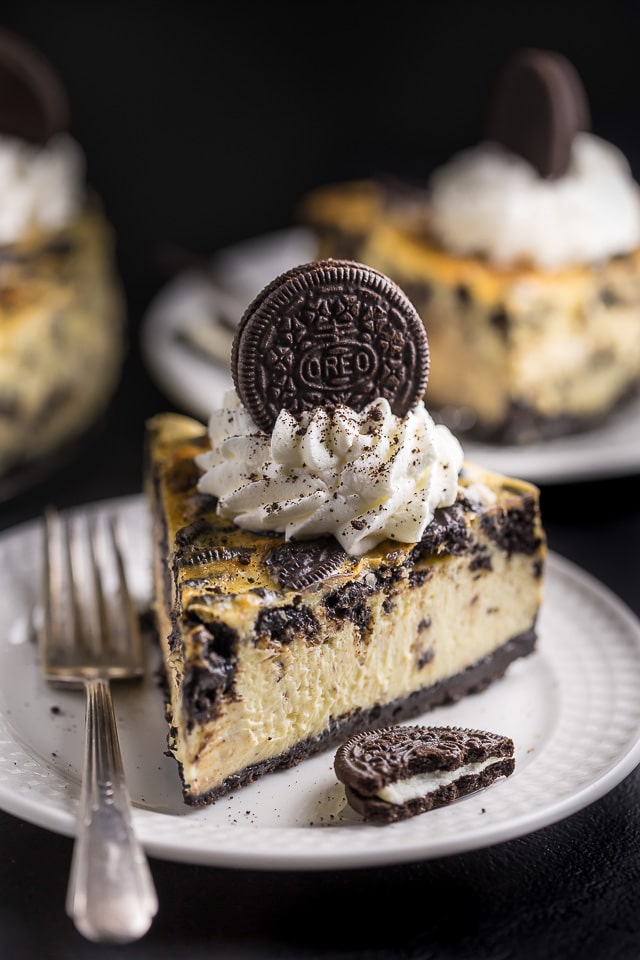
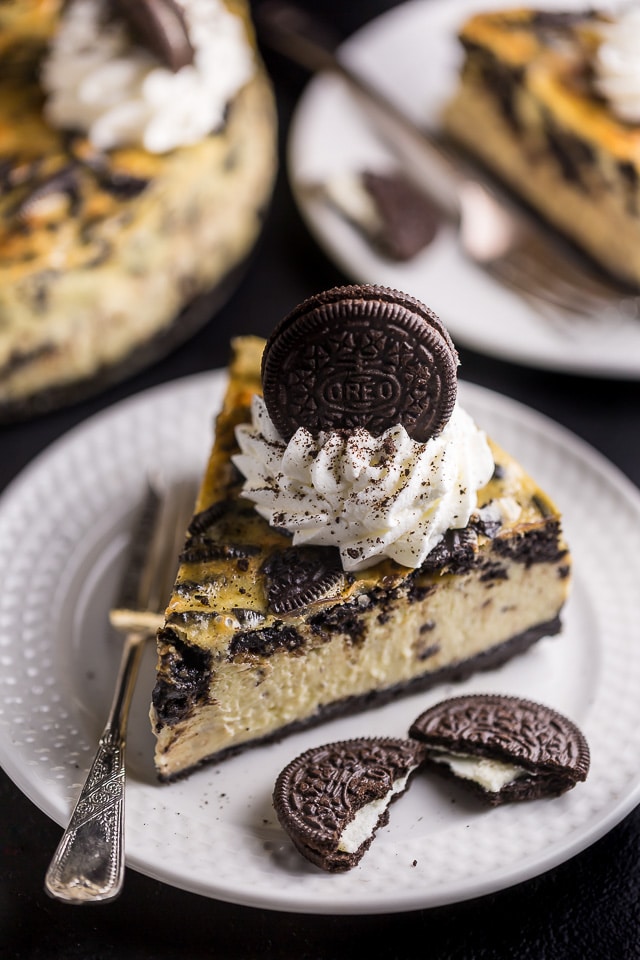
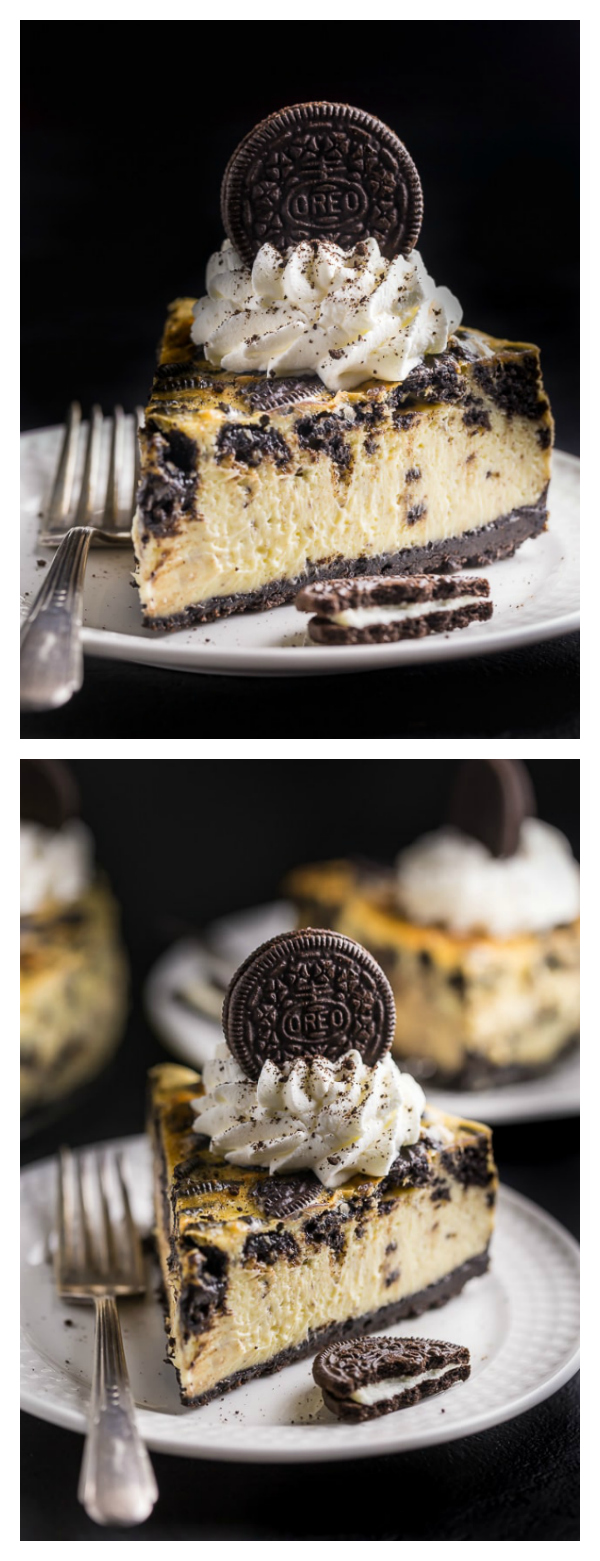
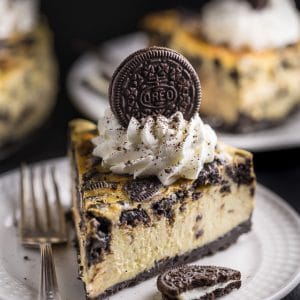
What makes this Oreo cheesecake recipe extra special? An Oreo cookie crust, Oreo cookie cheesecake filling, plus whipped cream and extra Oreo cookies on top! A must-try dessert for oreo cookie lovers.
I drew inspiration for today’s Oreo cheesecake recipe from my days slinging cheesecake at the CCF!
Funny enough, the cheesecake factory Oreo cheesecake wasn’t my favorite. But this homemade Oreo cheesecake recipe is one best cheesecakes I’ve ever made! I used the batter for my tried and true New York-Style Cheesecake, and then added a ton of Oreo’s! Because why mess with perfection, right?
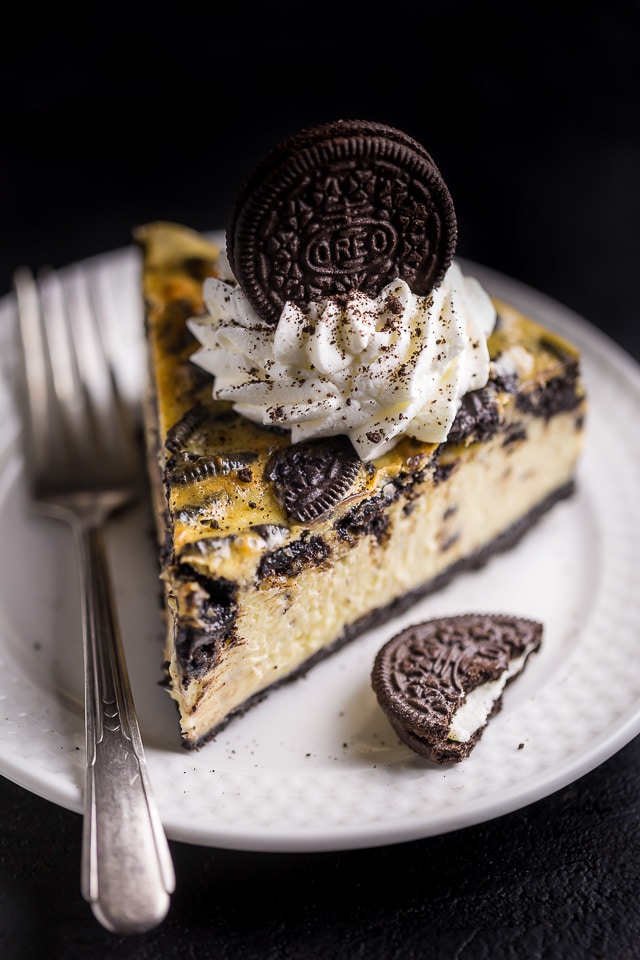
Of course, I also added an Oreo cookie crust. And then added some more Oreo cookies on top! Because an Oreo cheesecake recipe should use as many Oreo cookies as possible, right? If you’re interested in making this already decadent cheesecake even more sinful, try topping it with chocolate ganache.
Ingredients for Oreo Cheesecake
- Oreo Cookies: You’ll use oreo cookies in the oreo cookie crust and in the cheesecake filling. For the oreo cookie crust, you’ll pulse the cookies into fine crumbs. Do not remove the cream filling. Use any extra oreo cookies in my oreo brownies!
- Butter: Unsalted butter works best, but you can use salted butter in a pinch. Don’t use oil instead of butter, it will not work!
- Cream Cheese: Use brick-style full-fat cream cheese. And bring the full-fat cream cheese to room temperature before use.
- Sour Cream: Full-fat sour cream works best, but in a pinch, you can sub full-fat plain Greek yogurt.
- Granulated Sugar: Do not reduce the sugar or sub with brown sugar or sugar alternatives.
- Eggs: You’ll use 3 large eggs plus 2 large egg yolks. Bring your eggs to room temperature before baking!
- Heavy cream: Also known as heavy whipping cream. Do not replace this ingredient with milk or half and half.
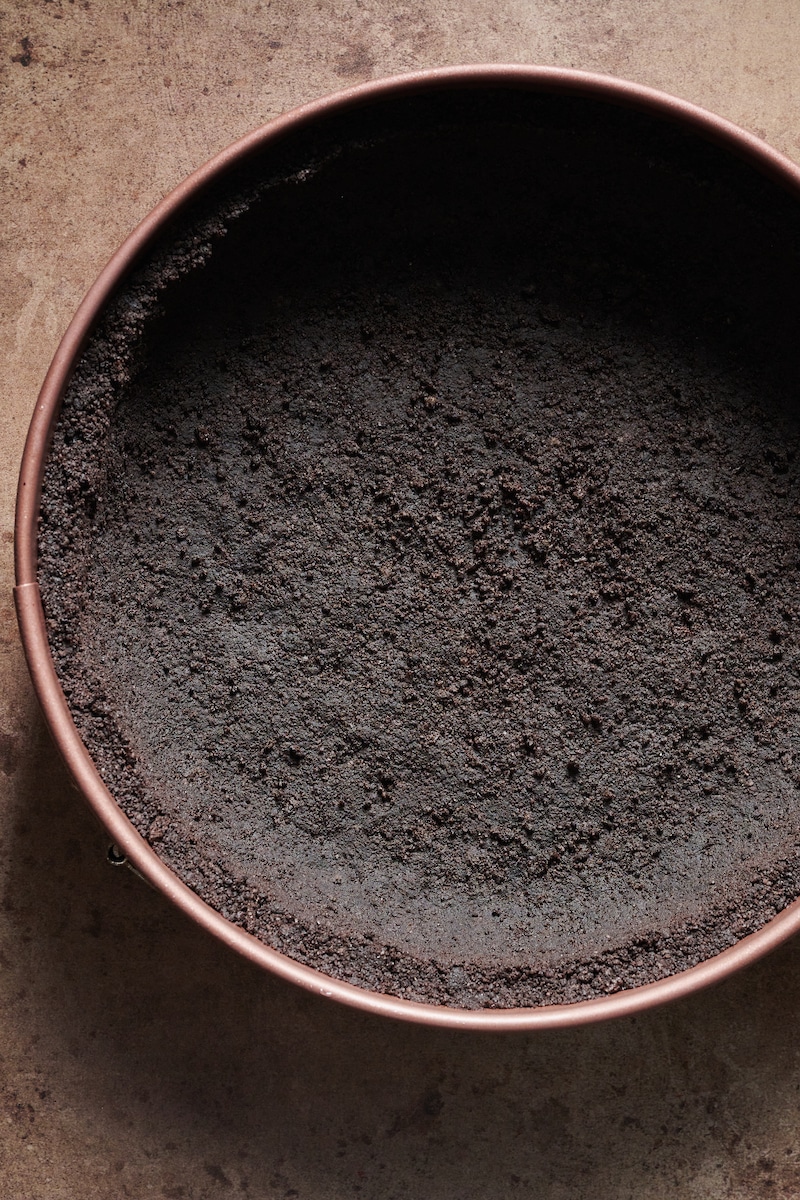
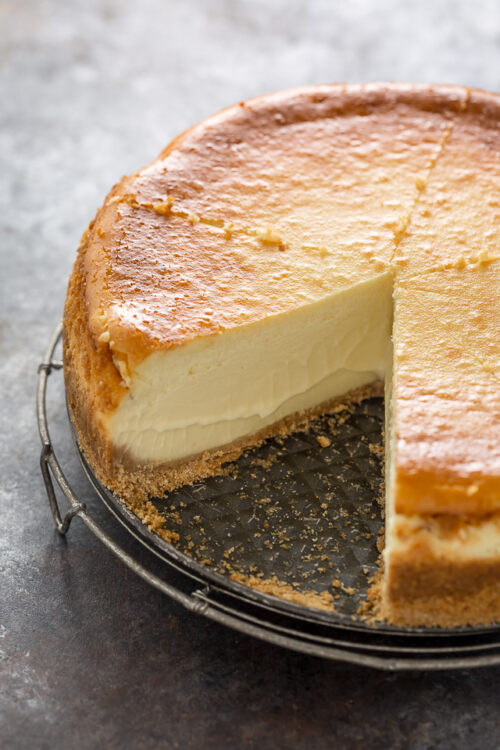
Make the Oreo Crust
To make the Oreo cookie crust you’ll need melted butter and crushed Oreo cookies. Yep – just two ingredients for this homemade Oreo cookie crust! You do not need to remove the cream from the center of the cookies.
- Place the whole oreo cookies in a blender or food processor and pulverize them into fine crumbs. Once you crush them, combine them in a large bowl with the melted butter. Then press this mixture into your prepared pan.
- When pressing the Oreo cookie crust down into the bottom of the springform pan, press it down firmly. A firmly packed crust will bake up nice and thick, and most importantly, won’t crumble too much when sliced.
- I recommend pressing the crumbs down in the center of the pan. Then work the crust out and just a little bit up the edges. Use the back of a spoon to do this or wrap your hand in a piece of plastic wrap (also known as saran wrap) and do it manually.
How to Make Oreo Cheesecake
- Prep the Pan: Wrap a spring form pan with heavy-duty aluminum foil and set aside until needed.
- Oreo Cookie Crust: Make the oreo crust and bake for 12 minutes. Set the crust aside while you make the cheesecake filling.
- Oreo Cheesecake Filling: Use a blender or food processor to make the cheesecake filling. Stir in the oreo cookies. Pour the cheesecake filling into the prepared pan.
- Water Bath: Fill a large rimmed baking sheet or roasting pan with a few inches of hot water. Place the cheesecake inside the pan, then carefully place the pan in the oven.
- Bake: Bake your oreo cheesecake for 1 hour and 20 minutes. Then turn off the oven, but leave the cheesecake in the oven. Allow it to cool in the oven, without opening the oven door, for 30 minutes.
- Cool: Allow the oreo cheesecake to cool completely at room temperature. It can take 2 hours for it to cool completely. Then place the oreo cheesecake in the oven and chill for 6 hours.
Room Temperature Ingredients for Oreo Cheesecake
- Room temperature ingredients to making any cheesecake filling! So bring your cream cheese, eggs, sour cream, and heavy cream to room temp before you begin making the Oreo cheesecake batter.
- The cream cheese especially needs to be room temperature or softer before use! Otherwise it’ll clump up and could even damage your blender or food processor.
- To quickly bring your eggs to room temperature, place them in a warm bowl of water for 20 minutes. Dry them, then use as directed in the Oreo cheesecake filling.
Oreo Cheesecake Filling Tips
- Important step: beat the cream cheese and sour cream until smooth before adding the other ingredients.
- No matter what you use to make the cheesecake batter, be sure to scrape down the sides of the container while you’re blending. This will help you avoid getting “surprised” by large lumps of cream cheese later.
- Once the cheesecake batter is silky smooth and lump free, you’ll add in the sugar, and then the eggs one at a time. Before pouring in the cream and then finally folding in the Oreo cookies. If you want an extra chocolate fix, you could also throw in a handful of chocolate chips at this point. But this is optional.
Is a Water Bath Necessary?
And finally, we need to talk about the dreaded water bath. I say dreaded because I know so many folks fear making one or have had really bad experiences with them. But baking your oreo cheesecake in one is a must if you want silky smooth, creamy, crack free results.
- My biggest tip here is to wrap your pan in multiple layers of extra wide heavy duty aluminum foil.
- Push the cheesecake into the oven carefully, so that the water doesn’t move around too much.
- Many reader’s have told me they sometimes use a crockpot liner in addition to ensure no water gets in. I’ve never tried this but wanted to put the idea out there in case you want to give it a shot.
Let Your Oreo Cheesecake Cool!
When you remove the cheesecake from the oven, it will need to cool – in the pan – for at least 30 minutes before being covered and placed in the fridge to chill completely. You will keep the oreo cheesecake in the pan until it’s completely chilled. The remove the sides of pan and serve.
This Oreo Cheesecake can be baked, fully cooled, and frozen for up to two months! Making it a perfect holiday dessert option.
Simply thaw the night before you plan on serving! And don’t be surprised when your friends think you bought this oreo cheesecake from a fancy bakery. It’s seriously that impressive!
More Oreo Recipes:
New York-Style Oreo Cheesecake
Ingredients
For the Oreo Crust:
- 24 Oreo cookies
- 1/4 cup (4 Tablespoons) unsalted butter, melted
For the New York-Style Oreo Cheesecake:
- 3 (8 ounce) packages full-fat cream cheese, very soft
- 1 cup full-fat sour cream
- 1 and 1/4 cups granulated sugar
- 3 large eggs plus 2 large egg yolks, at room temperature
- 1/2 cup heavy cream
- 16 Oreo cookies, roughly chopped, divided
Instructions
Prepare the Pan:
- Preheat oven to 325 degrees (F). Wrap a 9″ spring form pan in multiple layers of heavy-duty tin foil. Lightly grease the pan with non-stick spray and set aside until needed.
For the Oreo Crust:
- Place the Oreo cookies in the body of a small food processor – or blender – and pulse until the cookies are fine crumbs. Pour the crumbs into a large mixing bowl and stir in the melted butter; mix well to combine. Scrape the mixture into the prepared pan and firmly press the crust down the center of the pan and slightly up the sides.
- Bake in preheated oven for 12 minutes.
- Remove from oven and set on a cooling rack until needed.
For the New York-Style Oreo Cheesecake:
- In the body of a high power blender, food processor, stand mixer fitted with the whisk attachment, or in a large bowl using a hand held mixer, beat the softened cream cheese and sour cream until completely smooth, scraping down the sides and bottom of bowl as needed
- Add in the sugar and beat smooth. Add in the eggs and yolks, one at a time, beating well after each addition.
- Pour in the cream and beat just until it’s evenly incorporated in the batter. Turn the mixer off and, using a rubber spatula, fold 3/4 of the chopped Oreo cookies into the batter.
- Pour filling into prepared crust and spread evenly. Sprinkle the top with remaining Oreo cookies.
- Place the cheesecake pan into a large, deep pan. Fill the pan up with 2 inches of hot water. This is your water bath and will help ensure your cheesecake comes out crack free.
- CAREFULLY place the pan in the oven and bake cheesecake for 1 hour and 20 minutes. If the top begins to get too brown, place a piece of tinfoil on top of the pan.
- Once the baking time is up, turn the oven off but allow the cheesecake sit, undisturbed, inside the oven with the door shut, for another 30 minutes. The cheesecake should be still slightly wiggly.
- Remove the cheesecake from the oven and place it on a cooling rack. Gently run a knife around the edge of the cake. Cool to room temperature, then cover the pan with aluminum foil and refrigerate for at least 6 hours before slicing.
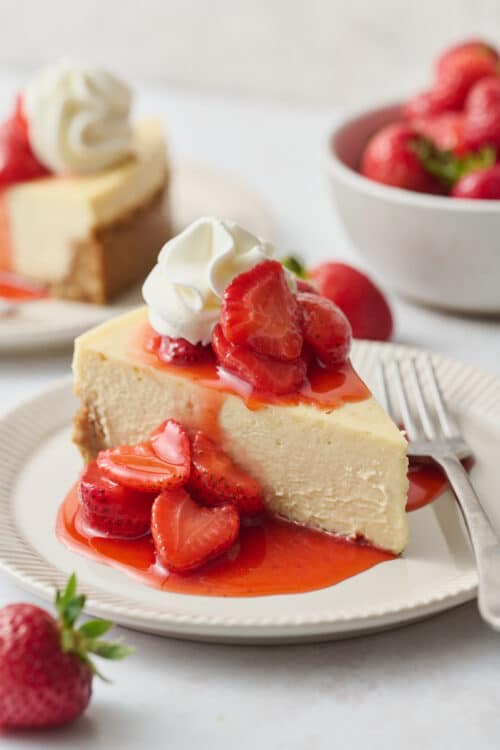
- When ready to serve, top with a dollop of whipped cream and extra Oreo cookies. And enjoy!
Wow! Perfect recipe ! I decided not to do the water bath of course it did crack but the reason I opted not to do water bath is because I wanted to do a chocolate ganache on top therefore it covered all cracks. Great tasting my family loved it!
This was DELICIOUS! We will definitely be making it again. Thank you!
instruction 3: Pour in the cream and beat just until it’s evenly incorporated in the batter. Turn the mixer off and, using a rubber spatula, fold 3/4 of the chopped Oreo cookies into the batter.
Are you saying pour in the sour cream or the heavy cream? Is the heavy cream only for making whipped cream? If so, how do you make whipped cream?
The best oreo cheesecake I’ve ever had! Including the CCF. Can I make into mini cheesecakes?
this recipe is AMAZING. my cheesecake cracked and puffed up a bit before deflating when cooling but it still came out perfect. made it for my boyfriend’s birthday and he is a cheesecake fiend, he said it was better than the cheesecake factory (which is normally where i get his cake every year). decorated with some home made whipped cream on top using a piping bag and star-shaped piping tip. will be making again!!!
This looks incredible! Do you pulse the Oreo cookies with or without the frosting in the middle?
1
Can I use a regular pan instead of a springform pan? Would I need to change the cooking time?
I think you can – but then you have to use a baking sheet at the bottom and wait till it’s all frozen and set to turn the cake upside down to take it out of the pan if not it will be a hot mess.