


 Search
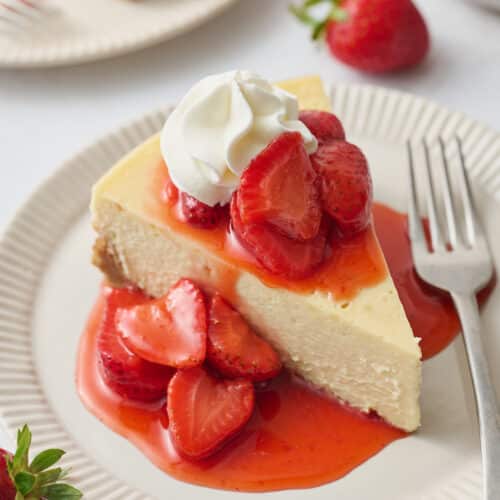
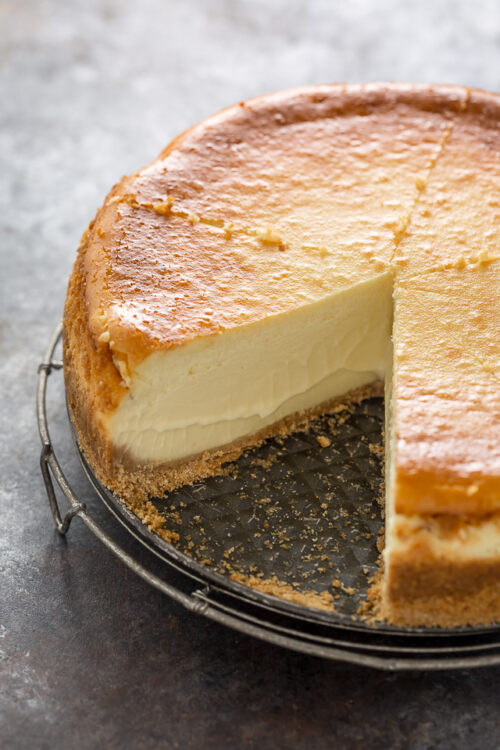
New York-Style Cheesecake is rich, creamy, and one of the most famous cheesecake recipes in the world! With a crunchy graham cracker crust and dense but creamy cheesecake filling, it’s delicious with strawberry sauce on top! Follow my pro-tips below to prevent cracking while the cheesecake bakes.
New York Cheesecake? Yes, Please!
Reader Sheri F. says: ![]() This truly is the best NY style cheesecake recipe!!! So many compliments from friends and family that it’s the best cheesecake they’ve ever had. Even my cousin from NJ! I’ve made it 3 times in the last 6 weeks.
This truly is the best NY style cheesecake recipe!!! So many compliments from friends and family that it’s the best cheesecake they’ve ever had. Even my cousin from NJ! I’ve made it 3 times in the last 6 weeks.
If you’re a cheesecake purist, today’s new cheesecake recipe is for you! Because today I’m teaching you how to make the BEST New York-Style Cheesecake! This variety of cheesecake is famous for a few reasons:
- Thick and crunchy graham cracker crust – with lots of buttery flavor.
- Dense but creamy cheesecake filling – truly the perfect texture!
- To-die-for delicious classic cheesecake flavor – it’s hard to stop at one slice!
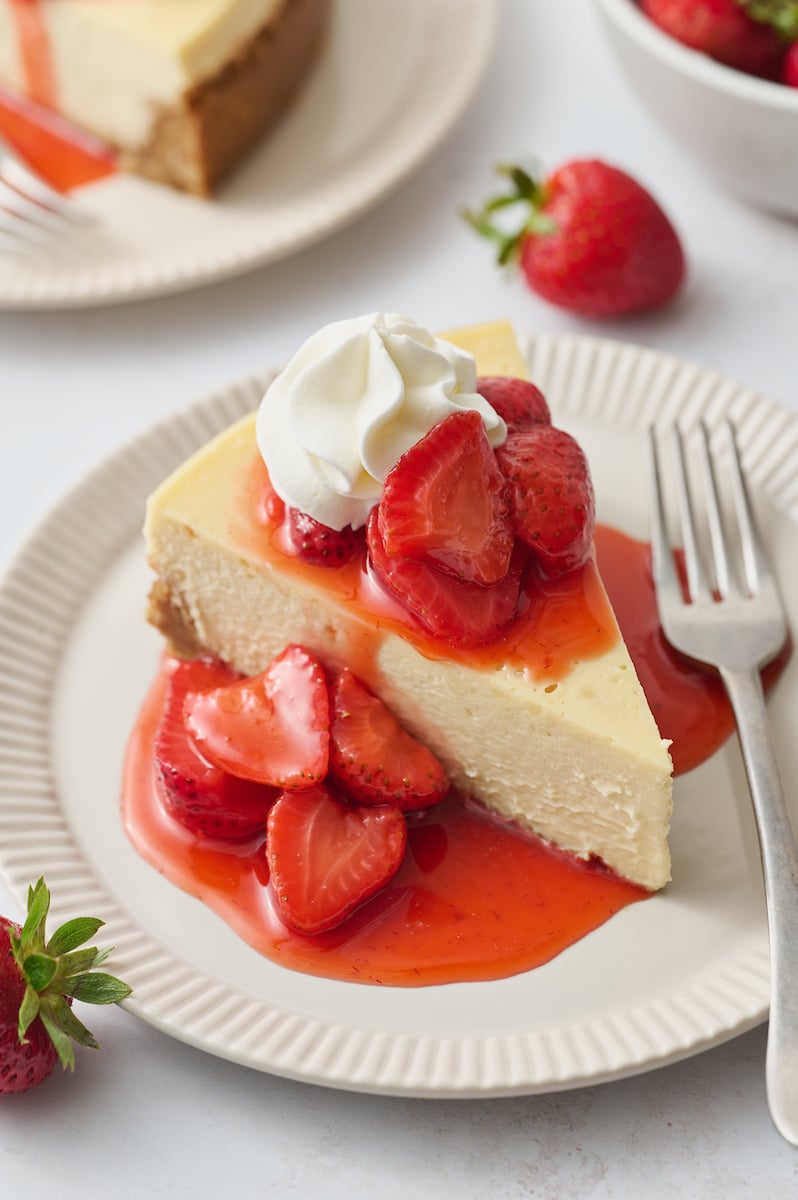
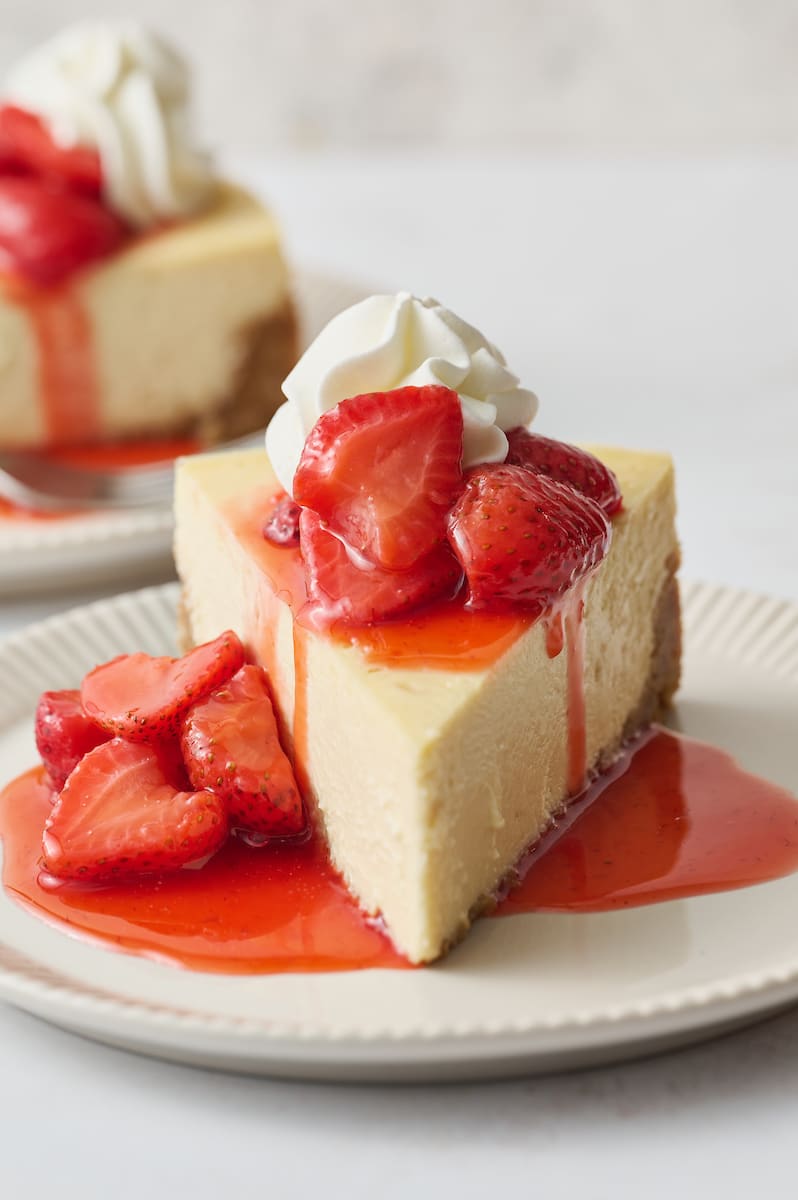
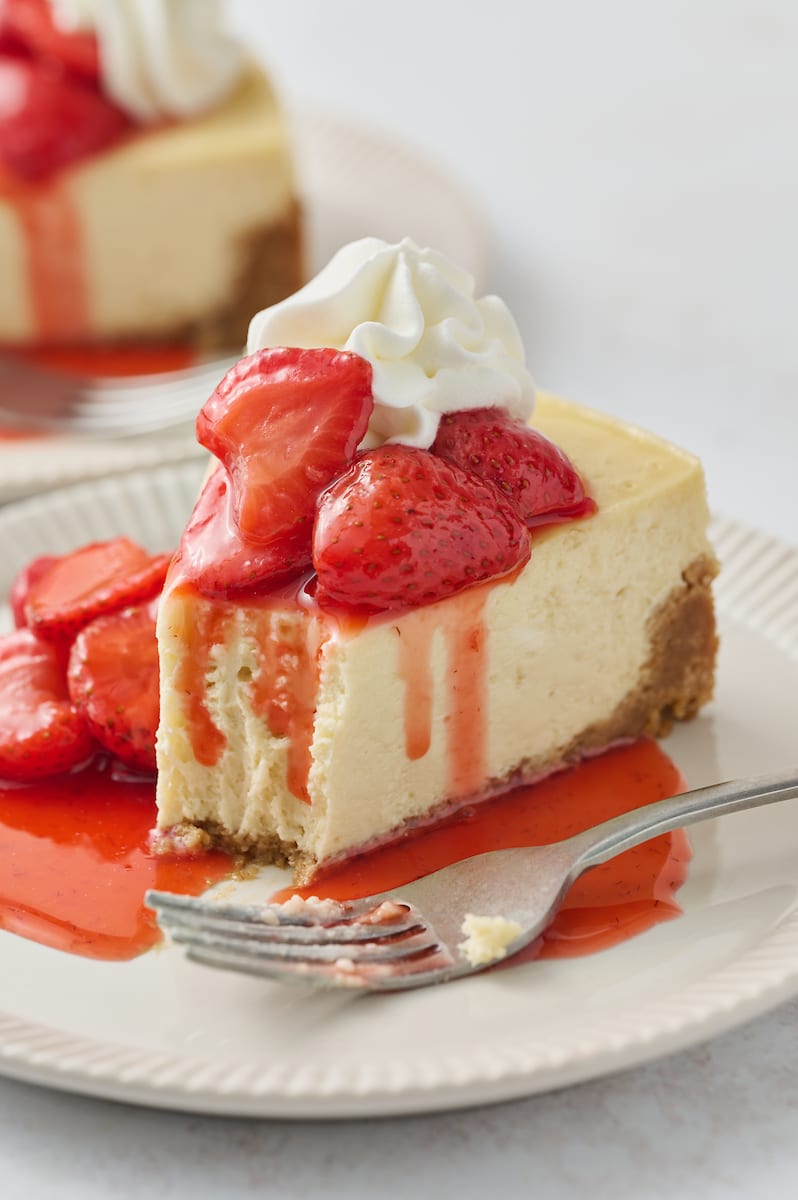
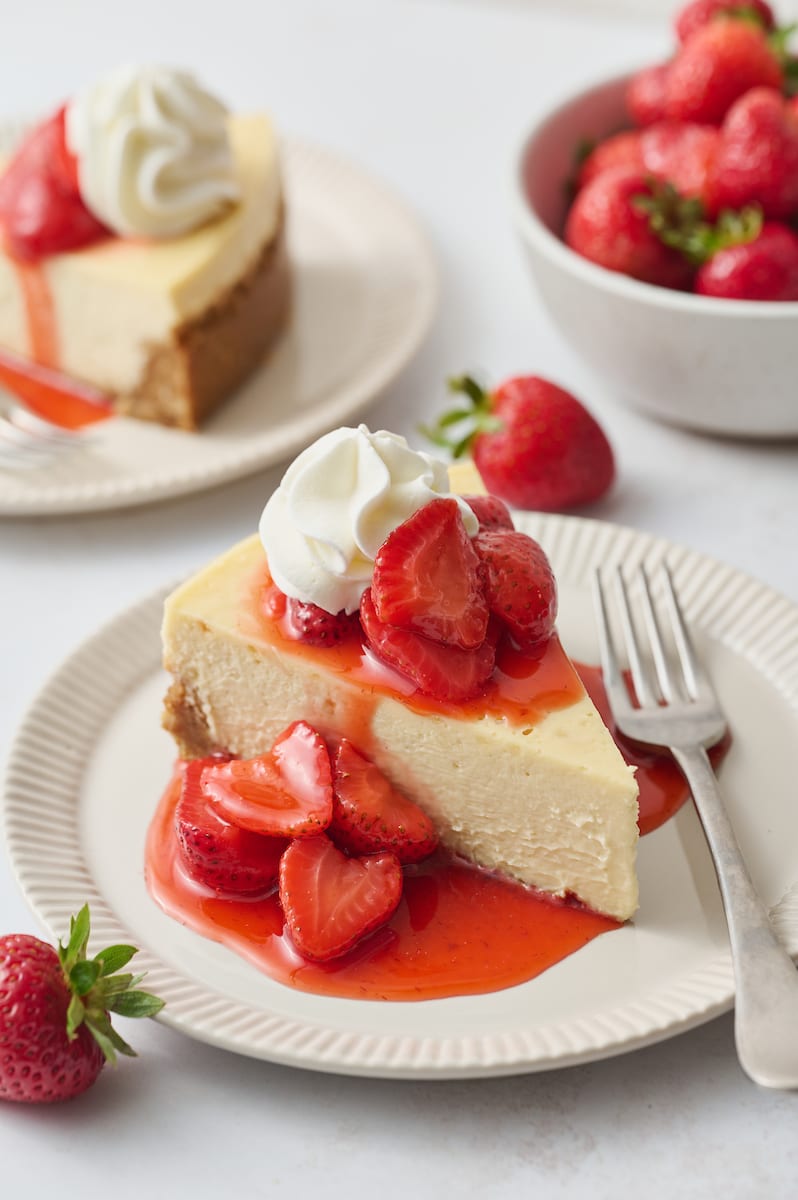
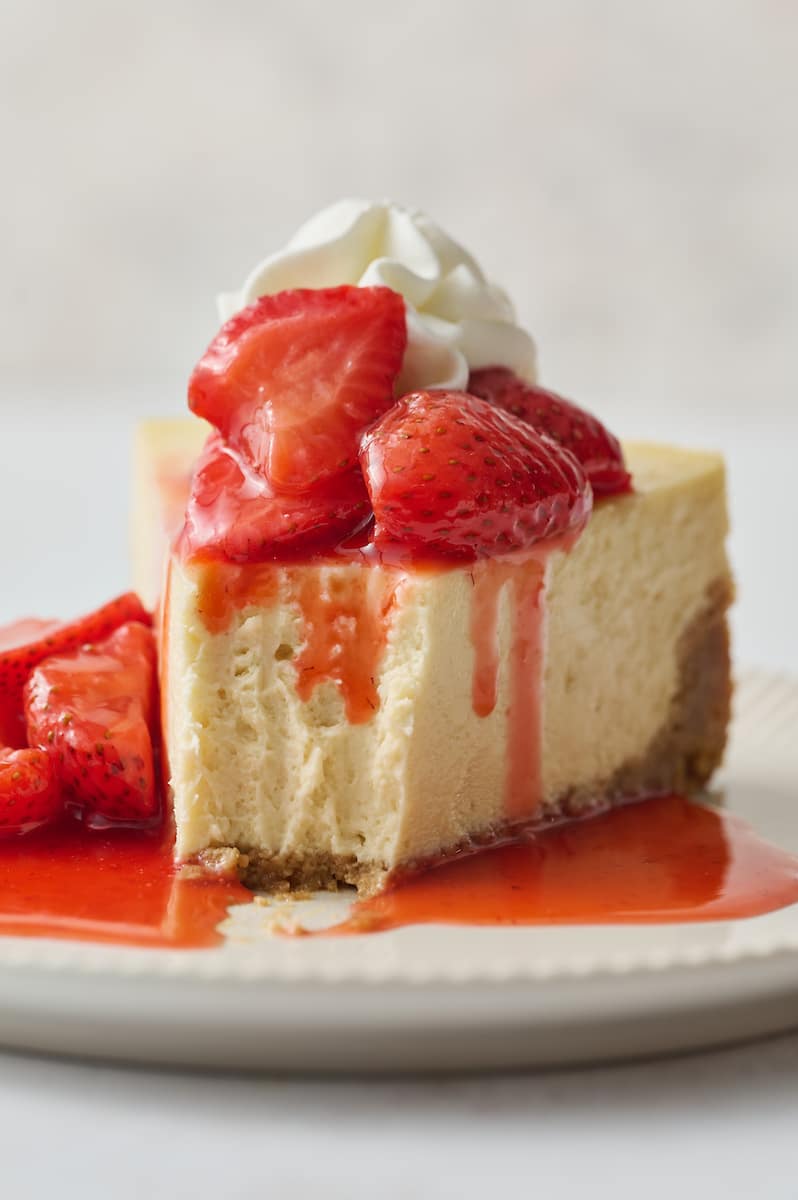
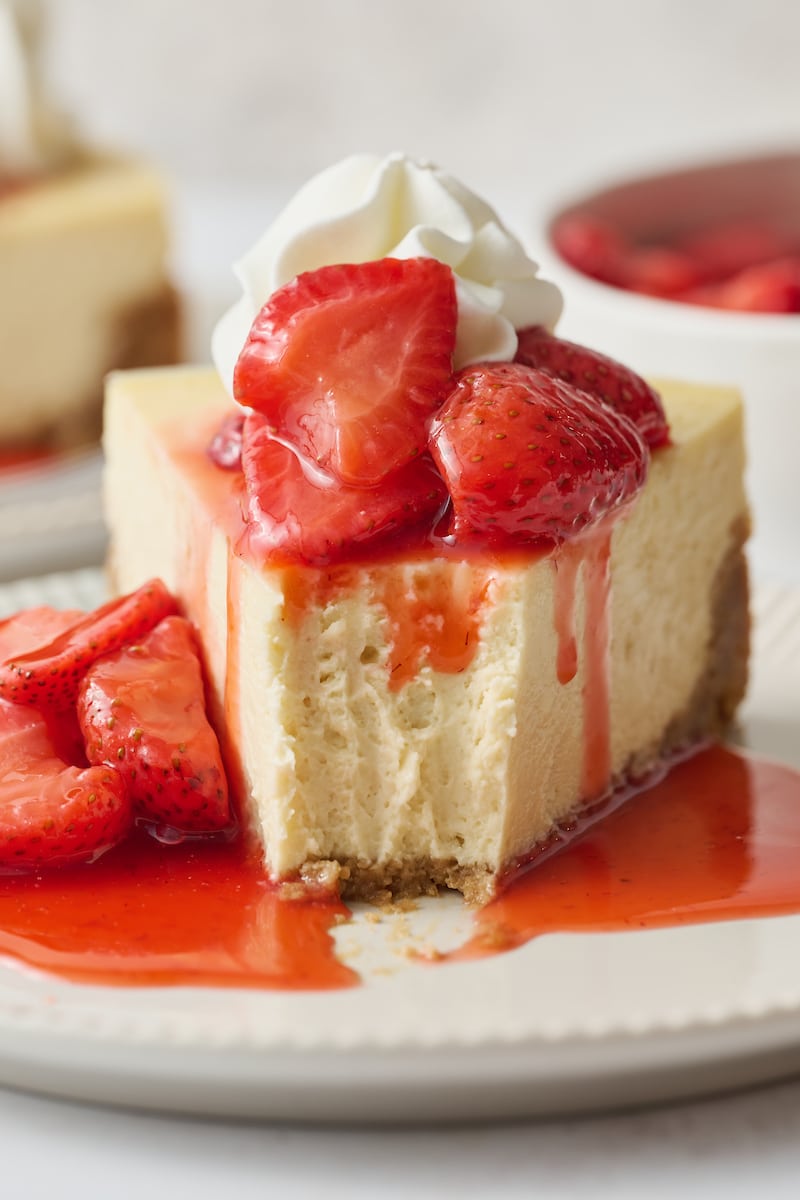
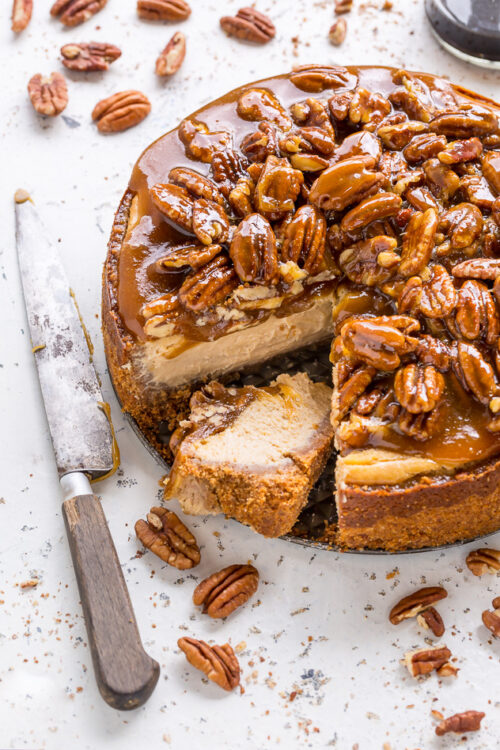
- Delicious plain or with a variety of topping like whipped cream, strawberry sauce, hot fudge, or salted caramel sauce.
If you’re a cheesecake pro, you’ll love knowing that I have tested and perfected this recipe. And it has dozens of 5-star reviews! If you’re a cheesecake beginner, this recipe is a great starting point for you because it’s basically foolproof. But feel free to ease your way into the cheesecake baking world with these New York-Style Cheesecake Bars, which are even easier!

Cheesecake Ingredients
- Graham Crackers Crumbs: For ease, I buy them already crushed. But you can buy sheets of graham crackers and pulverize them in a food processor or a high-power electric mixer.
- Unsalted Butter: Melted butter is the binder for the graham cracker crust. If you can only find salted butter, simply omit the salt called for in the recipe.
- Cream Cheese: Brick-style full-fat cream cheese works best for cheesecake recipes. For easy and even blending, make sure it’s at room temperature – or softer – before making the cheesecake batter.
- Sour Cream: Adds richness and a delightfully tangy flavor to the cheesecake. If you cannot find sour cream, an equal amount of full-fat plain Greek yogurt is the best substitution.
- Vanilla Extract: A dash will add delicious vanilla flavor while enhancing the other flavors in this recipe. Be sure to use pure vanilla, not artificial or imitation vanilla.
- Eggs: This recipe calls for whole eggs and egg yolks. Use large variety eggs. They help thicken the batter and give it a smooth texture. Be sure to add the eggs one at a time, and beat on medium-low speed until just combined.
- Flour: A small amount of all-purpose flour gives this cheesecake it’s trademark dense yet creamy texture. I think a 1-for-1 GF flour would work fine here.
- Heavy Cream: Aka heavy whipping cream. This dairy product makes the cheesecake insanely smooth and creamy. Do not sub milk or half and half.
The Perfect Springform Pan
After baking HUNDREDS of cheesecakes, I’ve finally found the perfect springform pan. Actually, I have two favorites: Fat Daddio’s Springform Pan and USA Pan Springform Pan.
- You’ll need a 9-inch springform. A regular 9-inch cake pan will not work. Luckily, these pans have many uses beyond cheesecake recipes, and are worth the investment! Please don’t attempt this recipe without the right pan.
- The springform pan needs to be able to hold at least 8 cups of batter, so choose one that’s at least 2.5 inches deep. If you end up with extra batter, you can always bake it in a muffin tin like these mini cheesecakes.
- I suggest a springform pan that’s lighter in color. Lighter colored pans will bake a cheesecake with a pale top. Darker pans will yield darker baked goods. A dark cheesecake top isn’t the end of the world though… and some people even prefer it!
Secrets to a Creamy Cheesecake
- Full-fat Cream Cheese: This cheesecake recipe is not the place to use reduced fat cream cheese. I also don’t recommend using Neufchâtel, which is lower in fat content. And thus will produce a less creamy cheesecake. So buy full-fat brick-style cream cheese for best results.
- Sour Cream AND Heavy Cream: Most cheesecake recipes only use one of these ingredients. But in my testing I’ve found you get the creamiest cheesecake when you use both! If you cannot find sour cream, plain full-fat Greek yogurt is the way to go.
- Do NOT over Mix the Batter: You should do the majority of your mixing BEFORE you add the eggs and flour. Once you’ve added these ingredients, you want to mix on low speed until just combined.
- Water Bath: Baking in a water bath allows the cheesecake to bake slowly and evenly. This produces an ultra creamy cheesecake!
- Follow the Cooling Process: After baking, you’ll turn off the oven, but don’t open the oven door! You’ll let it cool this way for 30 minutes before removing it from the oven and then removing the pan from the hot water.
How to Prevent Cracking
- Don’t Over Mix: Especially once you’ve added the eggs and flour! The only time you want to mix the cheesecake batter on high is while you’re getting the clumps out of the cheesecake. Once you add in the eggs, it’s crucial to mix on low so that you don’t beat too much air into the batter. Excessive beating will make the cheesecake puff up in the oven and then sink and crack once you remove it from heat.
- Room Temperature Ingredients: Cold ingredients don’t bond evenly! And in this case, cold ingredients would also require a lot of mixing, which as stated above, is a no-no. So be sure all of your ingredients are at room temperature. Especially the full-fat cream cheese, which needs to be quite soft before use.
- Water Bath: Baking in a water bath is an essential step for creamy cheesecake! This extra step will help prevent cracking and will ensure a smooth and creamy cheesecake recipe!
- Don’t Over Bake: This is the piece of advice most people ignore… and the regret it! You do not want to over bake your cheesecake. In fact, you want to remove it from the oven before it sets completely in the center. A little jiggle is a good thing, because it will continue to cook as it cools.
- Cool Slowly: You’ll want to cool this New York-Style cheesecake slowly, which helps prevent cracking. You’ll begin by cooling the cheesecake in the oven, with the temperature turned off. Then you’ll open the oven door, remove the cheesecake, and cool to room temperature. Finally, you’ll chill in the fridge for several hours.
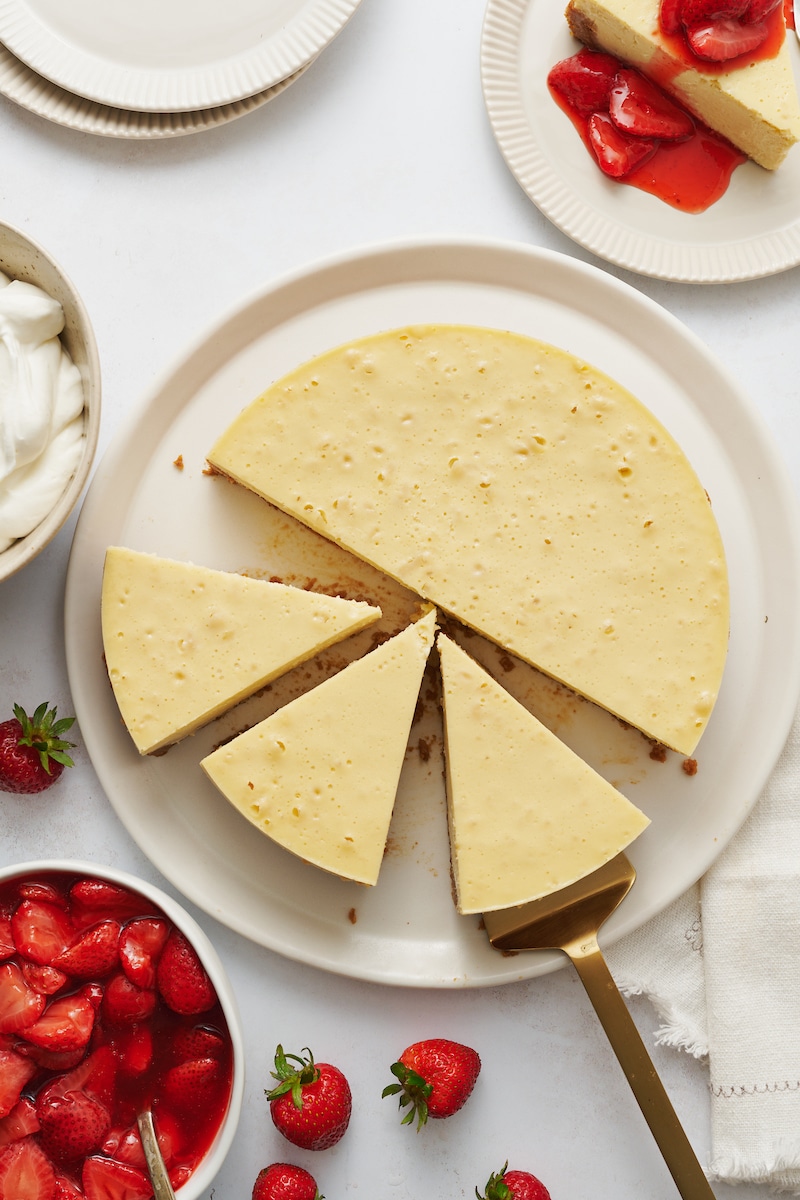
Once you finish chilling your cheesecake, you can slice it and dig in! To get clean slices of cheesecake, use a large knife and press firmly down when cutting. Wipe the knife clean with a warm wet cloth between slices.
Baking in a Water Bath 101
Baking a cheesecake in a water bath helps the cheesecake stay moist, creamy, and helps prevent cracking. A lot of new bakers fear this process, but I promise there’s nothing to fear. I have a whole post on how to make an easy water bath for cheesecake, but here are my top tips broken down:
- Springform Pan: Before you even think about baking cheesecake, make sure you have the right springform pan on hand! This is essential for cheesecake AND for the water bath.
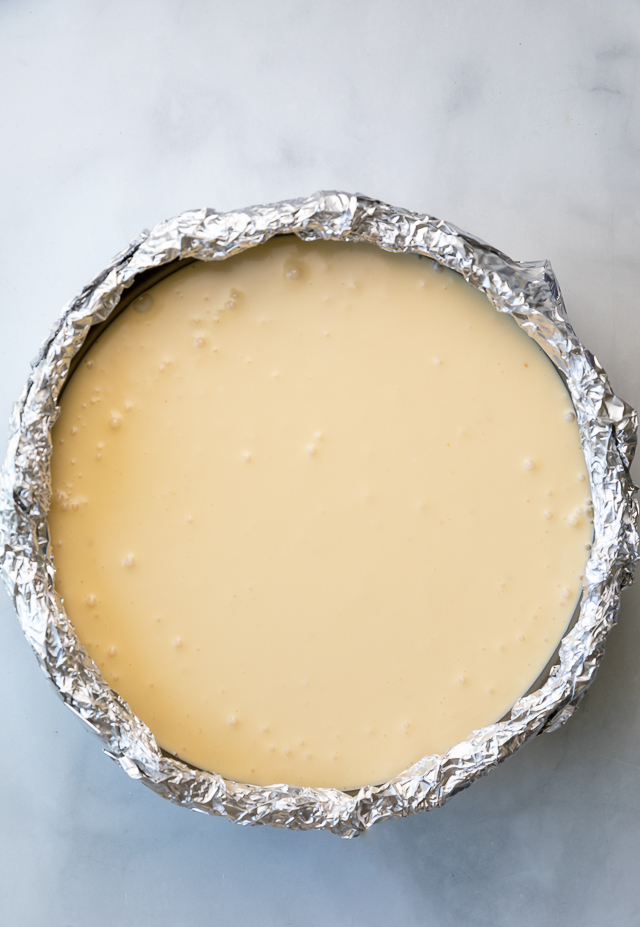
- Aluminum Foil: To ensure no water seeps into our pan, you’ll wrap the springform pan with aluminum foil. I recommend extra wide heavy-duty aluminum foil, which basically promises no water will ruin your graham cracker crust.
- Roasting Pan: You’ll need a pan that’s wide enough to hold the springform pan and deep enough to hold about 3-inches of hot water. A flat-bottomed roasting pan works best, but you can get creative here and try to find a pan you already have that works.
- Hot Water: The last step before placing your cheesecake in the oven? Add about 3-inches of freshly boiled hot water into the roasting pan. Make sure you pour slowly; you don’t want the water to splash and get IN the cheesecake.
How Long Does Cheesecake Last in the Fridge?
One of my favorite things about cheesecake recipes is that you can make them in advance! Baked and fully cooled, this cheesecake will keep in the fridge for up to 4 days. So you can bake it before your next holiday gathering and relax knowing desert is ready when you are. Or you can freeze it following my instructions below!
Can you Freeze Cheesecake?
- Baked cheesecakes freeze great, and will keep for up to 2 months when frozen correctly.
- You must cool and chill the cheesecake completely before freezing it. Then you can decide if you freeze the whole cheesecake or cut it up and freeze it in slices. If freezing whole, do not freeze in the cheesecake pan!
- Place the whole cheesecake – or slices – on a baking pan and carefully place in the freezer just until firm. This takes about an hour for slices and two hours for the whole cheesecake.
- Remove from the freezer (set a timer so you don’t forget) and wrap the cheesecake tightly in several layers of saran wrap. The plastic wrap will ensure the cheesecake doesn’t get freezer burn.
- Place the whole cheese, or the slices, in a large freezer bag. Press out any excess air, then seal the bag. Label with the date and pop the bag in the freezer for up to 2 months!
- To defrost this New York-style cheesecake, remove it from the freezer the night before you plan on serving it. Thaw the wrapped cheesecake in refrigerator overnight, or until soft and sliceable. Do not attempt to thaw this cheesecake in the microwave or oven!
While the Cheesecake Bakes…
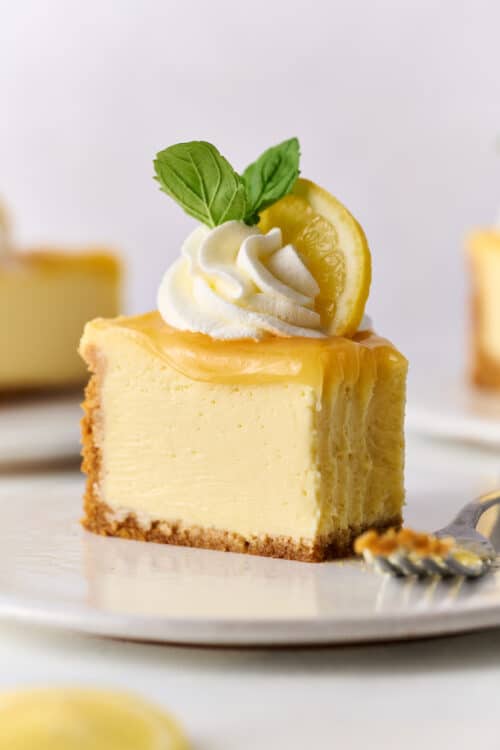
This cheesecake has a long bake time… but since you’re already in the kitchen, why not make a fresh strawberry sauce? You’ll only need a handful of ingredients like strawberries, lemon juice, and sugar. And this strawberry sauce is the perfect topping for cheesecake! Between the crunchy graham cracker crust, creamy cheesecake filling, and fruity strawberry sauce topping, it’s literally dessert perfection!
The Best New York-Style Cheesecake
Ingredients
For the Crust:
- 2 cups (210g) graham crackers crumbs
- 1/3 cup (66g) granulated sugar
- 1/4 teaspoon salt
- 1/2 cup (113g) unsalted butter melted
For the New York-Style Cheesecake:
- 3 8-ounce packages (681g) full-fat cream cheese room temperature
- 1 cup (227g) full-fat sour cream room temperature
- 1 and 1/4 cups (249g) granulated sugar
- 2 teaspoons pure vanilla extract
- 3 large eggs room temperature
- 2 large egg yolks room temperature
- 2 tablespoons (28g) all-purpose flour
- 1/2 cup (113ml) heavy cream room temperature
Instructions
For the Crust:
- Preheat the oven to 350 degrees (F). Lightly spray a 9-inch springform pan with non-stick spray. Wrap the bottom and sides of the pan with heavy duty extra wide aluminum foil. I recommend doing several diligent layers here to ensure no water creeps through when you place the pan in the water bath. Set the pan aside until needed.
- In a large bowl, combine the graham cracker crumbs, sugar, salt, and melted butter. Mix well. Press the crust into the prepared pan, pressing the crust down firmly and slightly up the sides.
- Bake in a preheated oven for 10 minutes. Place partially baked crust on a cooling rack and set aside while you prepare the filling. Reduce the oven temperature to 325 degrees (F).
For the New York-Style Cheesecake Filling:
- In the bowl of a large food processor, add the cream cheese and sour cream and beat until smooth and creamy, scraping down the sides and bottom of the bowl as needed. Beat in the sugar and vanilla until combined.
- On the lowest speed, beat in the eggs and yolks, one at a time, beating until just combined, and scraping down the sides and bottom of the bowl as needed.
- Using a rubber spatula, fold in the flour, then fold in the cream, mixing just until combined. Then use the spatula to scrape the sides and bottom of the bowl a few times to ensure the batter is smooth and all of the ingredients have been evenly combined.
- Pour the filling into the prepared crust and, using a silicone spatula, smooth the top. Place the cheesecake pan into a large, deep pan. Fill the pan with 3-inches of hot water. This is your water bath and will help ensure your cheesecake comes out crack free.
- Carefully place the pan in the oven and bake for 1 hour and 30 minutes.
- Turn the oven off and open the oven door just slightly. Let the cheesecake sit, undisturbed, in the oven in the water bath for 30 minutes as it cools down.
- Remove cake from the oven and lift out of the water bath. Place the cheesecake on a cooling rack and cool completely, then chill for at least 6 hours. Do not remove the cheesecake from the springform pan until completely cooled!
This recipe is amazing. I am new to baking but I learned to follow directions word for word. Learned that the hard way tho . The list of tips seemed mandatory after I made it!. Glad you didn’t leave anything out. I have used the water in a seperate dish for making a pound cake which came out great. The water bath scared the crap out of me but I did use the wide foil in the roast pan. I tackled my fears, used 3 sheets, and I wrapped the pan tight with foil before putting it in the roaster pan. I saw the disaster of it getting my cake wet when I read it the first time but took my time just to see if it works. No leaks and it came out beautiful. Haven’t put it in the fridge yet waiting for timer from the oven being off but my mouth is watering just from looking at it. My household can’t wait to devour!! We all gotta wait til tomorrow but im sure it will be worth it!! Thank you!! & i would love to see more recipes!!
And whats a dollop lol!!???
In our family I am the cook and the baker. I am proud to say that I am especially well known for my cheesecakes. I always make them around the holiday time. I’ve had a receip that I’ve used for years and everyone has really liked it. This year I decided I wanted to try a new recipe. I did a Google search for “perfect cheesecake” and this recipe popped up first. I read the directions and I really liked the level of detail in the instructions. After I read through it twice I decided to give the recipe a try. The first time I made it I was impressed with the consistency of the batter. My old recipe can be ruined if it’s over beaten. That doesn’t seem to be true for this one even though I didn’t over beat the batter. I like that it stays in the oven after the time is up. I would always use an instant read thermometer to make sure my other cake was done and it was a little hit or miss depending on the recipe. It worked for NY cheesecake but it didn’t work for my pumpkin cheesecake. So I was glad that I didn’t have to stress about that with this recipe.
First time I made it I brought it to a Christmas party and people actually raved about it. They couldn’t stop saying how much they enjoyed it and it made me feel good. I made it again for our family Christmas Eve party and then again just because my wife wanted cheesecake. One tip I would add is to buy some extra wide aluminum foil to wrap your spring form pan prior to placing into your water bath. It will keep the water out and the crust dry. Plastic wrap doesn’t always work very well, but extra wide foil works perfectly.
This is the best cheesecake I have ever made or even ever eaten. It’s easy to make, just follow the steps in the recipe. I have found that if I measure out each ingredient prior to starting it helps me to stay on track and not forget any ingredients. I do that no matter what I am making it just helps me. If you like cheesecake give it a try. It’s a favorite at our house and I think it will be a favorite at your house, too.
I made this cheese cake for our new years eve party. I was so nervous about it turning out. I followed your instructions and your tips.. My cake came out PERFECT!!!! Thank you for your recipe. I am checking out your other recipes now.
Oh. My. Goodness. This is amazing. But it is very time consuming, so make sure you allow for it. Also, I used a slow cooker bag under the foil; and I am so glad. I had 6 layers of heavy duty foil, and there was still water in the foil. Everyone at our New Year’s lunch loved it.
Can I make this the day before eating? Will it sitting in the fridge for a day be ok?
Can you eat this if it doesn’t cool for 6 hours?
I haven’t had the nerve to make cheesecake in a very long time unitl I saw all of the nifty tricks you put into the instructions. I made this cheesecake for our thanksgiving dinner yesterday. It was absolutely perfect and I am extremely critical of my own work! I split the recipe by using 2 pie crusts from the grocery store due to time issues (being rushed to hurry) but it made 2 perfect cheesecakes pies! I will definitely be using this recipe again for Christmas and probably more of it!
Did you end up reducing the baking time when you split in two?
How long did you bake it for with the pie pans? Did you still do a water bath?
What’s the difference between sugar and granulated sugar?
Sugar and granulated sugar are usually the same, but I specify granulated so it’s clear not to use brown sugar.
Thank you for the tips and tricks portion. Specifically the reason I am following your recipe.
How would you adjust for high altitude?