


 Search
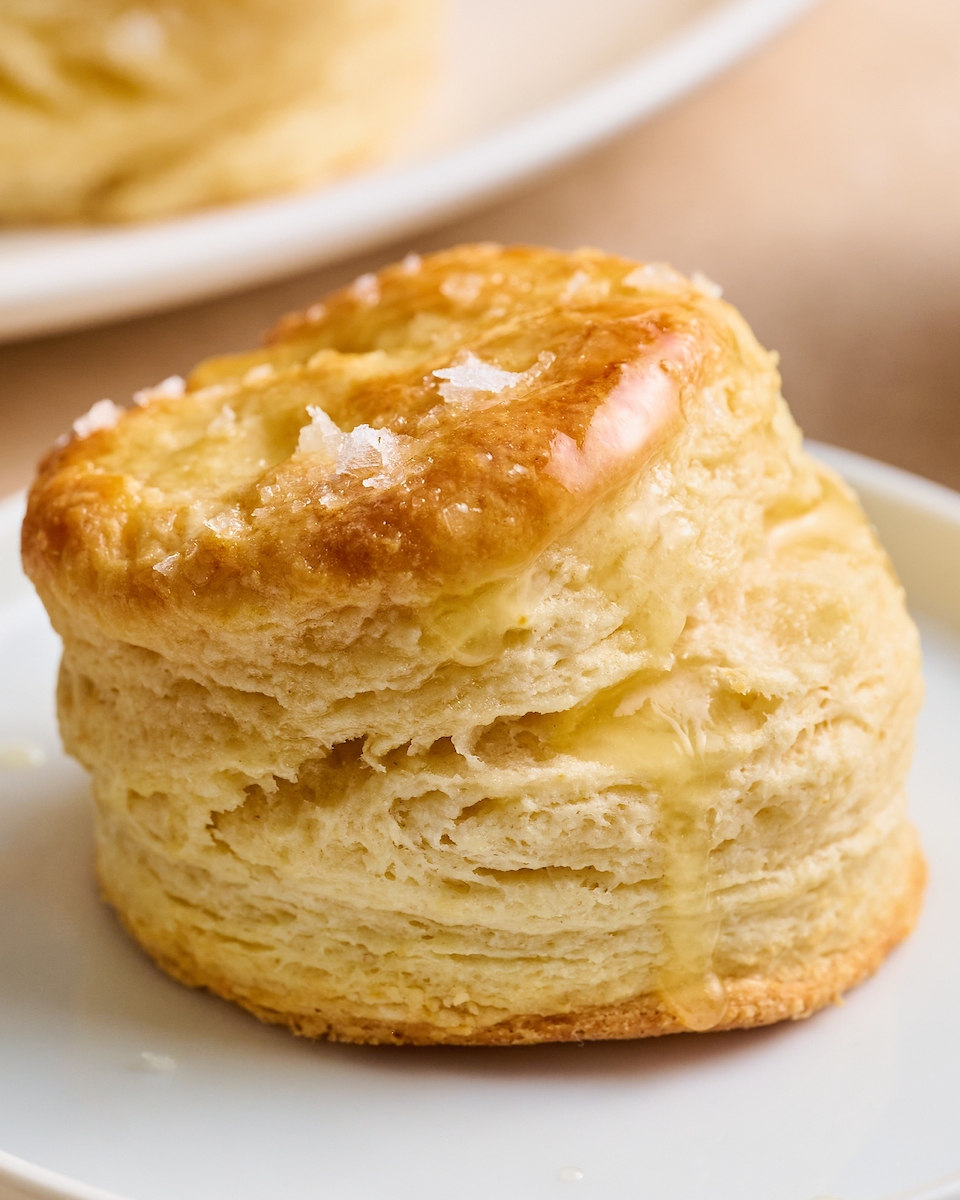
With the holidays right around the corner, my homemade buttermilk biscuits are sure to be in heavy rotation! Golden brown and ultra flaky, these biscuits rise sky high! I love these freshly baked, but they freeze great when stored in an airtight freezer bag! Just cut the dough, freeze until solid, then store in a freezer bag for up to 2 months.
Buttermilk Biscuit Recipe
February was biscuit month in my house! I was on a MISSION… a mission to create the best homemade buttermilk biscuits ever! The buttermilk biscuit recipe I’d use for the rest of my life… the one my children will grow up requesting for special holiday meals. And honestly, it was no easy task!
I went though 12 bags of flour, 2 containers of baking powder, and salt, and even somehow broke a rolling pin in the process! I made plenty of fine biscuits. Lots of pretty good ones, and even managed to make a couple that were kind of delicious.
But none that had that WOW factor. None made me want to wake up early, creep down to the kitchen, and bake my family a batch of homemade biscuits for breakfast. And that’s what I was searching for; a recipe that would become a tradition.
Hard Work Pays Off: Biscuit Edition
- But finally (FINALLY) I found buttermilk biscuit success. I found my perfect biscuit recipe.
- bonus: they’re made with pretty basic ingredients most bakers always have on hand!
- These buttermilk biscuits bake up SKY HIGH
- with tons of flaky layers (we can thank cold butter and the don’t twist method for this)
- and the most delicious buttery flavor (use high-quality butter
- and these golden brown biscuits are equally delicious with a bowl of chili or slathered in jam.
Make the Biscuit Dough with Cold Butter
- Ok, so here’s my secret for the most tender biscuits ever: all-purpose flour AND cake flour! This combination gives tall well structured biscuits with an ultra tender texture. I don’t recommend using all all-purpose flour or all cake flour.
- My second secret to perfect homemade buttermilk biscuits? COLD BUTTER!!! Cold butter is key for flaky golden brown biscuits. Never use room temperature butter for this buttermilk biscuit recipe!
- Instead of using a pastry cutter to work the cold butter into the dough, coarsely grate it (using a box grater. Then stir it into the dough. This method creates tons of buttery pockets that puff up in oven… hello, flaky layers!!!

Folding the Biscuit Dough
- Once your dough has been assembled, you’ll turn the dough onto a lightly floured surface. And gently knead it, about 8 to 10 times, or just until it comes together! Over working the dough can cause tough buttermilk biscuits.
- But here’s the real key step, you’ll gently pat the dough into a 1/2-inch thick rectangle, fold the dough into thirds (like a letter) and repeat this whole thing two more times. This folding of the dough creates those flaky layers I keep talking about! And I promise, it’s easier than it sounds!
Cutting the Biscuit Dough
The secret to fat and flaky biscuits? Pat the dough into a 1 and 1/4 inch thick rectangle! Yes, I suggest busting out the ruler for this! Then you’ll use your biscuit cutter to cut out as many biscuits as you can! Resist the temptation to twist the cutter! Instead you’ll want to press firmly down and lift straight up!!! Twisting will reduce lift and flakiness!
If you don’t have a biscuit cutter, you can simply use a knife to cut your rectangle into 8 to 10 square biscuits and bake them that way!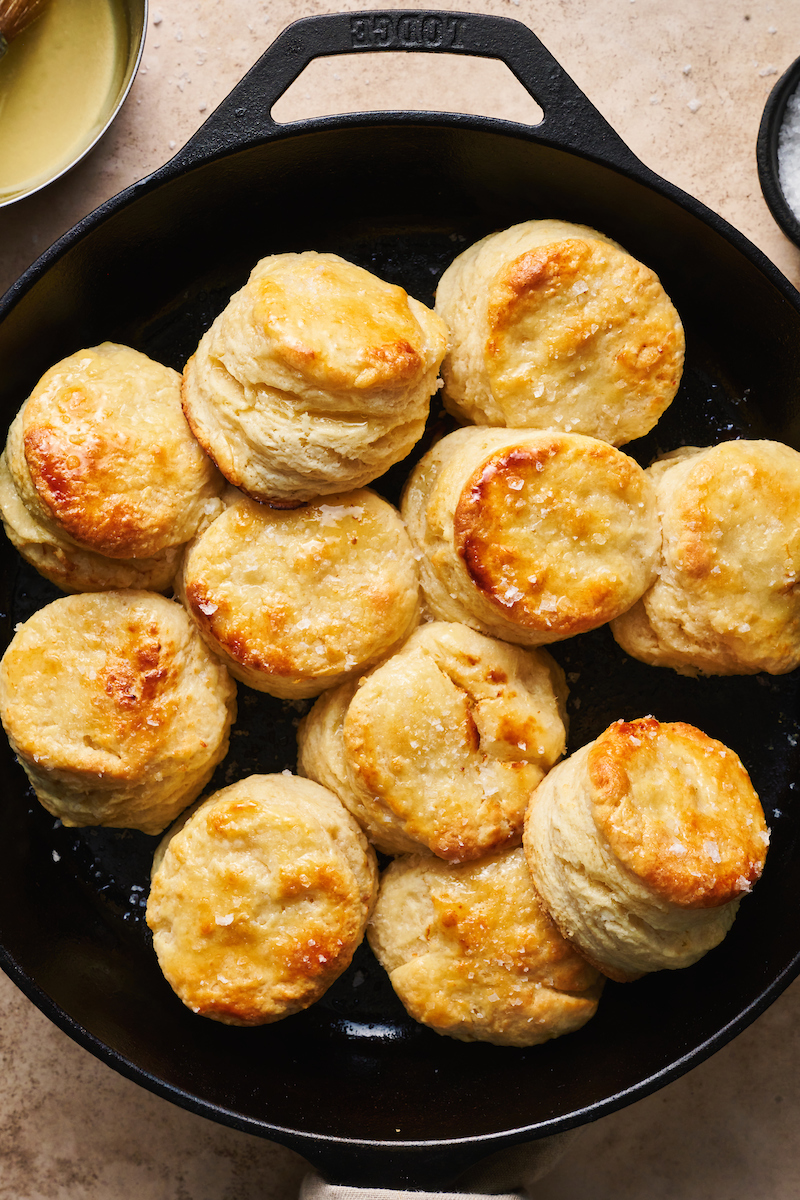
Baking the Biscuits
This recipe requires you to start at one baking temperature and then reduce the temperature during the baking process. To start, preheat the oven to 450 degrees (F) and bake the biscuits for just 5 minutes, then reduce the oven temperature to 375 (F) and continue baking for about 15 minutes, or until golden brown!
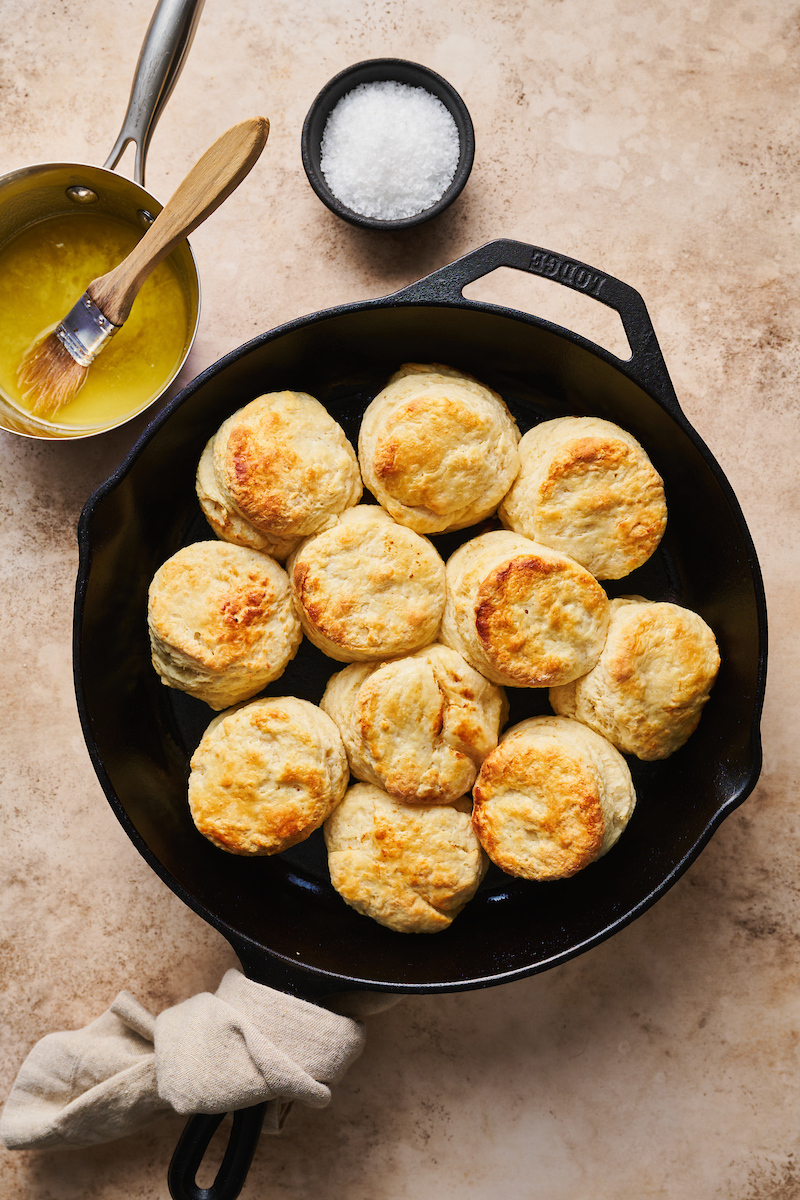
You’re going to bake the biscuits in a lightly greased 10″ cast iron skillet! No parchment paper needed! But first, you’ll place the biscuits in the skillet and refrigerate them for exactly 20 minutes. This allows any butter that’s warmed up to chill again before entering the oven. Remember: cold butter = flaky biscuits!
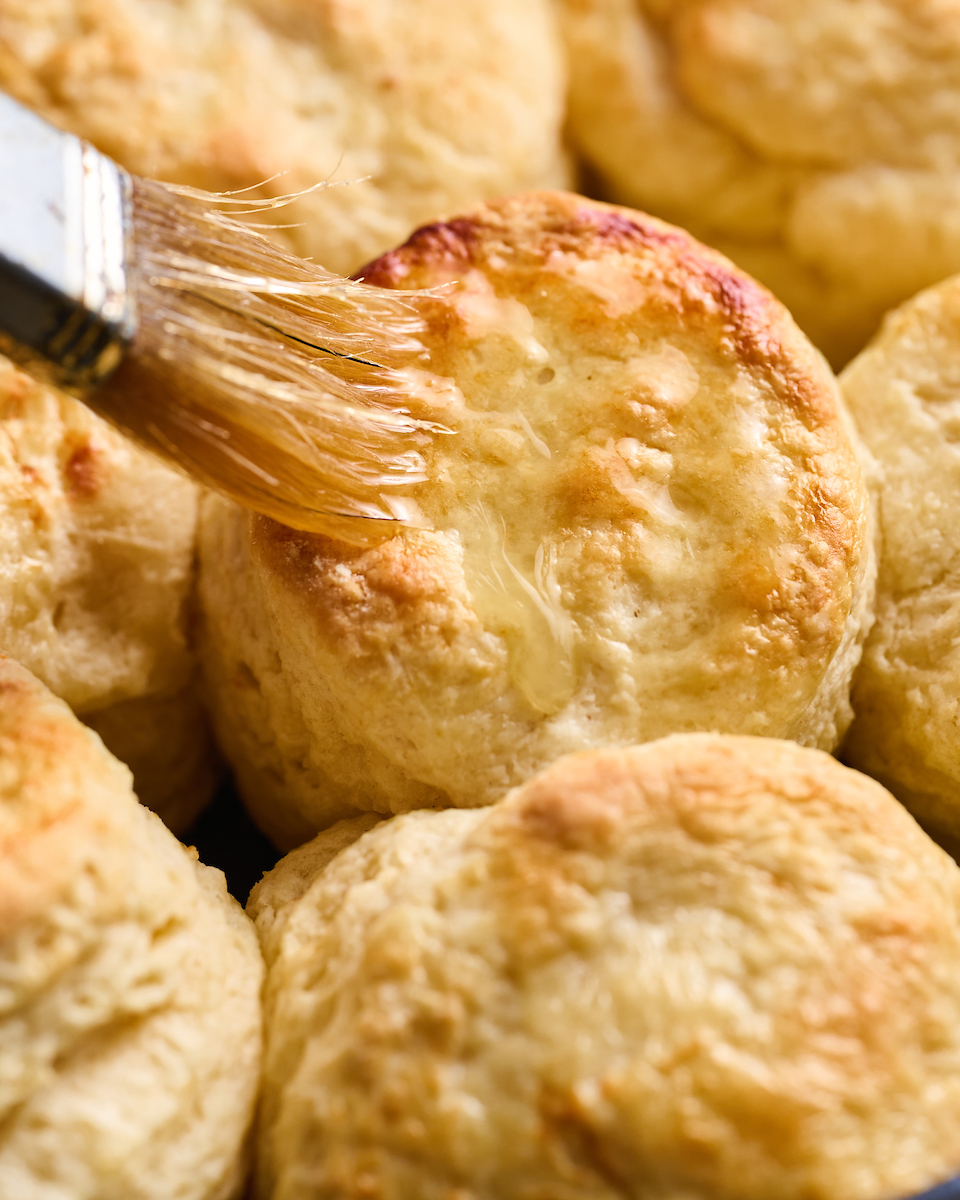
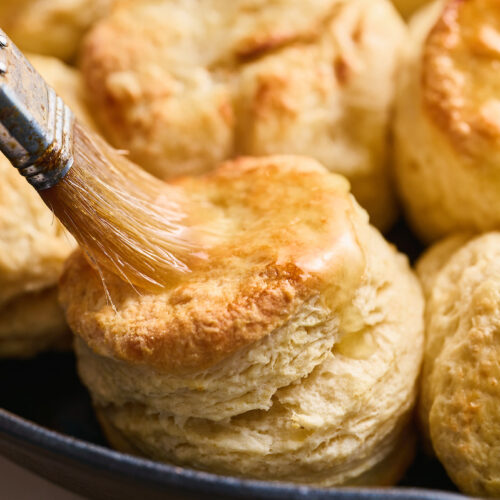
You’ll brush the tops of the biscuits with a little buttermilk, then bake!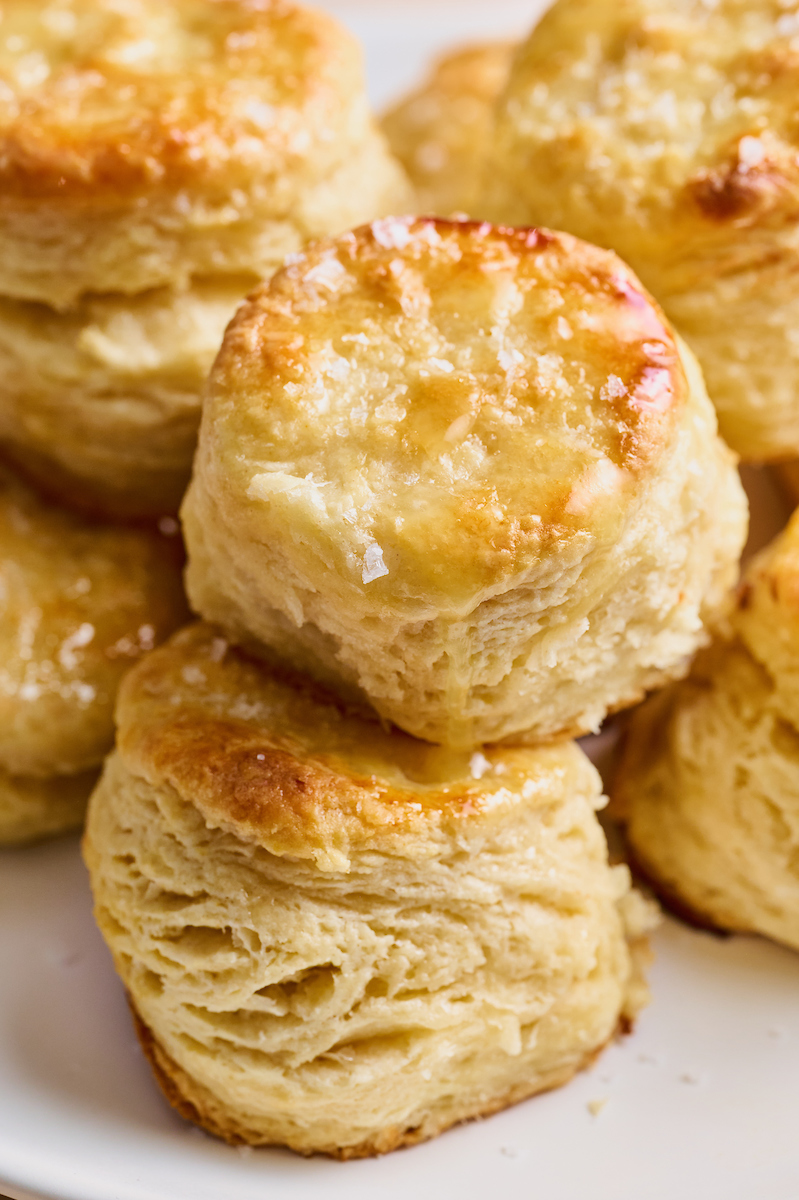
I promise it’s not that complicated!
Ok, so I know I just threw a lot of information at you and you might be feeling overwhelmed and thinking “who knew biscuits were so complicated?”. But I promise, they’re not! When you boil it down, it’s as easy as combining the liquid ingredients in a large glass measuring cup, combing the dry ingredients in a large bowl, and grating in the butter! Do a quick knead, a few folds, and a quick cut-out and boom: you have biscuits ready to be baked!!! And after one bite I know you’ll agree these are 100% worth the effort!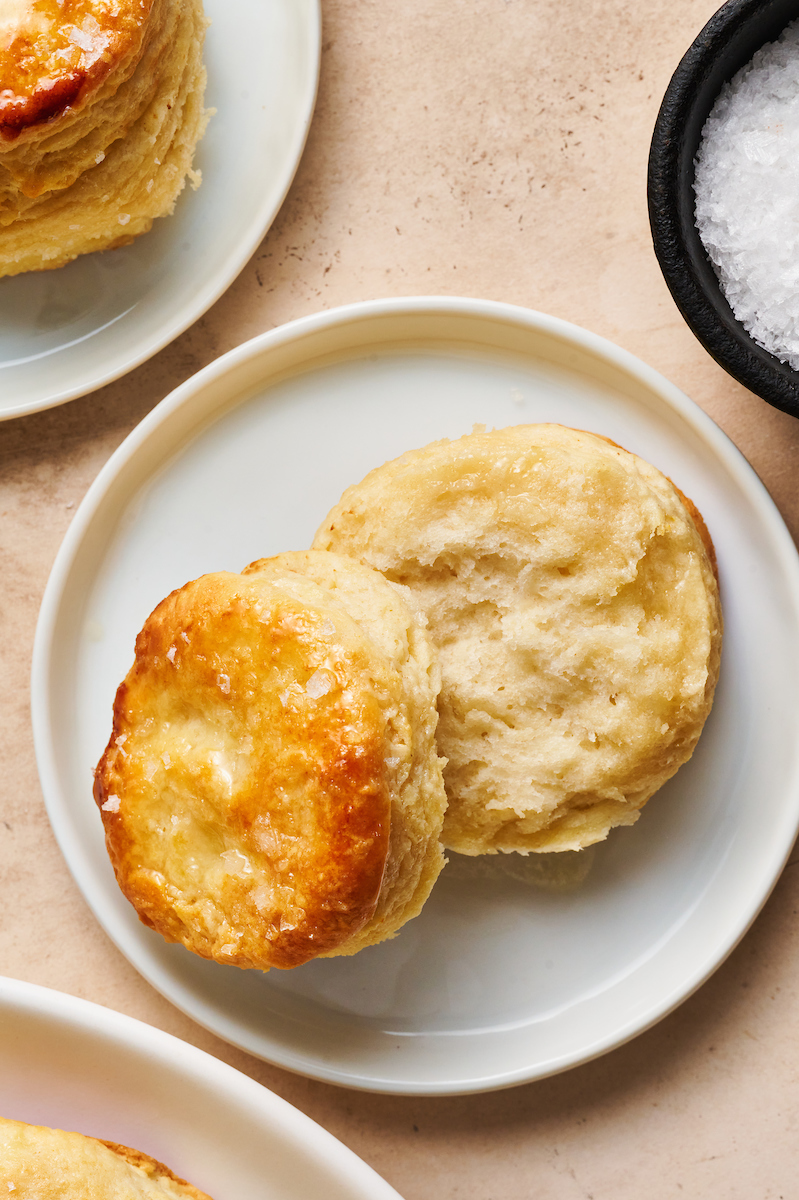
More Biscuit Recipes:
- Rosemary Parmesan Biscuits
- White Cheddar, Bacon, and Apple Biscuits
- Rosemary Goat Cheese Biscuits
- Cream Biscuits
- Brown Butter Maple Vanilla Bean Biscuits
Flaky Golden Brown Buttermilk Biscuits
Ingredients
For the Buttermilk Biscuits
- 2 and 1/3 cups (280 g) all-purpose flour plus extra for hands and work surface
- 1 and 1/2 cups (180 g) cake flour
- 2 Tablespoons (28 g) aluminum free baking powder
- 3/4 teaspoon baking soda
- 1 and 1/4 teaspoons salt
- 3/4 cup (170 g) unsalted butter frozen and coarsely grated
- 1 large egg cold
- 1 and 1/3 cups (303 ml) buttermilk cold, plus more for brushing
- 2 Tablespoons (43 ml) honey
For the Salted Honey Butter
- 4 Tablespoons (57 g) unsalted butter
- 2 Tablespoons (43 ml) honey
- 1 and 1/2 teaspoons flaky sea salt
Instructions
For the Buttermilk Biscuits
- Preheat the oven to 450 degrees (F). Lightly grease a 10” cast iron skillet with oil. Set the pan aside.
- In a large bowl, whisk together both flours, baking powder, baking soda, and salt. Grate the frozen butter into the flour using the coarse side of a box grater. Using a rubber spatula, stir the butter into the flour mixture until evenly incorporated.
- In a large glass measuring cup, combine the egg, buttermilk, and honey, and whisk well to combine.
- Stir the buttermilk mixture into the flour and mix with a rubber spatula until a shaggy dough has formed. Don’t over mix here!
- Dump the mixture onto a lightly floured surface and gently knead, 8 to 10 times, just until it comes together. Then gently pat the dough into a 1/2-inch thick rectangle. Fold dough in thirds, like a letter. Repeat this process two more times.
- Pat the dough into a 1-and-1/4-inch thick rectangle (it’ll be approximately 8-and-1/2 inches by 6 inches). Cut as many biscuits out as you can using a 2 1/2-inch round biscuit cutter. Try not to twist the cutter at all, instead press firmly down and life straight up. Twisting can reduce the flakiness and rise. Gently re-roll any scraps of dough and cut out more biscuits.
- Place the biscuits in the prepared skillet, arranging them close to one another. Press together the remaining scraps of dough and cut out more biscuits. Place the skillet in the refrigerator for exactly 20 minutes.
- Remove the skillet from the fridge and lightly brush the biscuit tops with buttermilk.
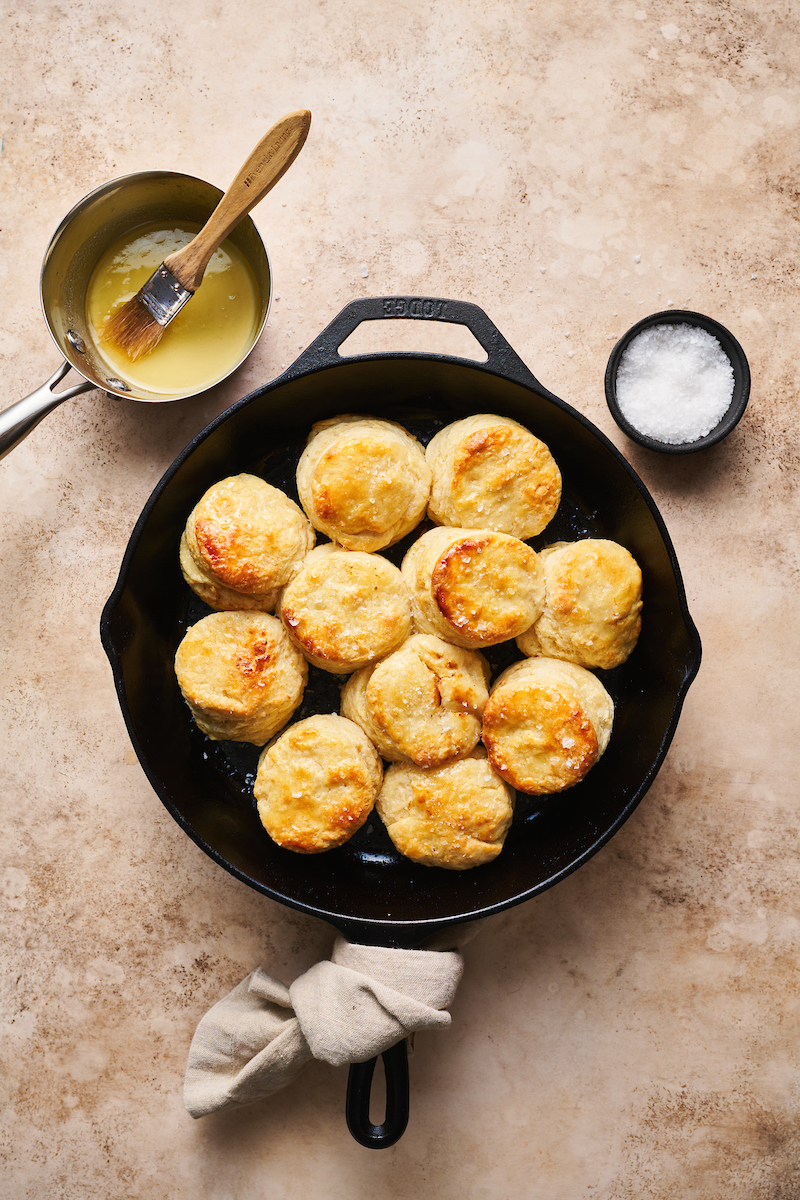
- Bake for 6 minutes, then reduce the oven to 375 degrees and continue baking for 13 to 15 minutes, or until they’ve puffed up and the tops are lightly browned.
- Remove from the oven, brush warm tops with melted honey butter, sprinkle with sea salt, and enjoy warm.
For the Salted Honey Butter
- In a small pan over medium heat, melt the butter. Remove from heat and whisk in the honey. Using a pastry brush, brush the warm honey butter on top of the warm biscuits. Sprinkle biscuits with flaky sea salt and serve.
I try many different biscuit recipes and most warm against overworking your dough. This dough came out very, very heavy and was hard to even roll out. It was too tough to pat out and I was afraid of warming it up too much with my hands so I used a rolling pin. Again, I really had to bear down on the roller. I didn’t have much conficence in the biscuits rising much. The fresh cut biscuits were like pucks. Wow, they did rise, and rose very well, 2-3X in height. I didn’t leave them at 1.25″ thick though. I went to about 3/4″ thick and the biscuits were about 1 1/2 – 2″ tall. They were very good. I didn’t have alum free baking powder so just used regular and I sub’d sugar for honey.
We loved these, super easy and so so good! I love the cake flour addition, really made them light and fluffy. And while I’m not from the south, I’ve lived here for over 13 years.
I’m so happy you enjoyed these, Megan!
I tried this the first time, and I love the taste. My daughter loved it because it is a little bit spicey and she loves spicy foods
Hi Ashley, when you are repeating the process do you knead each time too?Can’t wait to try these!
I’m a huge biscuit lover, and unfortunately these were a a bit disappointing for me. I will be sticking with my usual recipe.
Thank you. Thank you.
I have dozens of buttermilk biscuit recipes and have been looking for the best and final. This is IT!. and the honey butter glaze really puts it over the top. Super light and delicate.
I also made the Buttermilk pancakes today and so BakerbyNature is 2 for 2- both are now my ‘go to” recipes.
I love biscuits, can’t wait to try. The recipe says 2 tablespoons of baking powder, that’s really alot!
Yes, 2 tablespoons is correct 🙂