


 Search
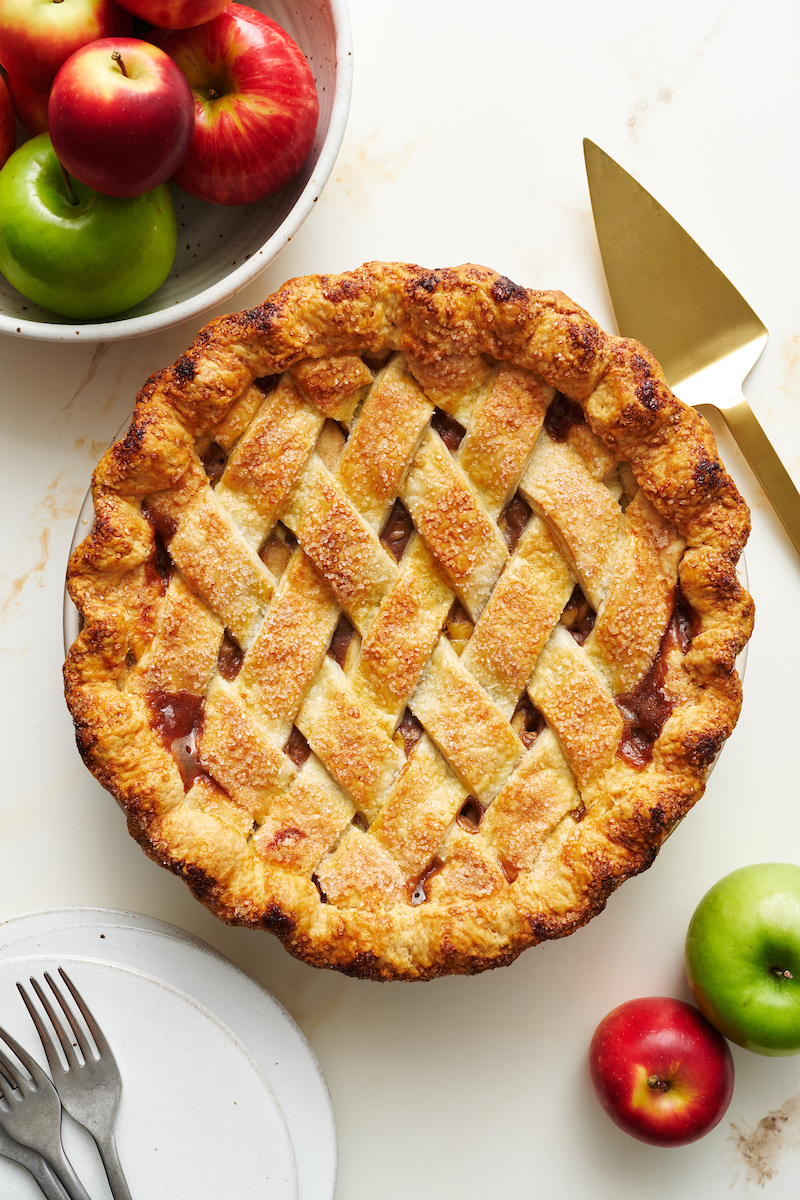
What makes this the perfect apple pie recipe? Let’s start with the all butter pie crust, as the pie bakes, it gets super flaky and golden brown. Next, the apple pie filling, which features apple cider, brown sugar, spices, and a ton of sliced apples. Top the baked apple pie with vanilla ice cream and caramel sauce!
The Perfect Apple Pie Recipe
We’re celebrating apple season here in the Hudson Valley and I’m loving every second of it. We live close to a few apple orchards, so there’s always a wonderful variety of fresh apples at the farmers market. Last weekend I lugged home 14 pounds of apples. And that means it’s time for all the apple recipes, starting with apple pie, apple crisp, and apple bars!
But of them all, apple pie is my favorite. And I have the perfect apple pie recipe to share with you! I’ve tested this recipe over 25 times and promise that while it is a labor of love… it’s basically foolproof. This apple pie recipe is heaven in a pie plate!
Why this is The Best Apple Pie Recipe?
- The homemade apple pie filling features a mountain of sliced apples, spices, and sugar.
- My secret ingredient, apple cider, adds even more apple flavor to the apple pie filling!
- Pre-cooking the sliced apples promises a thick and gooey apple pie filling.
- The pie dough bakes up super flaky… no soggy bottom on the bottom crust!
- A mix of Granny Smith apples and Honeycrisp (or Pink Lady) apples adds depth to the apple pie filling. Feel free to use all granny smith if that’s your preference.
Bonus: As the apple pie bakes, it’ll make your home smell better than any scented candle!
How to Make Apple Pie Recipe
- Make the Pie Dough: You’ll need enough pie dough for a bottom crust and top crust (lattice strips).
- Make the Apple Pie Filling: You’ll make an apple cider reduction on the stovetop. Then mix all the other apple pie filling ingredients in a large bowl. Add the sliced apples mixture into the apple cider and cook until soft.
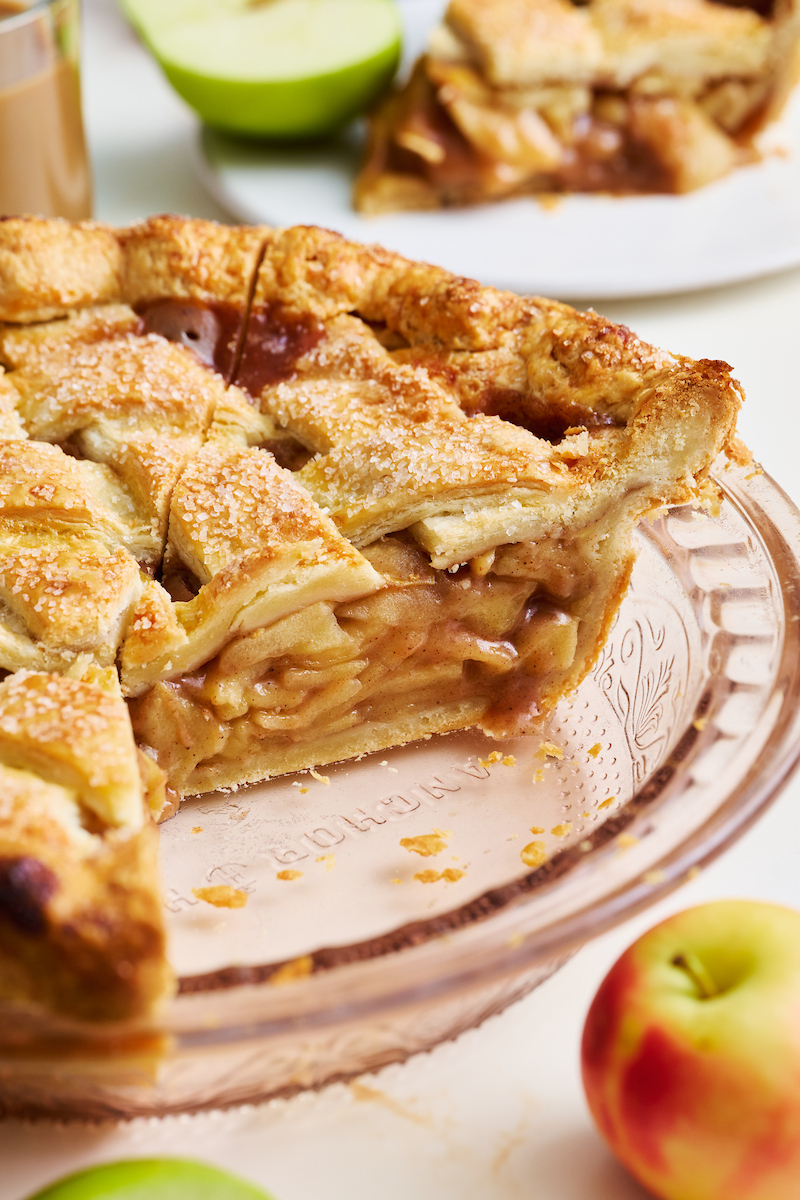
- Assemble the Apple Pie: Roll out the bottom crust and place in the pie plate. Roll out the top crust and slice into lattice strips. Fill the bottom crust with apple pie filling, then top with the lattice strips. Crimp the edges.
- Bake the Apple Pie: This pie will bake at a higher temperature to start, then continue baking at a lower temperature. If the pie crust begins to get to brown, tent with foil and continue baking.
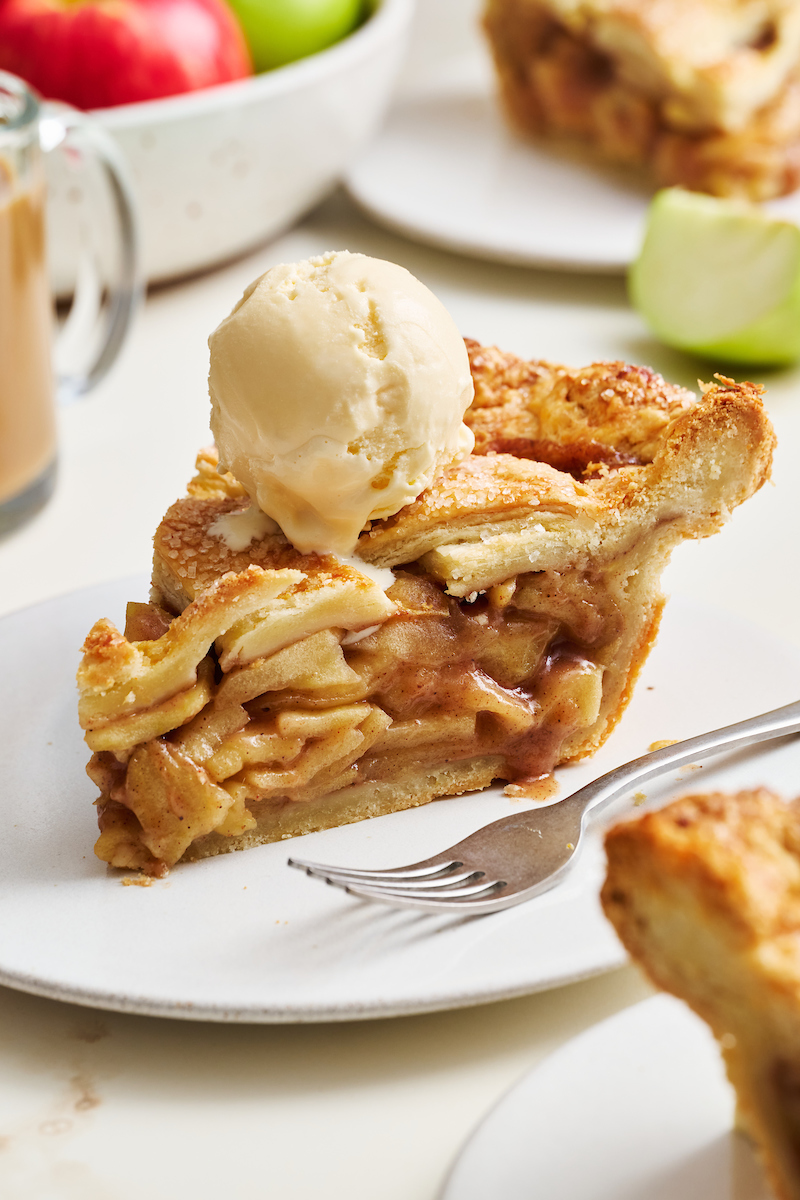
- Cool the Apple Pie: Allow your pie to cool for at least 6 hours before slicing! If sliced hot, the apple pie filling will leak everywhere. It takes a full 6 hours for it to set and slice like you see in my photos.
Pro-tip: If you prefer a slice of warm apple pie, you can heat it in the microwave for a few seconds before serving.
All-Butter Pie Crust for Flaky Pie Crust
Making homemade all-butter pie crust is a labor of love… but 100% worth it! Make the pie dough in advance and store it in the fridge for 24 hour or in the freezer for 2 months.
- If you make the pie dough in advance and store it in the fridge, let it sit at room temperature for 20 minutes before rolling it out.
- If you make the pie dough in advance and store it in the freezer, let it thaw in the fridge overnight. Then let it sit at room temperature for 20 minutes before rolling it out.
- To ensure a flaky pie crust, never let your pie dough get too warm. Anytime it looks like it’s beginning to melt, transfer the pie dough back to the fridge and chill until cold.
- If you don’t want to use my butter pie crust recipe, use your favorite pie crust recipe instead. Just make sure you’ll have enough dough for a top crust and bottom crust.
- An egg wash (simply, whisked egg and water) and sparkling sugar help the pie crust brown as the pie bakes.
Top Crust and Bottom Crust
This is a double crust apple pie, meaning there’s a top crust and a bottom crust. If you use my foolproof all-butter pie crust recipe, make the amount for a double crust. If you use another recipe, make sure there’s enough pie dough for a double crust pie.
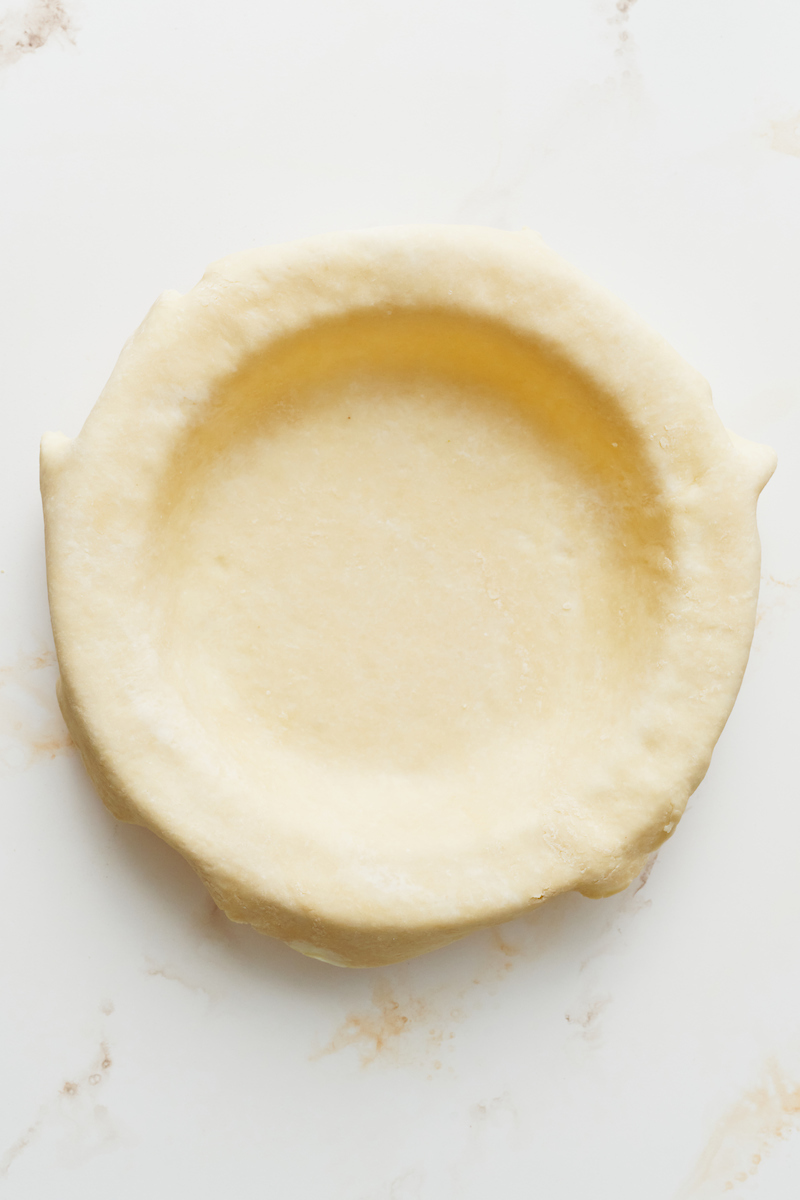
- Roll out the bottom crust and place it in the pie plate. Gently press the pie dough into the pie dish, making sure there’s no gaps between the plate and the pie dough.
- Sprinkle the pie dough with a 1/2 teaspoon of granulated sugar and flour. This is my trick to a flaky pie crust on the bottom crust. Place the pie plate in the fridge to chill while you prep the top crust.
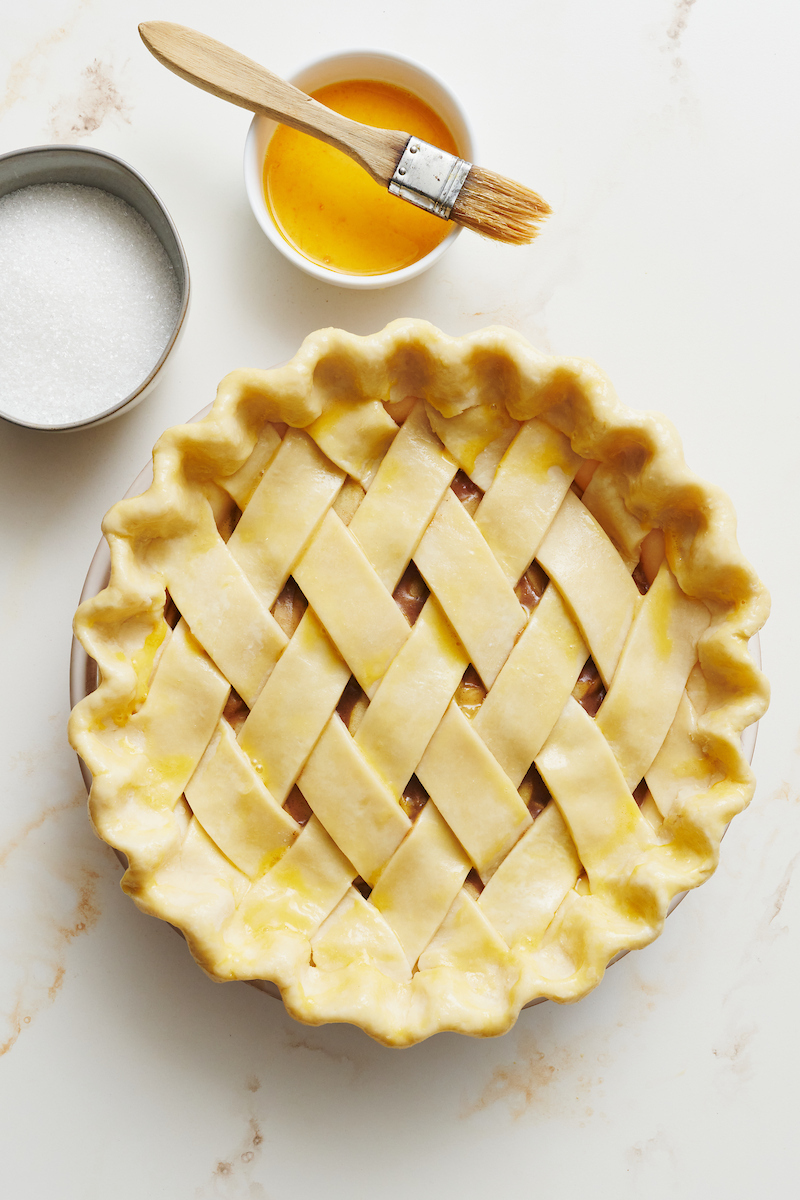
- For the top crust, you’ll make a lattice by slicing the pie dough into long strips using a pastry slicer.
- Once cut, place the strips of pie dough onto a baking sheet and chill for another 20 to 30 minutes. This is another trick for getting a flaky pie crust.
- When you’re ready to assemble, spread the apple pie filling on the bottom crust. Then, add the top crust (lattice strips). Crimp the edges, brush with egg wash, and sprinkle with sugar.
Easy Apple Pie Filling Recipe
Unlike most apple pie recipes that make the apple pie filling in a large bowl, this recipe makes it on the stovetop.
- We begin by making an apple cider reduction. Apple cider is an unfiltered, unsweetened, non-alcoholic beverage made from apples. Do NOT use apple cider vinegar or apple beer, hard cider, or stout.
- Once you reduce the apple cider, you’ll add in the sliced apples, sugar and brown sugar, and spices. And cook until the apples begin to soften.
- Cool the apple pie filling to room temperature before adding it to the bottom crust. Adding hot apple pie filling to the bottom crust is a major no-no and will create a soggy bottom crust.
- Feel free to make the apple pie filling recipe up to 24 hours in advance and store in the fridge until needed.
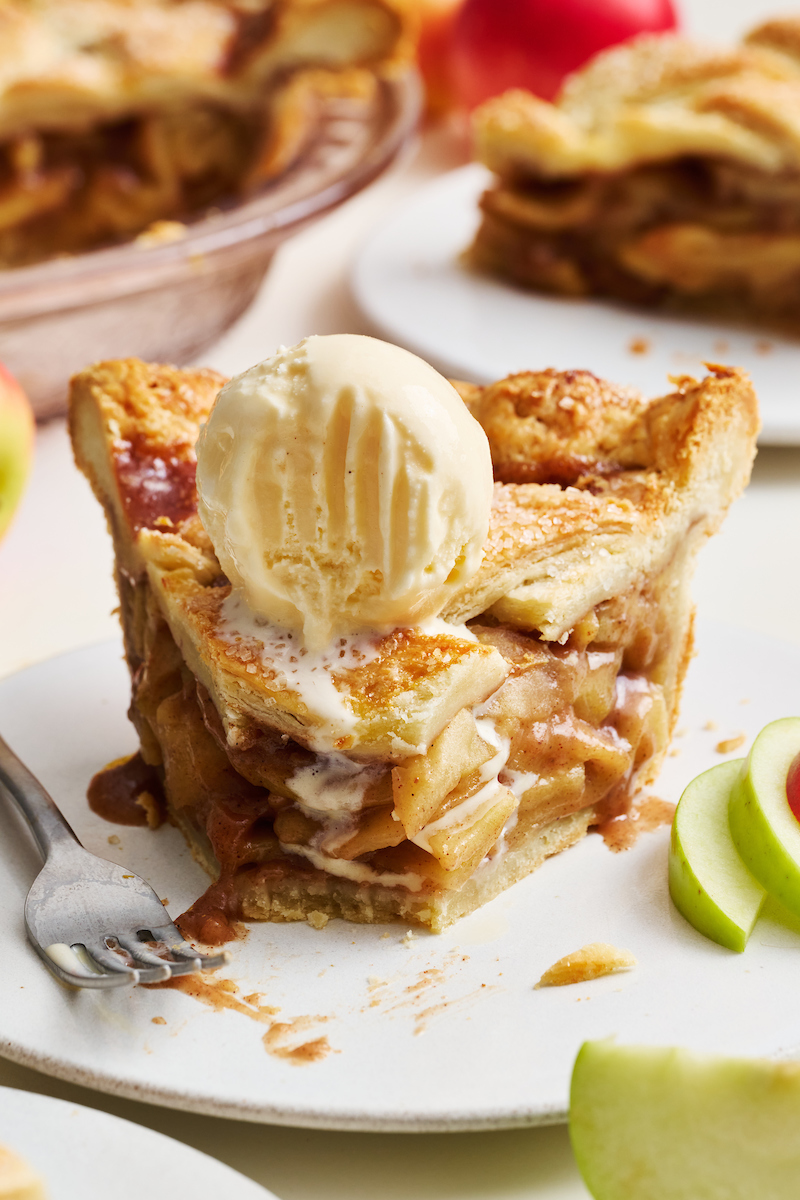
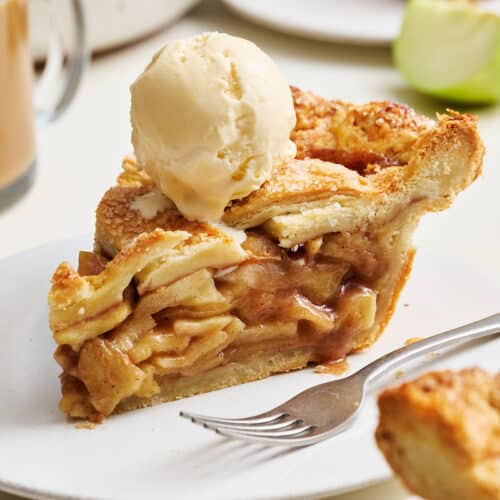
Top the Baked Apple Pie with Ice Cream…
- Apple pie and ice cream are an iconic duo! We enjoy topping our baked apple pie with vanilla ice cream. However, salted caramel ice cream and butter pecan ice cream are also tasty.
- If you prefer whipped cream, that’s also a great apple pie topping!
- And salted caramel sauce and candied pecans are always welcome on my apple pie, too.

Best Apple Pie Recipes:
- Salted Caramel Apple Pie
- Brown Butter Oatmeal Crumb Apple Pie
- Cute Little Apple Hand Pies
- Apple Pie Calzones
- Cinnamon Apple Bourbon Hand Pies with Whole Wheat Crust
Perfect Apple Pie Recipe
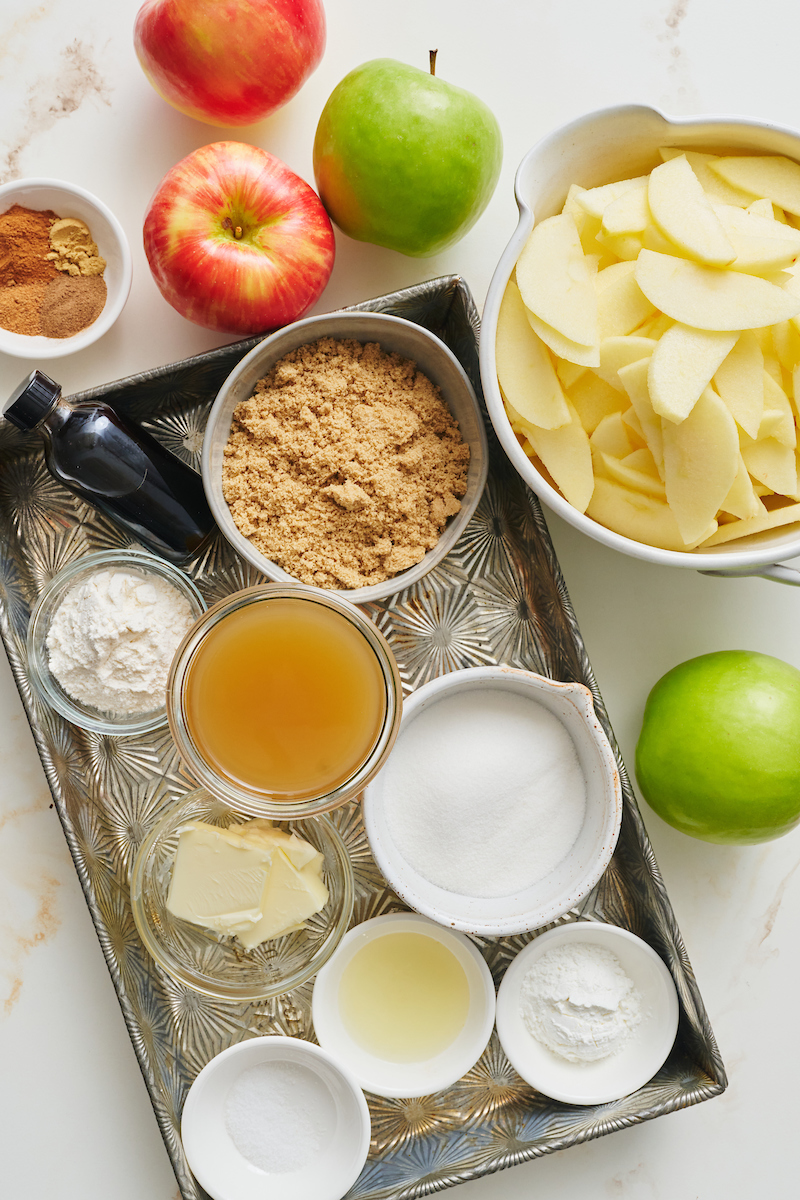
Ingredients
- 2 foolproof all butter pie crusts
- 1 cup (227ml) apple cider not apple cider vinegar or hard cider
- 4 Tablespoons (57g) unsalted butter cut into 1/2-inch cubes
- 8 large apples (4 granny smith and 4 honeycrisp) cored, peeled, and sliced ⅛-inch thick (about 1,450g before peeling)
- 1/2 cup (99g) granulated sugar
- 1/2 cup (106g) light brown sugar packed
- 1/4 cup (30g) all-purpose flour
- 1 Tablespoon (11g) cornstarch
- 1 and 1/2 Tablespoons (21ml) pure vanilla extract
- 1 Tablespoon (14ml) freshly squeezed lemon juice
- 1 and 1/4 teaspoons ground cinnamon
- 1/2 teaspoon ground nutmeg
- 1/2 teaspoon ground allspice
- 1/4 teaspoon ground ginger
- 1/4 teaspoon salt
For the Egg Wash:
- 1 large egg
- 1 and 1/2 teaspoons water
- 3 Tablespoons sparkling sugar
Instructions
For the Apple Pie Filling:
- In a large bowl, stir the apple slices, sugars, flour, cornstarch, lemon juice, vanilla, spices, and salt until thoroughly combined. Set aside briefly while you prep the cider.
- Pour the apple cider into a very large sauté pan or dutch oven and bring to boil over medium-high heat. Continue cooking, stirring occasionally, for 8 minutes.
- Reduce the heat to medium. Add in the butter and cook, stirring frequently, until melted.
- Pour the apple filling into the pan and cook for 8 minutes, or until the apples begin to soften. Remove from heat.
- Scrape the filling into a large bowl and cool to room temperature, stirring occasionally to help it evenly cool faster.
Prepare Bottom Crust:
- Remove one disk of the dough from the fridge 15 minutes before you plan on rolling, as dough that is too cold will crack.
- Lightly flour a rolling pin and a large clean work surface. Set the dough in the middle of the work surface and – beginning from the center of the disc – roll the dough away from you in one firm and even stroke. After each stroke, rotate the disc a quarter turn clockwise and roll again. Lightly sprinkle more flour on the work surface, pie dough, and rolling pin as needed. Continue rolling until the dough is about 16-inches in diameter, and around a 1/4" in thickness.
- Carefully fold the dough in half and lay it across one side of a 9 or 10-inch pie pan, placing the seam of the dough in the center of the pan.
- Gently unfold the crust, then use your hands to fit the dough down into the pan, making sure there are no gaps between the dough and the sides of the pan. If you see any visible air bubbles, gently burst them with a fork.
- Using kitchen scissors, trim the dough overhang to 1 and 1/2 inches, measuring from the inner rim of the pan. Lightly cover the crust with plastic wrap and place back in the refrigerator until needed, at least 20 minutes.


Prepare Top Crust:
- Roll out the pie dough as directed above.
- Using a pastry cutter, slice the dough into 12 strips (the width of the strips should be just over an inch). Gently lay the strips on the prepared baking sheet, cover with plastic wrap, and refrigerate until needed, at least 20 minutes.
Prepare Egg Wash:
- In a small bowl combine the egg and water, whisk until well combined.
Assembly & Baking:
- Preheat the oven to 425 degrees (F). Remove the prepared crust and lattice strips from the refrigerator.
- Sprinkle the bottom of the pie crust with 1/2 teaspoon of flour and 1/2 teaspoon of granulated sugar.
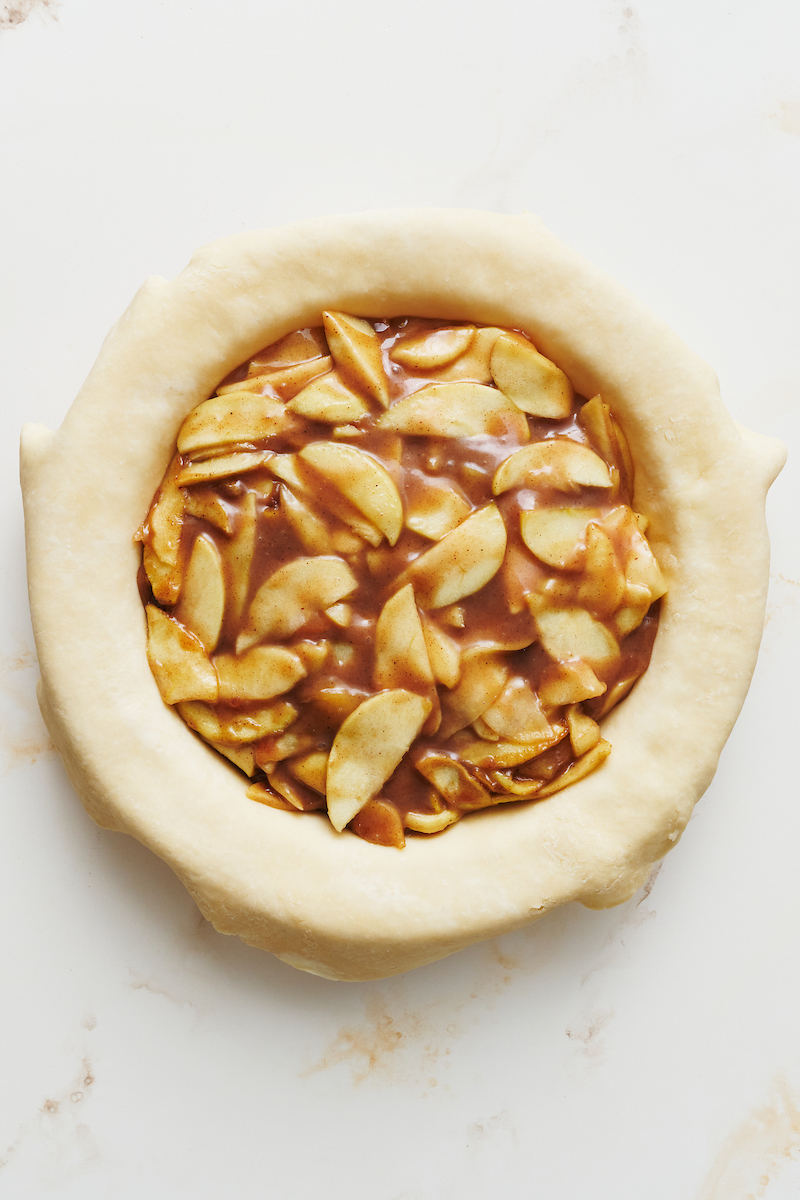
- Scrape the cooled apple pie filling into an even layer in the pie crust shell. Press down on the filling so it’s tightly packed in the pie shell.
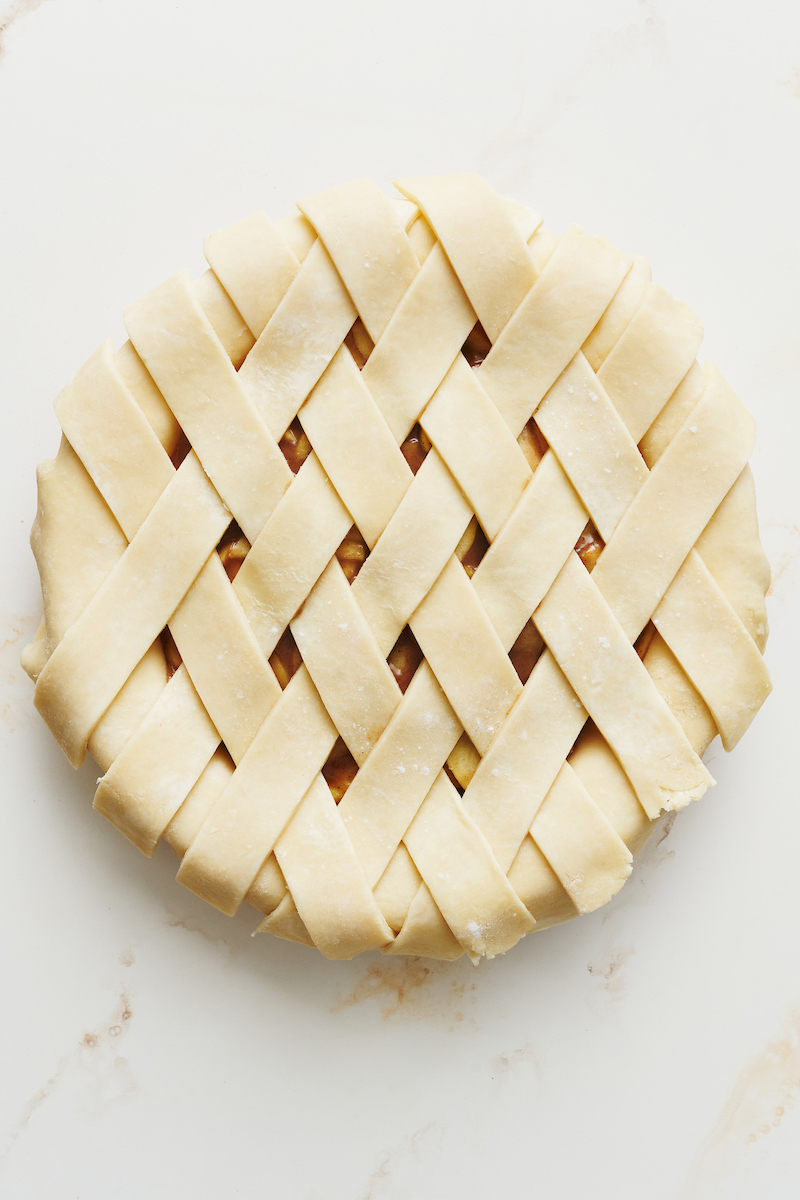
- Lay 7 of the strips parallel on top of the filling, leaving about 1/4-inch between each strip. Fold back the second, fourth, and sixth strip, then place a strip of dough so that it’s perpendicular to the parallel strips. Unfold the folded strips, so they lay over the perpendicular strip.
- Now fold back the first, third, fifth, and seventh strip, then place another strip of dough on top, so that it’s perpendicular to the parallel lattice strips.
- Repeat this layering process with remaining lattice strips, weaving the strips over and under each other.
- Trim the edges of the strips, leaving about 1/2 inch overhang. Tightly roll the excess dough up so it's firmly sitting on the edge of the pie plate, then crimp the edges to secure the strips with the bottom pie crust.
- Gently brush the edges of the crust and the lattice strips with the egg wash, then sprinkle generously with sparkling sugar.
- Place the pie on a baking sheet and bake in the lower third of the oven for 15 minutes.
- Then reduce the oven temperature to 350 degrees (F) and continue baking for 55 to 60 minutes, until the top crust is deeply golden brown and the filling is bubbling.
- Place the pie plate on a wire rack and cool for 6 hours before slicing. Once the pie is completely cool, it may be wrapped tightly in saran wrap and stored at room temperature for up to 24 hours.


Notes
- Be sure you use apple cider and NOT apple cider vinegar!
- I prefer using a glass pie plate. Ceramic may take longer to bake and may yield a less flaky crust.
- If the crust appears to be getting too brown, you can add a pie crust shield or gently tent aluminum foil on top of the pie. That being said, I’ve never had to do this. As long as your oven temperature is accurate, the pie should bake evenly, and transform into a deep golden brown color.

I make an apple pie every year and this year I chose your recipe. Wowza!!! I was floored. Perfect crust, plenty of apples, gooey but not wet. A true winner!
The apple cider adds so much flavor! My new favorite way to make apple pie for sure!
Definitely a lot of work but such a great apple pie! Will be making this for Thanksgiving (with your foolproof pie crust and green bean casserole!)
Hi Ashley,
I have a strong aversion to vinegar. Will it make a big difference if I leave it out?
Hi! If I already made this and froze it, how long should I cook it from frozen and at what temperature? Cant wait to serve it at Thanksgiving.
Hi Ashley,
Any recommendations for making this ahead of time for the holidays and freezing? Trying to prep!
Liz
Made this for the holidays and a hit!!
However, I found that 8 apples was far too many and had leftover filling. I recommend using 5-6, no less than 5 unless you have plans to use the filling for another recipe. Thanks so much! alive from GA ❤️